IMPORTANT: Before paying vendors or associations, be sure to have their default payment type configured.
- Go to the Pay Bills page:
- On the top of the page, click on the Quick Actions menu button and then click on Pay Bill.

OR
-
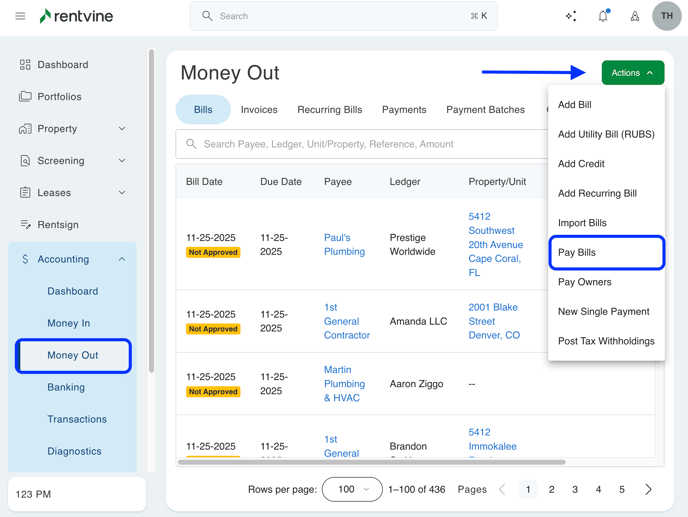
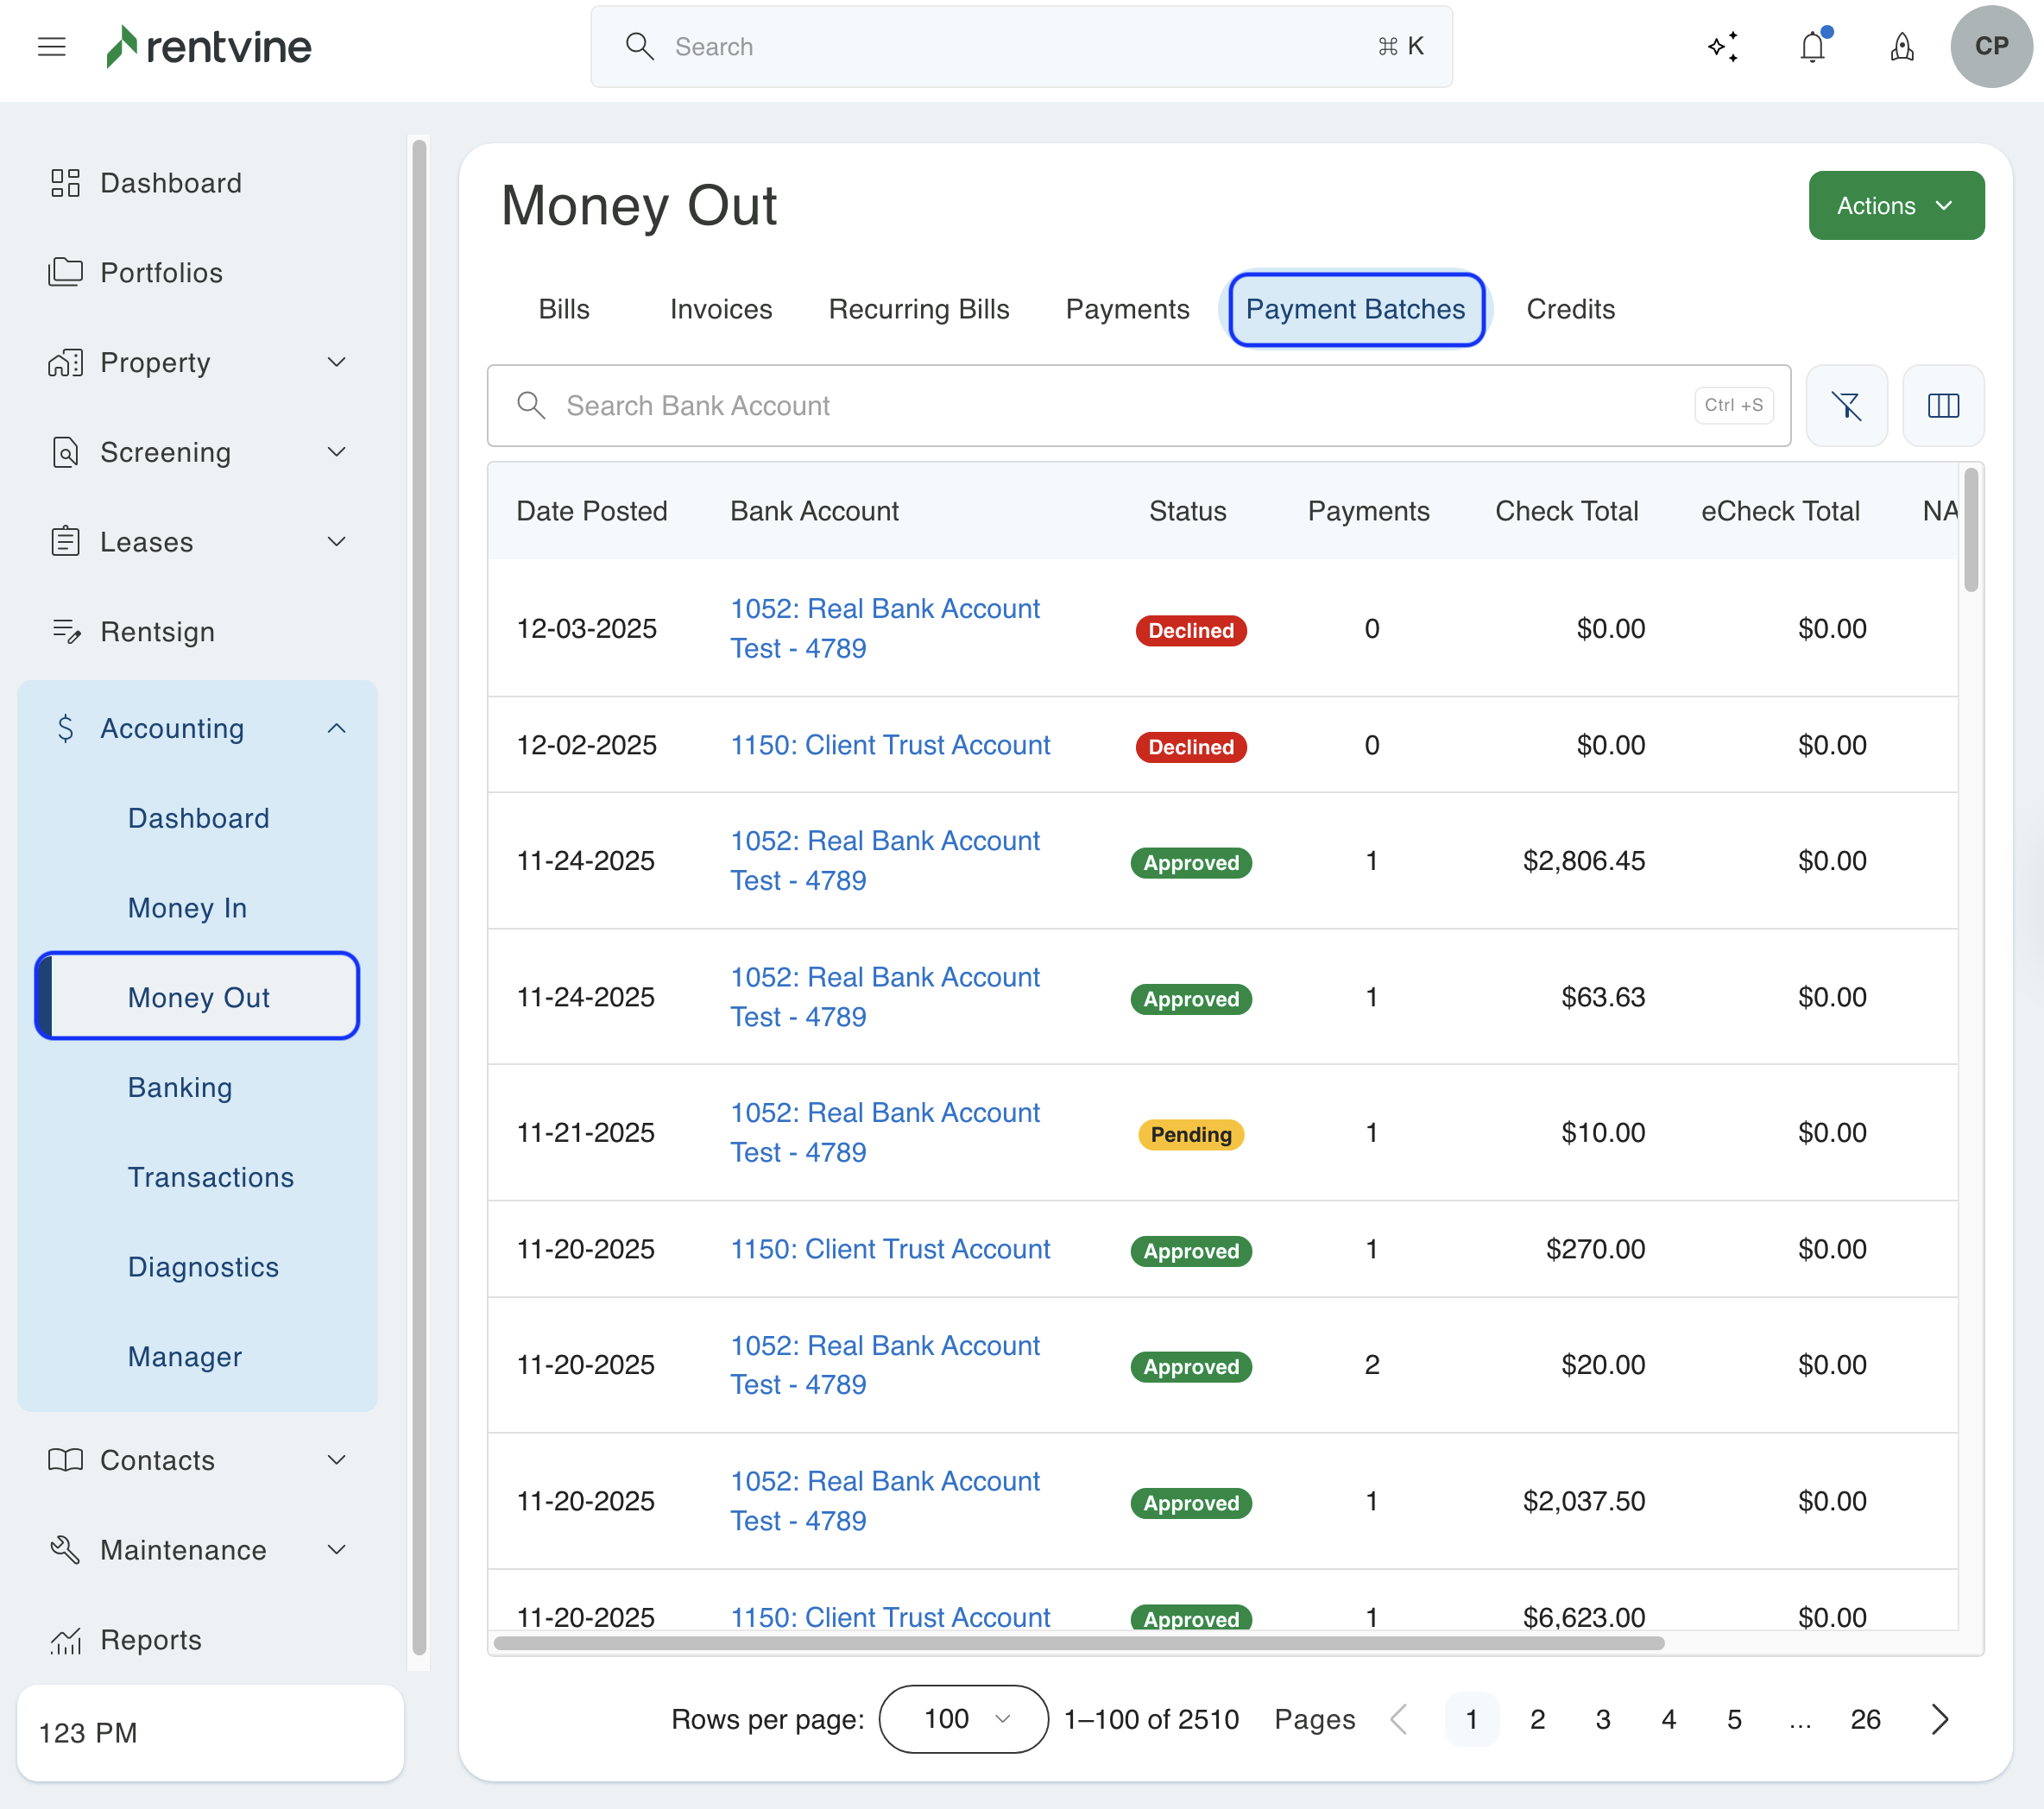
- Select the Accounting tab and find the section labeled Money Out.
- Click on the green Actions button and select Pay Bills.
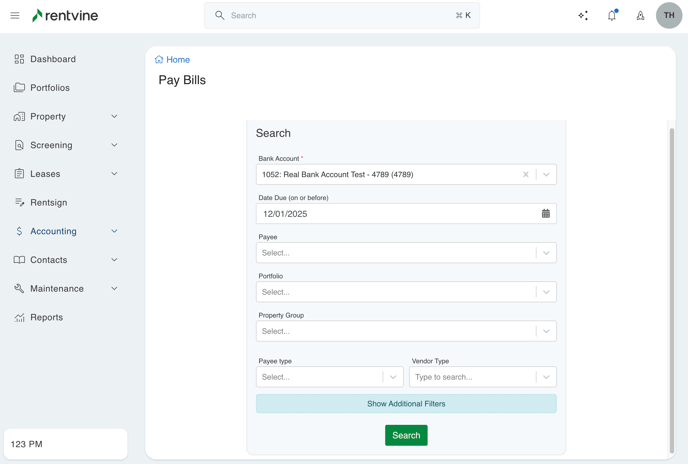
2. This will open up a filter page where you can filter by the bank account, date due, payee portfolio, and much more. You can also filter this even more by clicking the additional filters section at the bottom
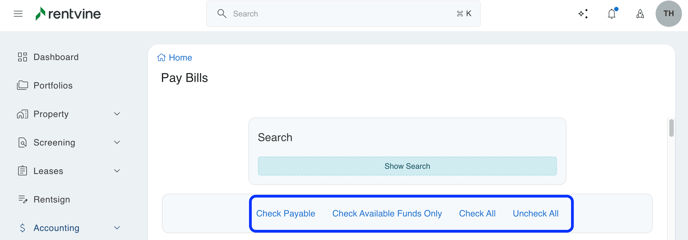
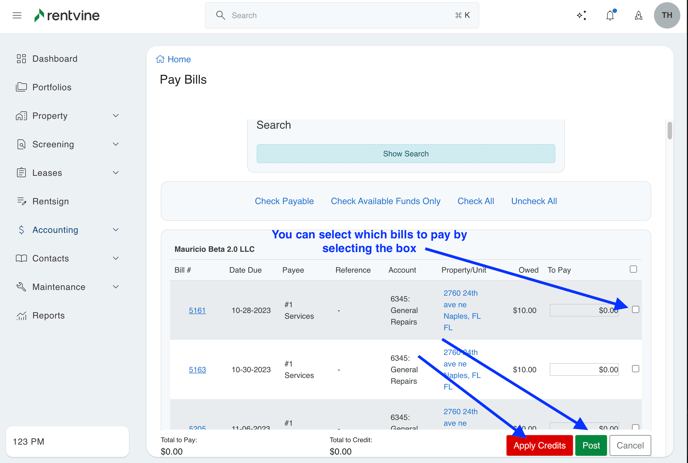
3. Once in the Pay Bills screen, you will want to choose the bills that you would like to pay from the available list by clicking the checkbox to the right of each bill. You can also select the links on the top right of the page to easily select multiple bills to pay (Check Payable, Check Available Funds Only, Check All, Uncheck All).
- Check Payable - Clicking on this link will automatically select all bills where the operating balance of the portfolio is enough to pay the selected bills
- Check Available Funds Only - Clicking on this link will automatically select all bills where the available funds balance is enough to pay the selected bills. The available funds balance is equal to the operating balance - undeposited balance
- Check All - Clicking on this link will select all bills
- Uncheck All - Clicking on this link will deselect all bills
Bills are grouped by the portfolio to they are associated.
To easily find specific bills, you can filter the bills you want to pay by selecting different filters located at the top of the Pay Bills page. The filters include the payee, payee type, portfolio, and more. By selecting a filter, you can narrow down the list of bills displayed on the page, making it easier for you to locate the bills you want to pay. This feature is especially useful if you have a long list of bills to pay and want to quickly find the ones that meet a specific criteria.
You will notice additional information pertaining to the portfolio of the bills that you can select and pay.
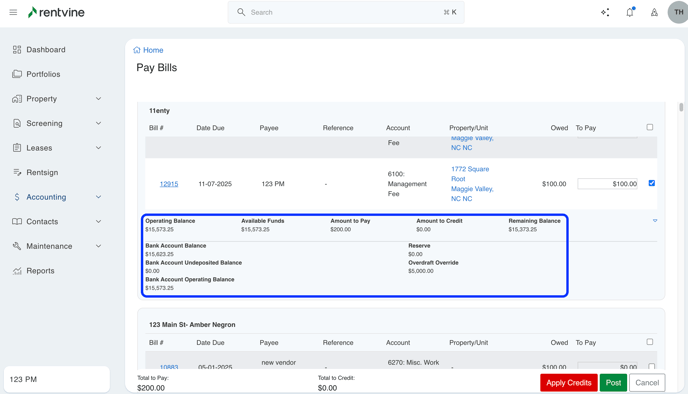
Operating Balance - The balance that can be used to pay bills
Available Funds - The Operating Balance minus the Undeposited Balance
Bank Account Undeposited Balance - Sum of all undeposited and unsettled lease payments, owner contributions, and other payments from the selected bank account
Bank Account Operating Balance - This is the balance that can be used to pay bills from the selected bank account.
4. When you are content with your selections, go ahead and select Post or Apply Credits.
The Apply Credits will only appear if there are unused vendor credits that can be applied to pay for some bills. If you select Apply Credits, a pop-up modal will appear where you can select which vendor credits you want to apply. The vendor credits will be automatically applied to bills that are eligible to use the vendor credits. Once you are done applying credits, you can then select the Post button.

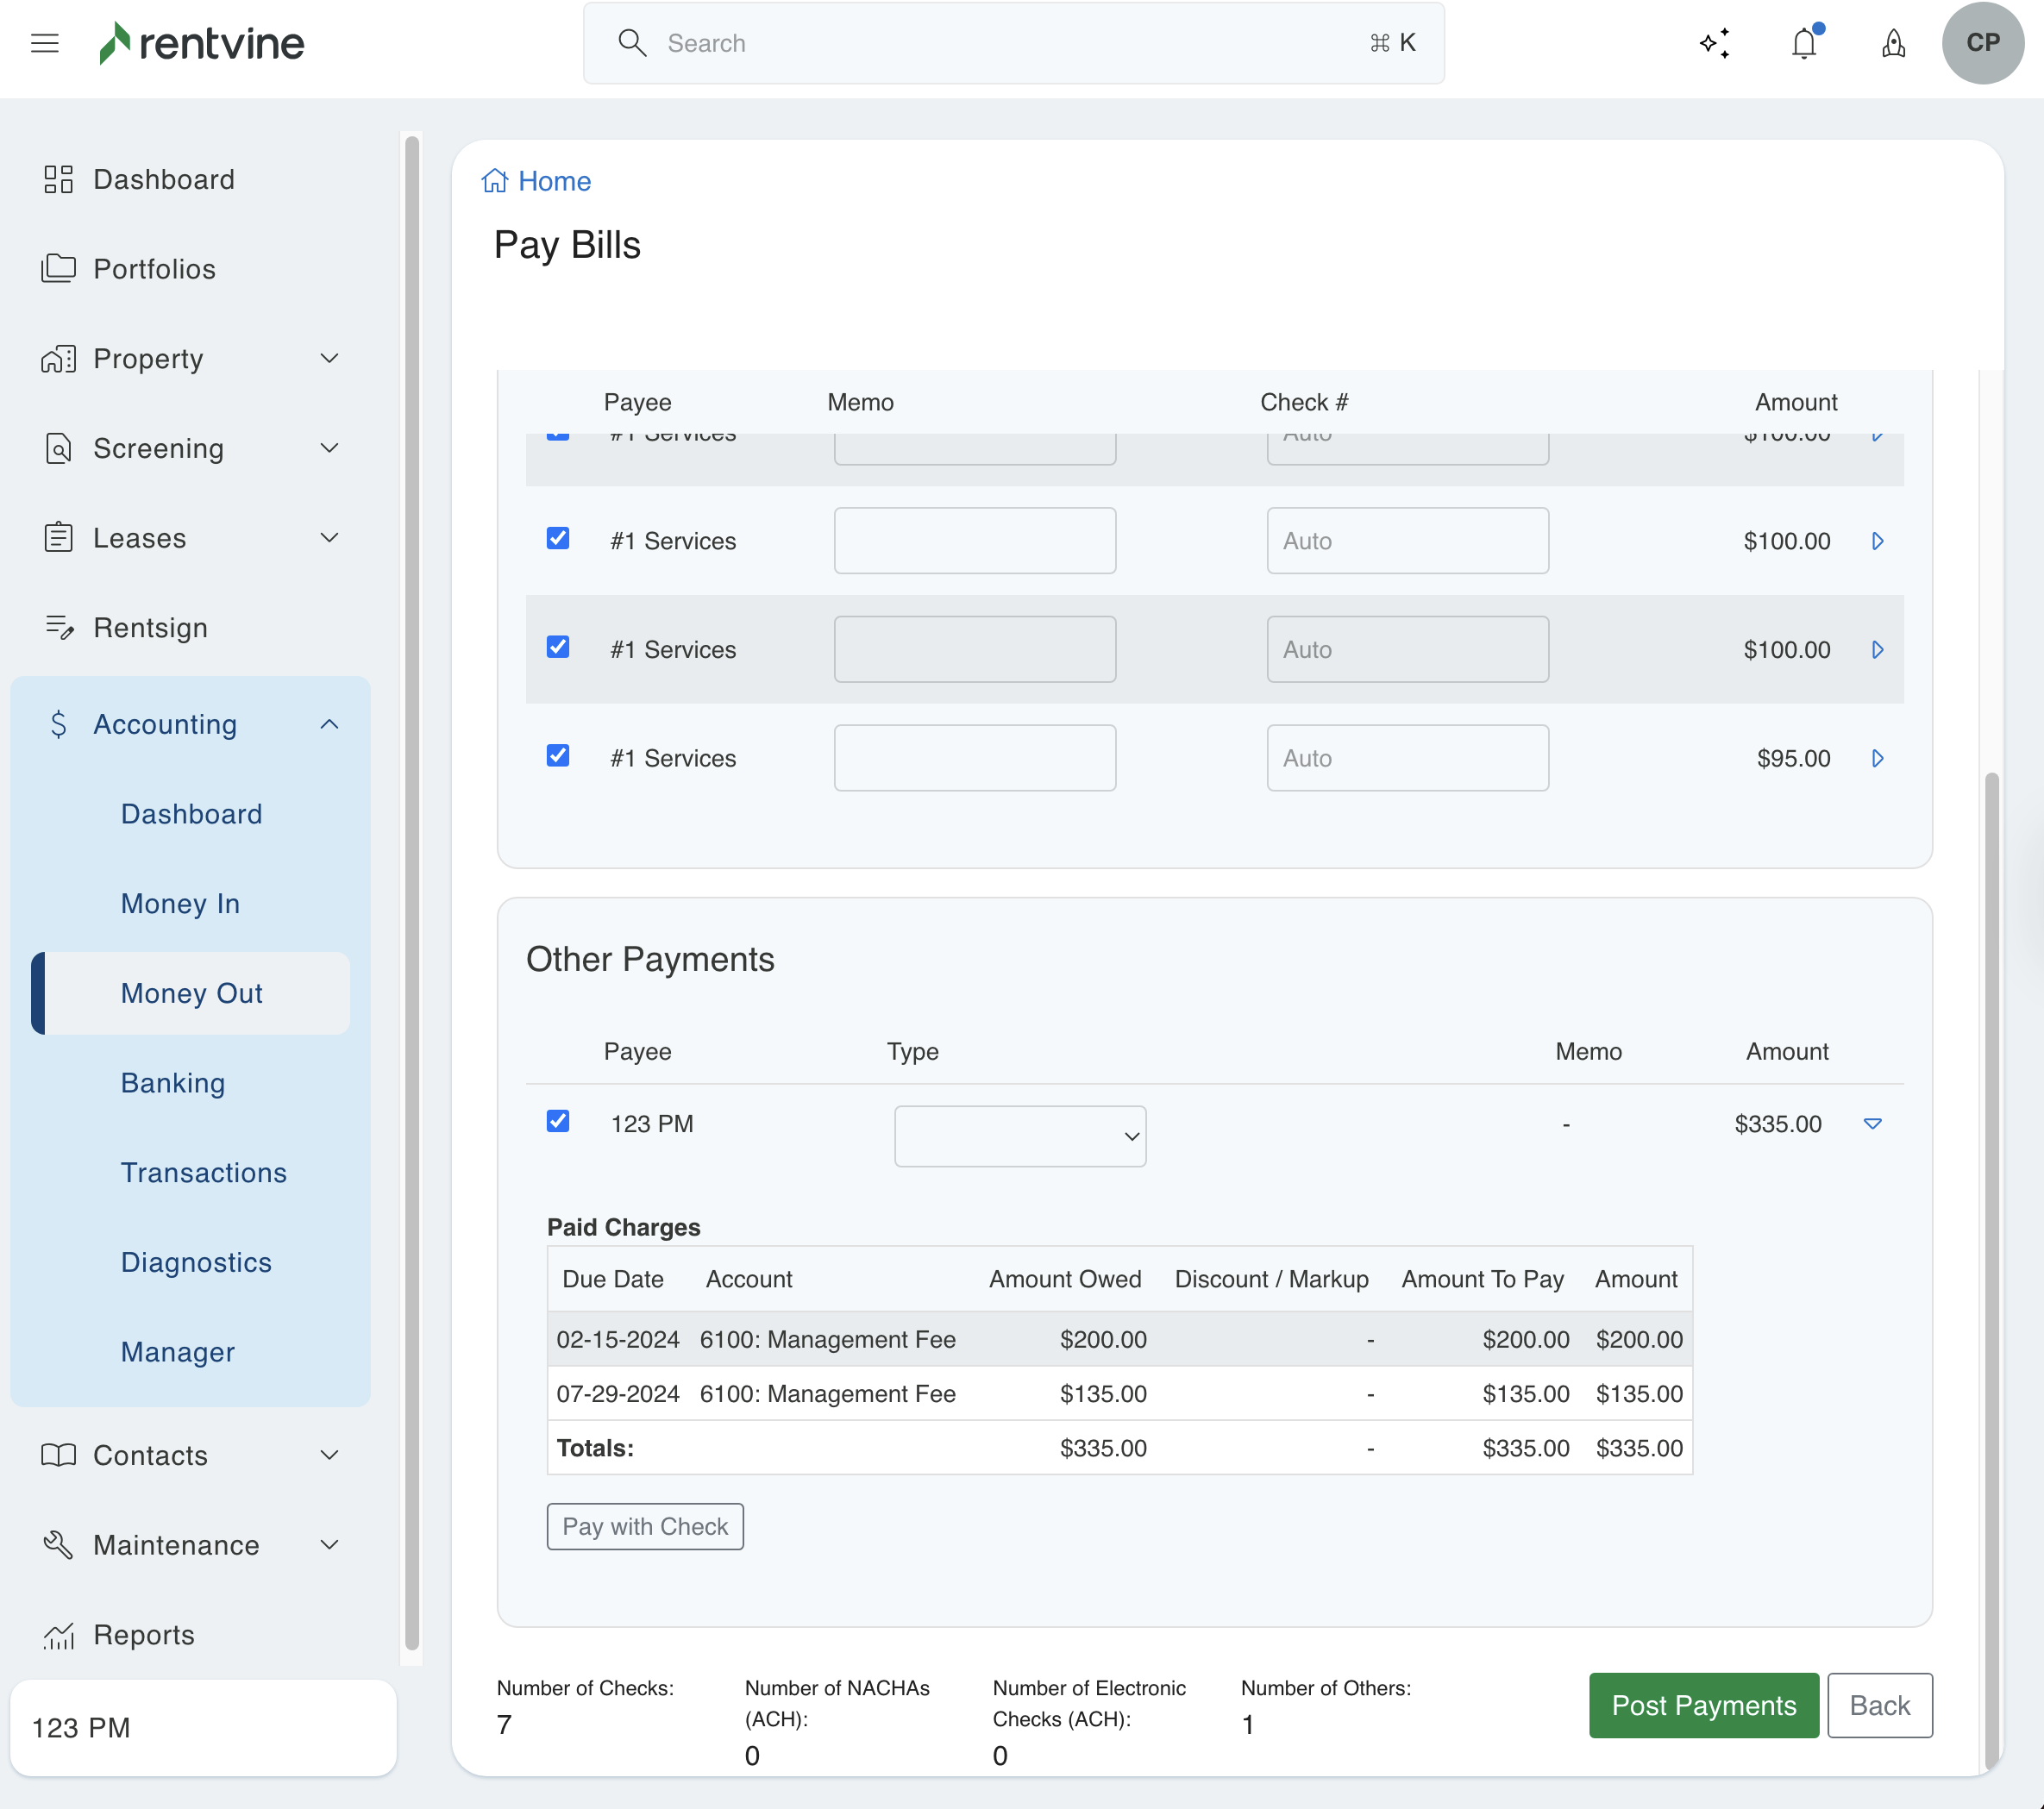
4. The next screen is a review screen to show you a breakdown of all the payments that are about to be paid. They are grouped by payment type (Check, eCheck (ACH), NACHA (ACH), and Other). Click Post Payments.
Click on the arrow icon to the right of the amount for more details/options. If applicable, there will be an option to change the payment type. (i.e, change payment type from eCheck to Check or to Other. )
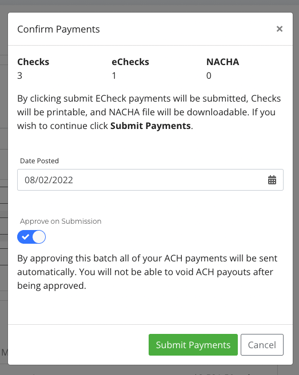
5. A confirmation pop-up will list how many types of payments will be submitted (Check, eCheck (ACH), NACHA (ACH), and Other).
- Date Posted - Enter the payment date that you want to post. (This is the post date on the ledgers.)
- Approve on Submission - Turn on if you have the proper permissions to approve the payment batch upon submission of the payment(s).
If the Approve on Submission toggle is turned off, once the payments are submitted, the associated payment batch will be pending approval. The payment batch will need to be approved in order to release the payment(s). The payment batch can be approved later by navigating to the payment batch view page.
*By clicking Submit Payments, eCheck payments will be submitted, Checks will be printable, and the NACHA file will be downloadable.
If vendors are paid by eCheck, it may take 1-2 business days for the vendors to see the distribution. Click here for more details on the timeframe.
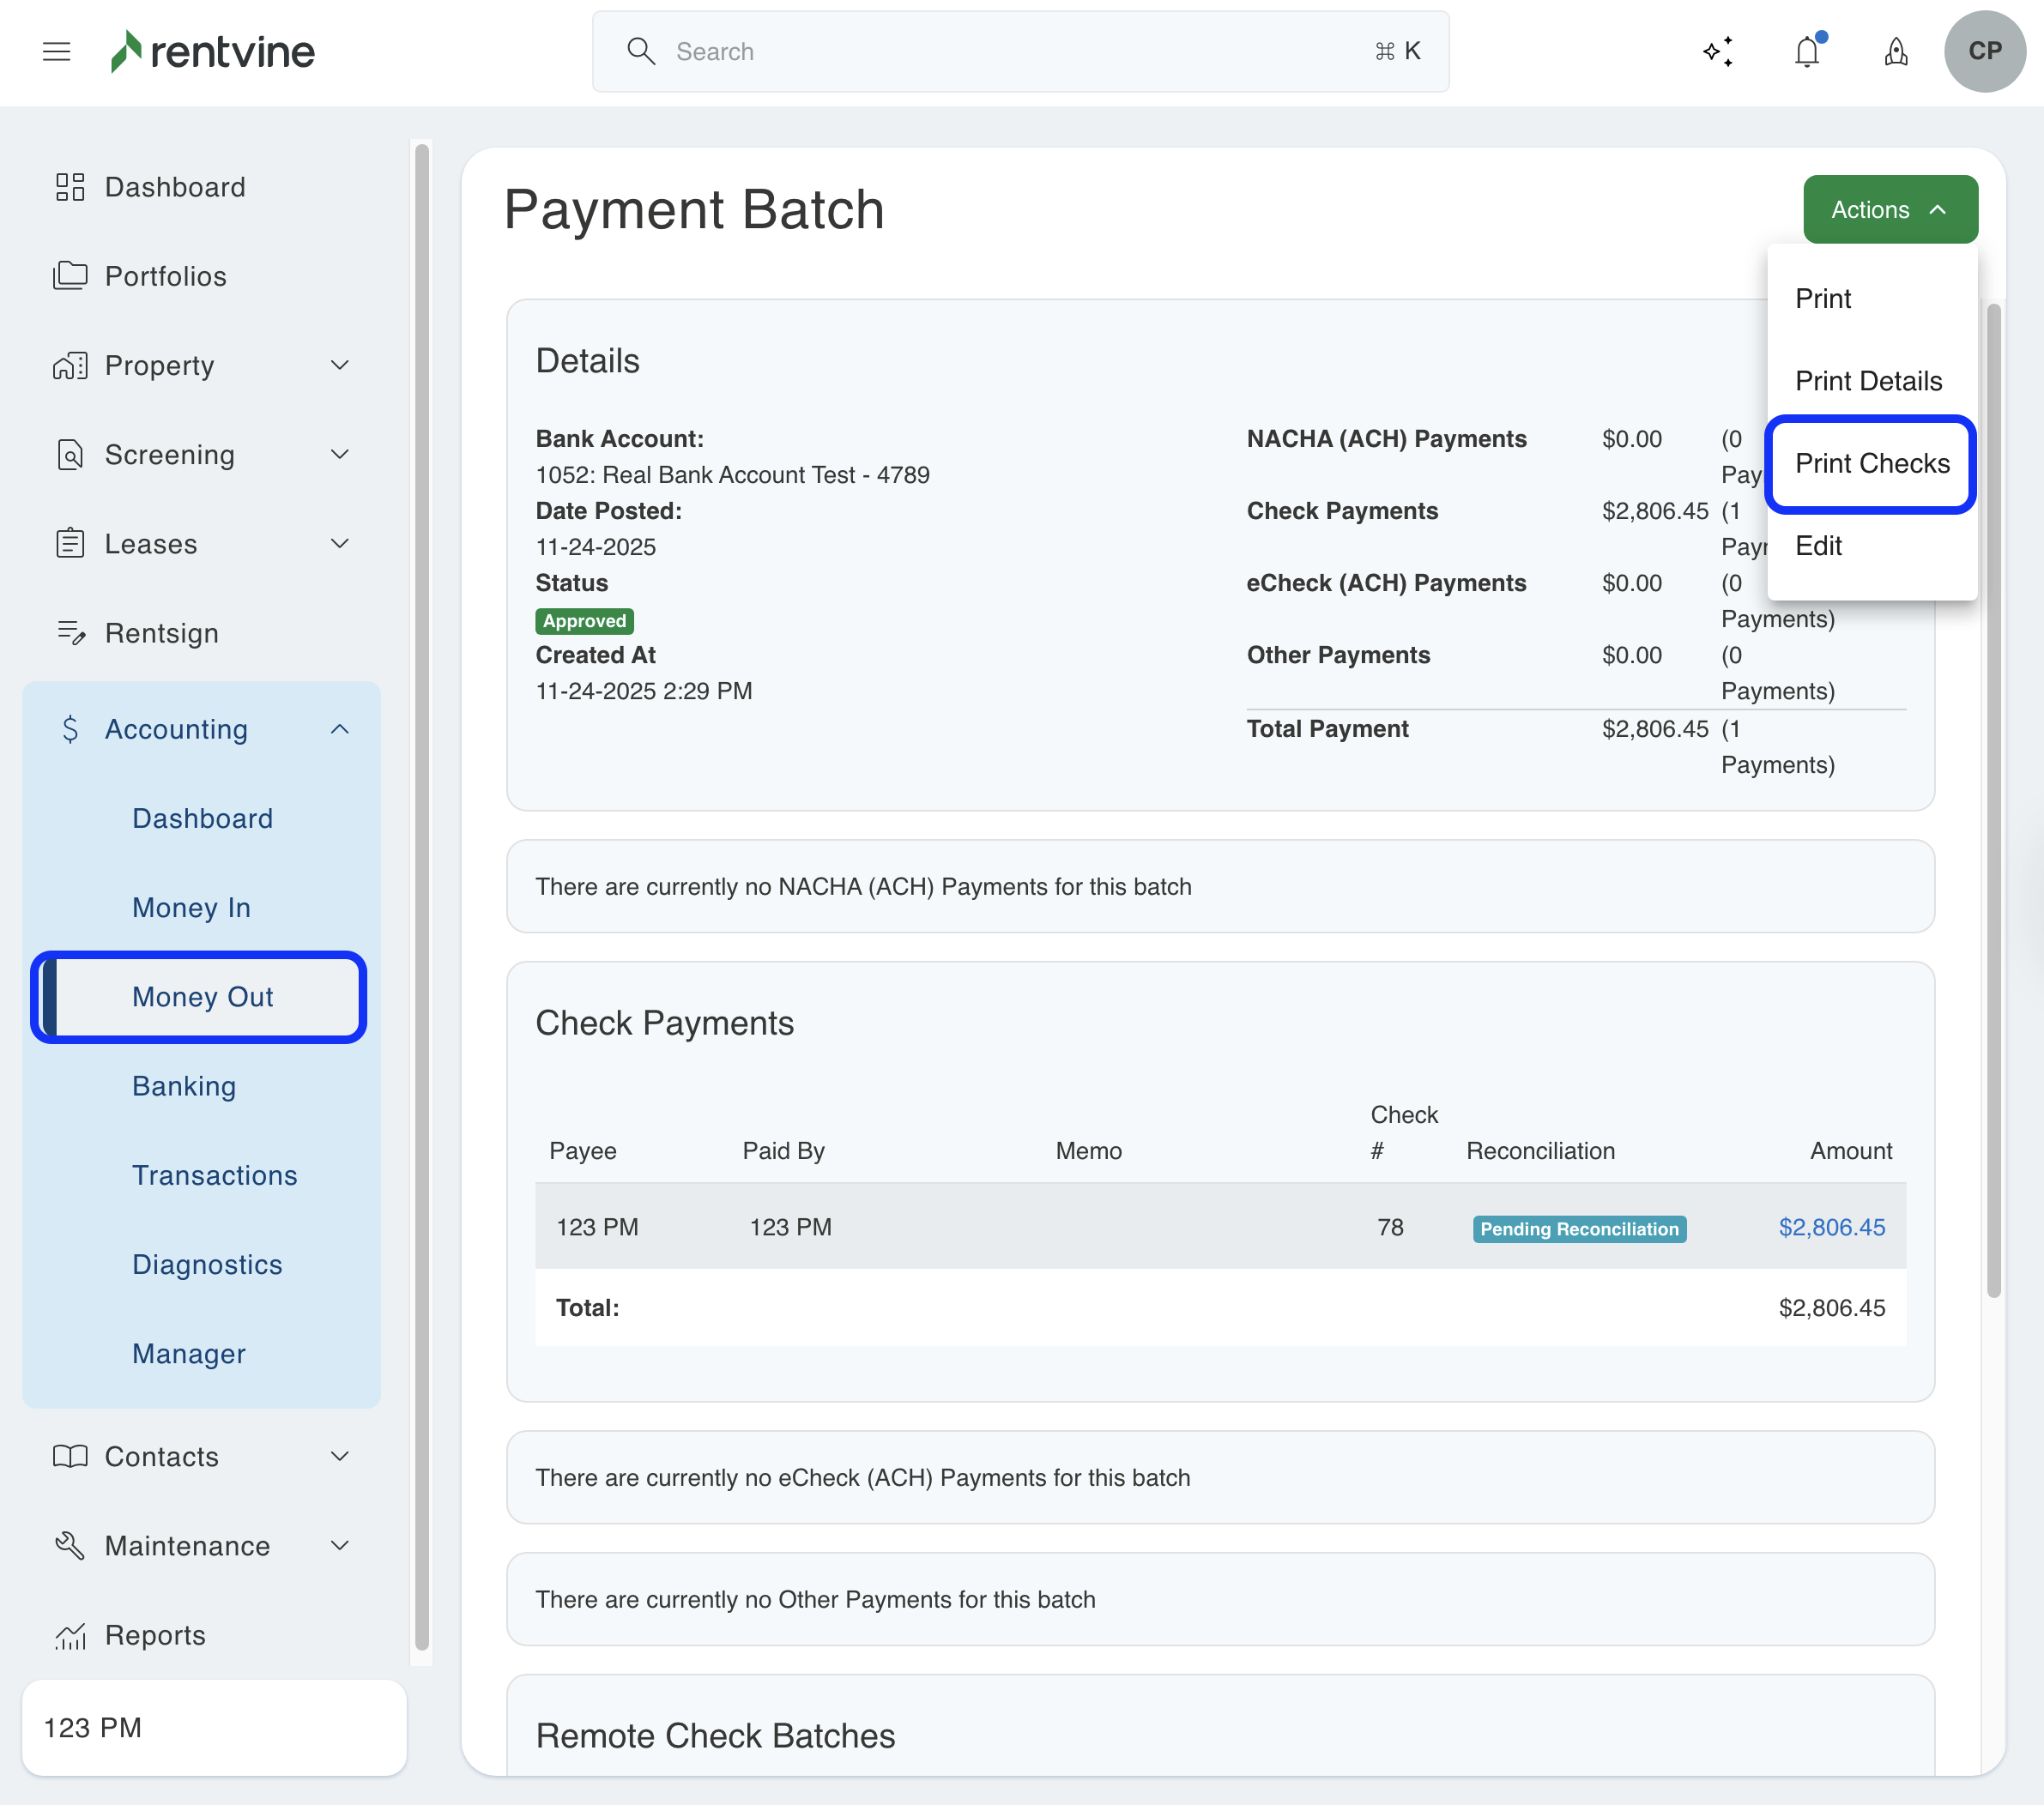
6. Once you select Submit Payments, you will then see your payment batch, which breaks down the details of the payments.
7. eChecks will automatically send. To Print Checks or Download NACHA File, click the green Actions button from within the payment batch, and click on the option that you need. If your account has Remote Checks enabled, an option to Send Remote Checks will also appear here.