Quick View Guide
Features & Tips
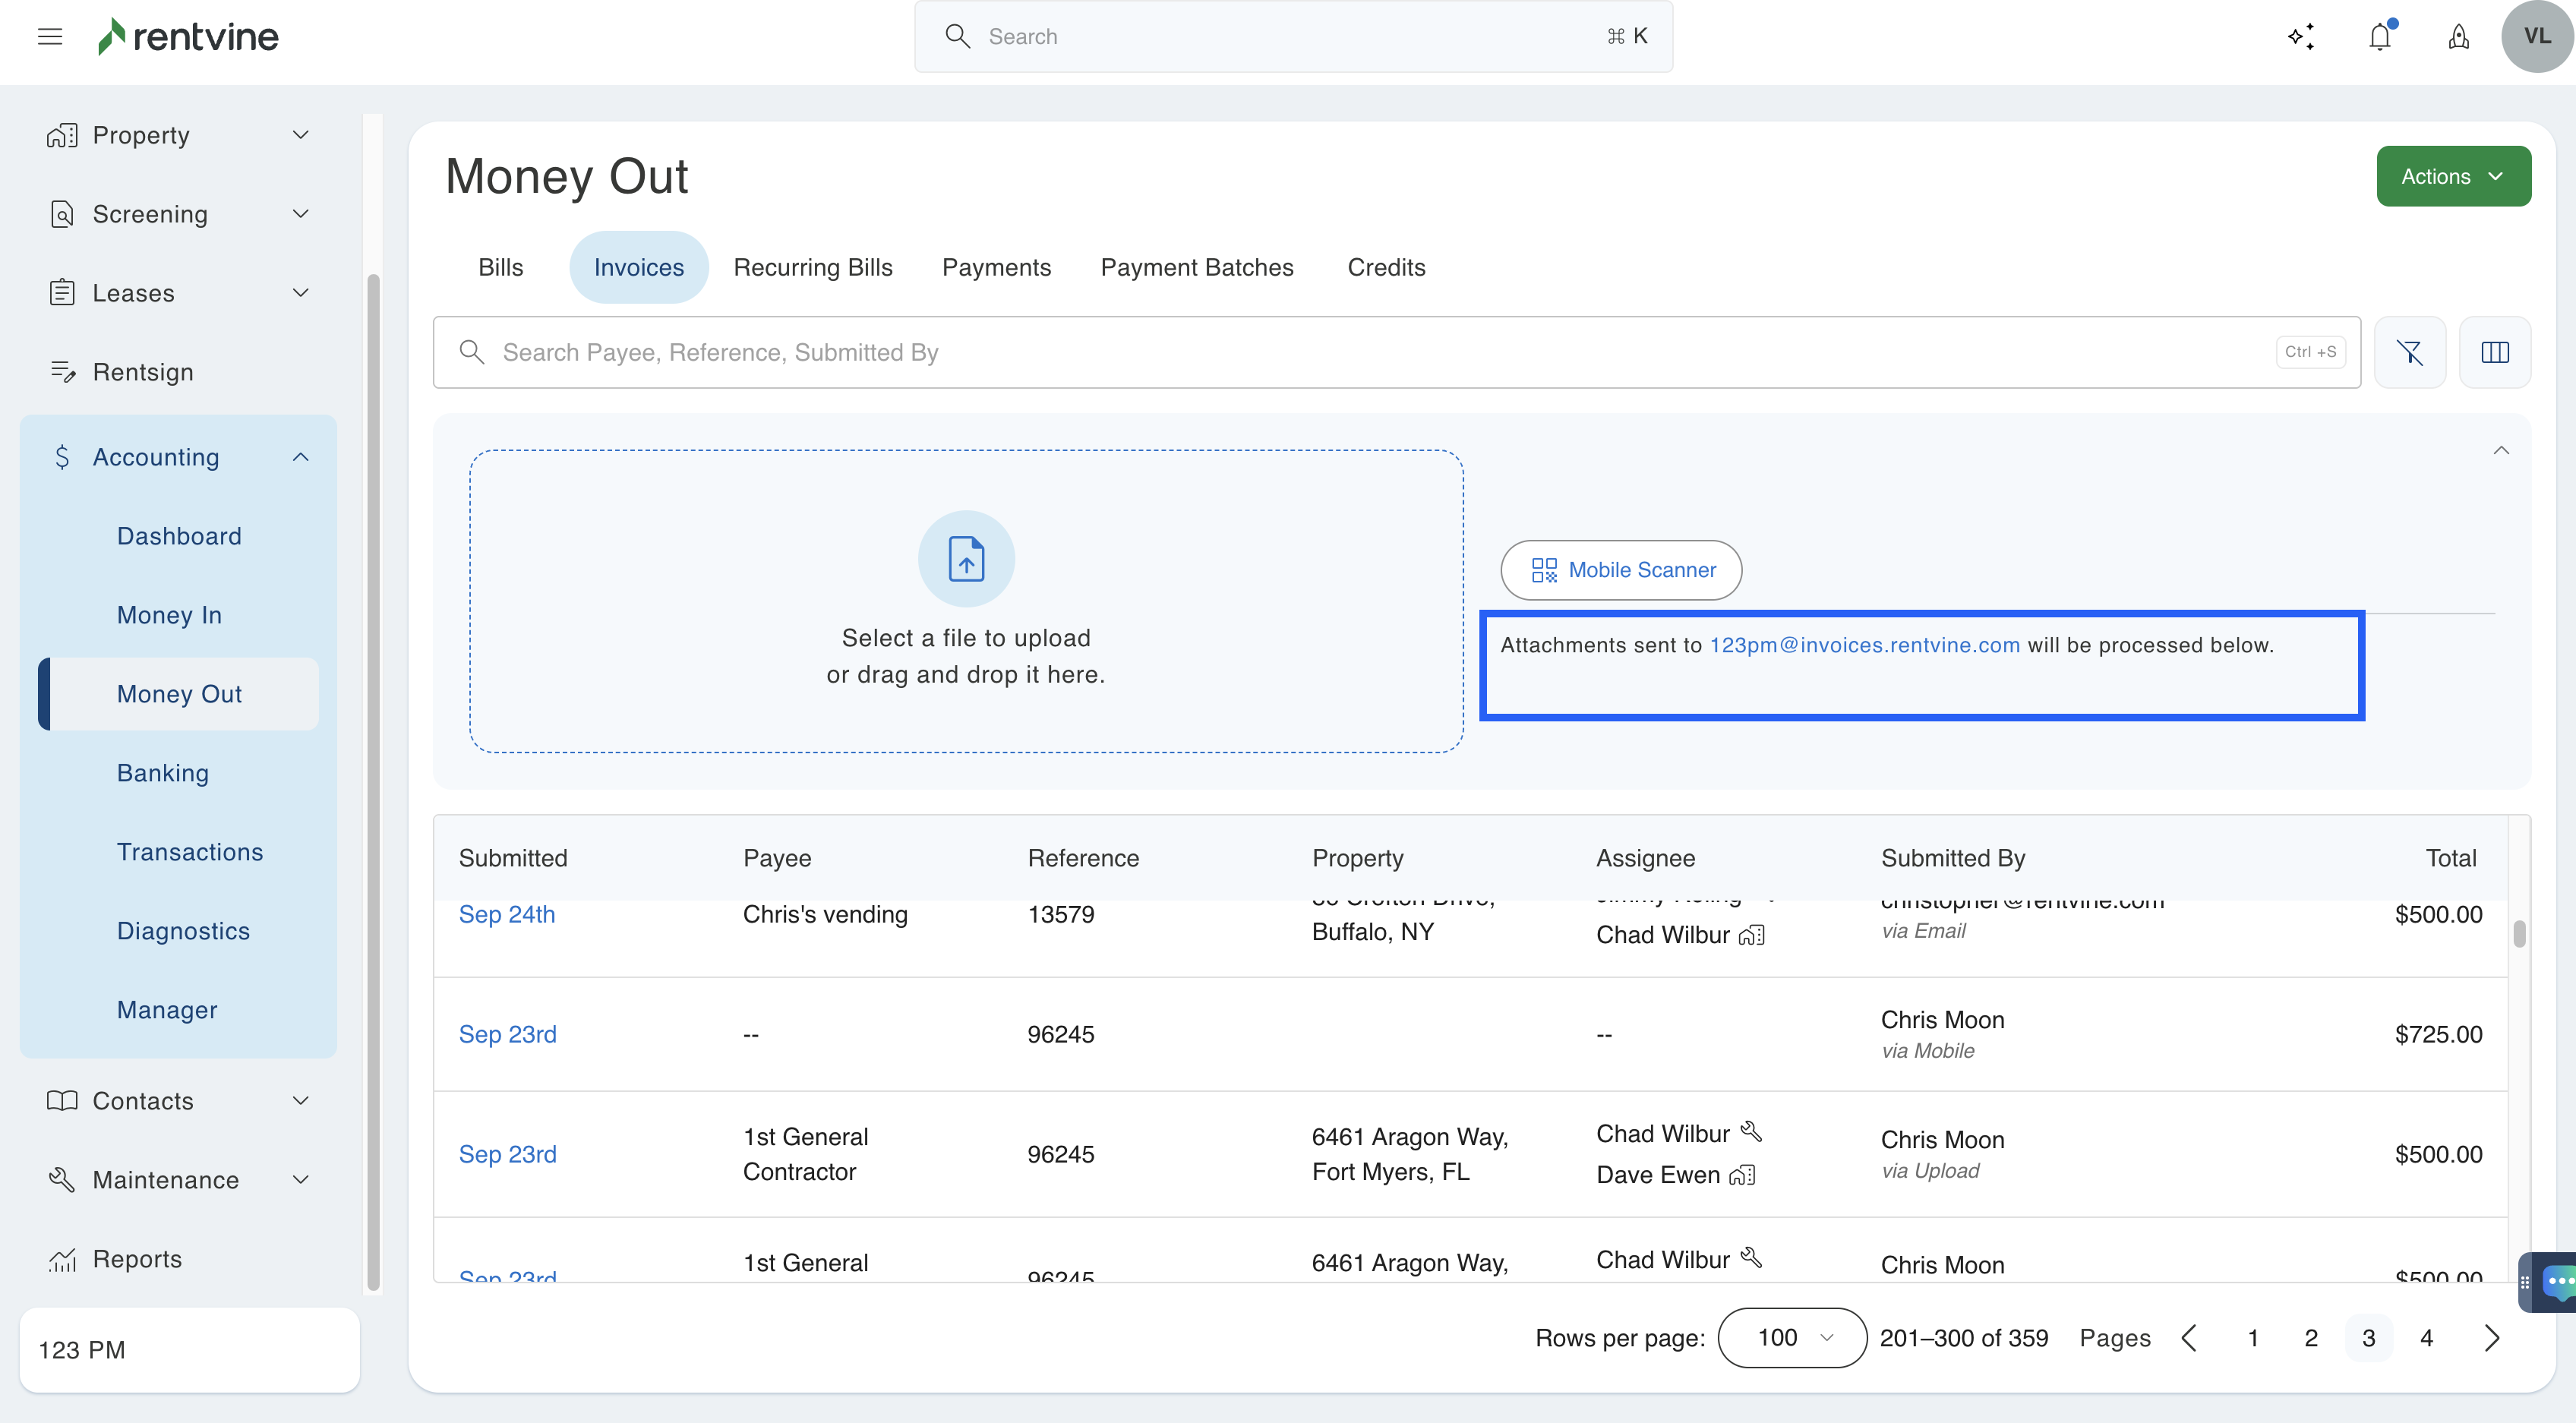
- Within the accounting money out tab, navigate to the vendor invoices page to view all invoices submitted by the vendor or manually uploaded into Rentvine by a user.

- You will notice the "Assignee" column. The system will read the assignees in the system to make them an associated assignee of the invoice. The system automatically makes the user an associated assignee of the invoice if an invoice is submitted and associated with the work order that they are the assignee of. This is signified by a wrench icon. If there is no assignee on the work order, the system will look at the assignee of the property and make that assignee the assignee to the invoice. This is indicated by a house icon. In cases where neither the property nor the work order has an assignee, the invoice will be labeled as "Unassigned". If the work order and property have different assignees, both users will be considered associated assignees.

- For information on how the invoice was submitted, you can view the "Submitted By" column. This will show you which user uploaded the invoice into the system. It will also inform you how the invoice was uploaded, including if it was by mobile, uploaded, emailed, or submitted through the vendor portal.

- The filter option located at the top right of this page allows for streamlined team workflows. Team members can easily filter invoices by specific assignees, simplifying the process of selecting and processing assigned tasks. This feature is particularly handy when dealing with a large number of unassigned invoices, as you can quickly filter and focus on them by selecting "Unassigned" in this section.


- You will also notice an upload button on this page. By clicking on the upload option, a drop-down menu will appear. Here, you can upload any invoices directly from your computer files. The prediction service will try to read this invoice and tie an associated assignee based on either the property or the work order of the invoice, if possible.

- Besides the upload option, you can click the "Mobile Scanner" button. This will pull up a personalized QR code linked to your account. You will be able to scan this using your phone to access a secure uploader for direct invoice uploads. These will seamlessly synchronize with your account and show up in the invoices tab.


Here is the view from the secure file uploader from your phone.

This immediately reflects in the system and lets you know this was via mobile.

- Furthermore, a unique email address is provided for your company. This email can be shared with vendors or used to send invoices to yourself. Once sent as an attachment to the email, the invoice will automatically appear in the vendor invoices section. You can also click this email to easily copy it to quickly send it to any vendors that may need this email address.
- If you are using a new vendor that has not been created within your Rentvine account, you will have the ability to type in the vendor's name in the payee box. Rentvine will recognize that this is a new vendor and allow you to create a vendor contact straight from this page.

Please note that you will still need to fill out the rest of the vendor's information at the vendor contact level.
- On invoices that are multiple pages long, you will have the option to split the invoice. You can do this by clicking the "Split" button above the invoice. On this page, you will have two options.
- One Per Page- This will create individual invoices for each page of the submitted invoice
- Custom Split- This will allow you to select how you would like to split the invoice. You can create as many splits as you want and split the pages wherever needed.


Please note that when the invoices are split, the original invoice with all pages is removed, and this cannot be reverted.
- When there is an invoice with multiple line items, the system will default to putting all charges under one line item in bill creation. If you would like to separate these charges into individual line items, you can click the "Separate Charges" button under the charges section. This will prefill all necessary information.


- For an individual invoice, there is a reject option available. Clicking on this will delete the invoice, allowing you to provide a reason for the rejection and promptly notify the vendor.


Please note that when an invoice is rejected, it will be permanently removed from the system.
- When processing an individual invoice, you have the option to allocate the bill among the properties in a portfolio as needed. This step allows you to divide the invoice in a way that suits your requirements. You can specify the total amount, account, allocation type, description, portfolio, and property groups for accurate allocation.

Rapid Invoice Creation Workflow
- In this demonstration, we will upload three invoices using the upload feature to illustrate the entire workflow. After uploading, a progress bar will appear as the system reads the invoice and attempts to complete all necessary fields for bill creation. Upon completion, these invoices will populate in the list view of invoices. You will also notice that the system has already begun pre-filling fields such as the payee and property.
 a
a
All new invoices uploaded will have a green outline flash around them to inform you that these are newly uploaded.

- To initiate the Rapid Invoice process, simply select the invoice you would like to begin with. In this example, we will start with the invoice at the top of the list.
- After selecting an invoice, you will find navigation options at the top. These include the total number of invoices that still need to be processed, a next and previous option to switch between different invoices, and a drop-down menu for easily selecting an invoice from the list for processing.

- You will also observe that the selected invoice was automatically scanned by the system, populating all fields that could be extracted from the submitted invoice. This includes details such as the payee, bill date, due date, invoice number, payer, charge account, amount, and description. These are highlighted with an orange outline to inform you of all of the fields that were able to be prefilled.


Please note that it is important to double-check all of the pulled fields to ensure their accuracy or to add any fields that could not be pulled from the invoice.
For the charge account to automatically populate, you will need to have a default charge account set at the vendor contact level. When the vendor is selected from the invoice, it will prefill this selected account.

To customize the bill description, payment memo, and charge description field population, you can view our knowledge base article on setting up an invoice autofill template by clicking here.
- In the Summary section located at the bottom of the page, you will find a detailed breakdown of the invoice creation process. For instance, this example outlines the specifics of the $725 amount that the vendor is set to receive for this particular invoice.

- Once you are prepared to proceed, click on the "Convert To Bill" button located at the bottom of the page. This action will complete the processing of the invoice and generate a bill for future payment.

- This will move you to the next invoice in the list. You will notice that the invoice number has been updated at the top. You will be presented with the same options as before, enabling you to proceed with submitting this invoice. Simply continue following these steps until all invoices have been successfully processed.

Once an invoice is processed, you will be able to click the hyperlink from the success alert if you would like to view the bill immediately before moving on to the next invoice.
