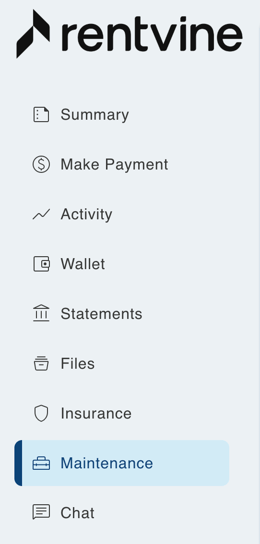
Quick Links to the Breakdown of all the Different Tabs within the Resident Portal
- Summary Tab
- Make Payment Tab
- Activity Tab
- Wallet Tab
- Files Tab
- Insurance Tab
- Service Requests Tab
- Chat Tab
The Summary Tab

- The first thing that you will see within your resident portal will be the summary page. In this page you will be able to view/pay your security deposit, set up autopay for monthly charges, view your upcoming balance, and current balance. Here you can also view and recent notices that your property management company posted.

Please note that you may not see the "Pay Deposit" button. If this is not in your portal don't worry you can pay the deposit through the
"Make a Payment" button.
- In here you can also quickly view your most recent activity. Your recent activity will be made up of all charges that have been posted to pay and any payments that you have made. There will also be a blue link labeled "View Receipt" where you can see the receipt for any of your payments. There is also a button in the top right to "View All Activity". This will take you to your activity page where you can view all charges and payments.
- You can also view your lease details on this page. This will show you the start date and the end date that your lease is for.
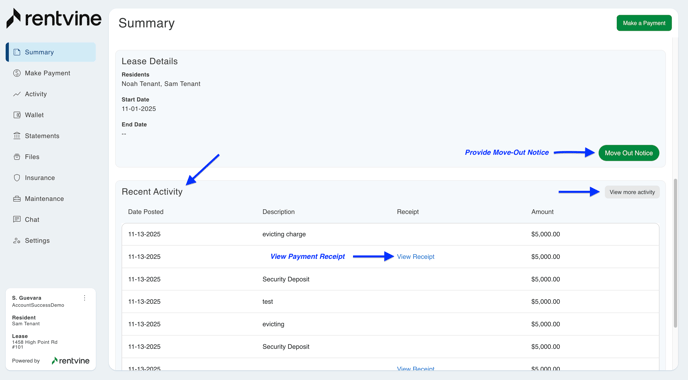
- In this box there will be a box labeled "Move Out Notice". This is how you can notify and your property manager of a move out and fill out information like why you are leaving and your forwarding address.
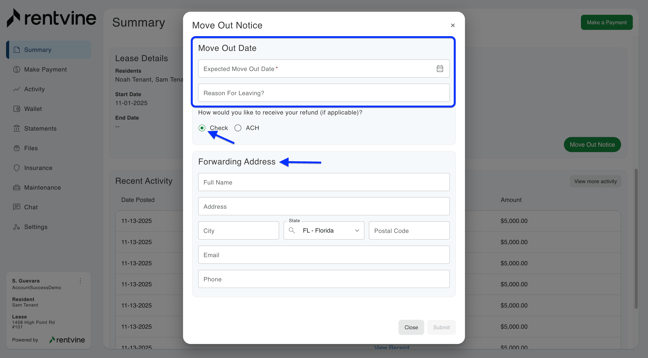
Please note that you may not have the option to give move out notice through your portal. This is because it has been disabled by your property manager and they may have you give move out notice a different way
- The last thing you will see is the monthly charges set up on your lease. This will show what the charge is, the frequency the charge will post, the next charge date, and the amount.

The Make Payment Tab

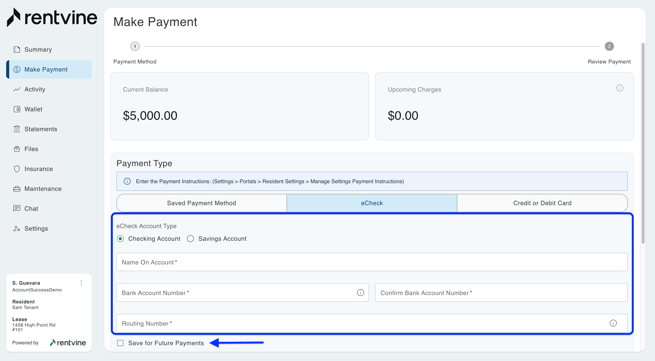
- The first thing you will see in the payment tab is your account snapshot. This will show you your current amount due and upcoming charges. The current amount due is made up of charges that are due right now and need to be paid. The upcoming charges is made up of any charges that are going to post within 18 days and will show that full amount.
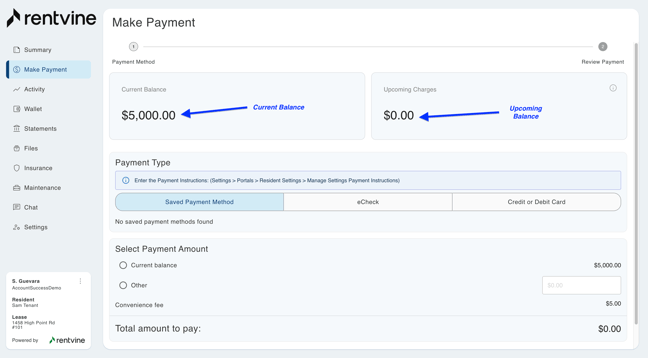
- The next thing you will see is how you would like to pay. The first way to pay is Payment Method, this comes from the Wallet Section in the resident portal.
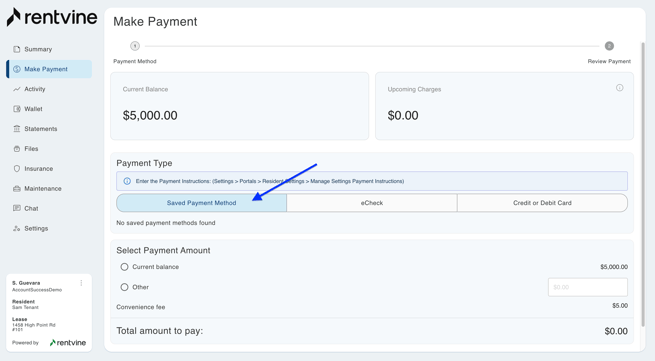
To add a payment method, you will need to create on in the wallet section of your resident portal first. Click here to jump to this section of the article, Wallet Tab
- The next option is to pay via eCheck that you can select and this will collect the money using your account number and routing number straight from your bank account. You can save this payment to use for future payments if you select the check box under this.
- Your other option for payments is to use a credit or debit card. You would first need to click on the credit or debit card option and then you will need to fill out the card number, expiration month and year, the CVC, name on the card, and postal code. You can also save this payment method to use for future payments.
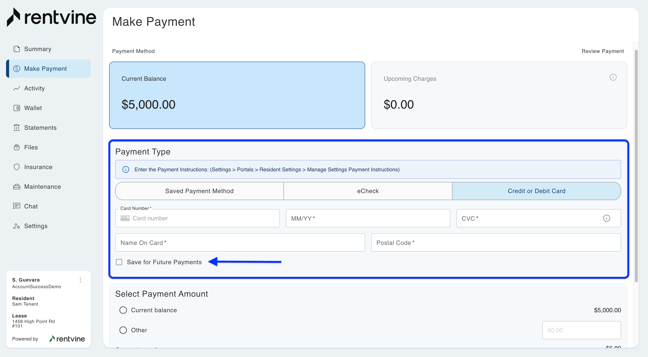
Please note that for debit or credit card options there is a 4% Processing Fee on your payment that is non refundable
- Your last option for payments is to pay via CashPay. You would first need to click on the CashPay option and then click on the green button labeled Pay with Cash
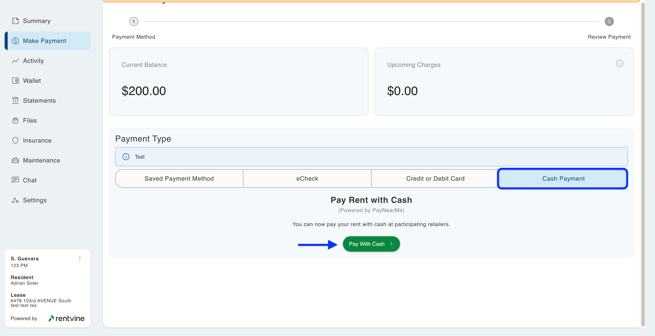
Please note this option will only show if enabled by the property manager. For further information on how to make a payment if this option is enabled in your portal, please visit this knowledge base article, Cash Pay through Resident Portal
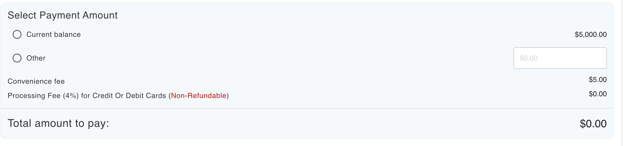
- The next step is to choose the amount you want to pay. Your options are to choose if you want to pay the current, current & upcoming, or the other payment. To select the current this will be everything that you owe up to today's date and will need to click on the bubble. For current & upcoming this will be the amount you currently owe plus any charges that are going to post within 18 days and will need to select that bubble. If you choose other you will need to click that bubble and enter in that amount in the allotted field. There will be no processing fee if you select eCheck but there will be a 4% processing fee if you select credit or debit card. Click the Next Review Payment button, to view the total that you are paying.
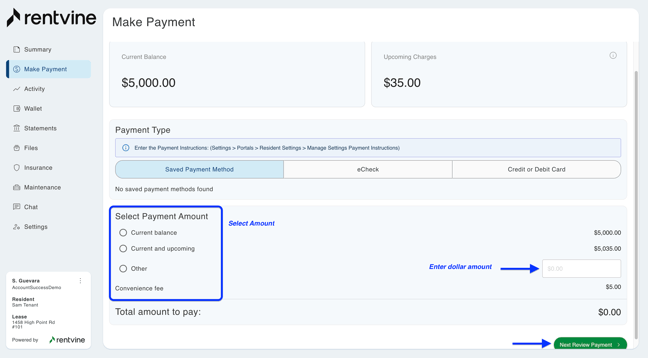
Please note that you may not have the other option on your portal. If this is the case it is because your property manager is only accepting payments in full and no partial payments
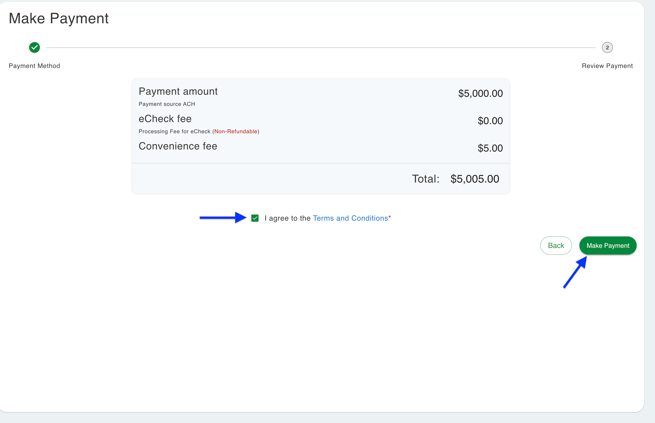
- The final step is to check the total amount that you are paying and ensuring this is the correct amount. Then selecting the terms and agreement box and submitting you payment by clicking Make Payment.
The Activity Tab

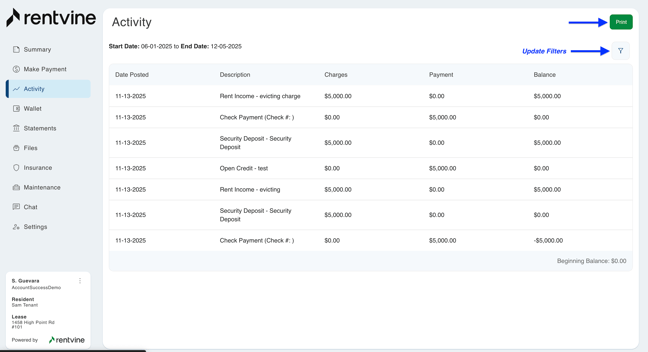
- This tab will show you the full activity of your account. In here you will be able to see any charges that have been posted to your portal as well as any payment that you have made. For any payments that you have made you can also view the receipts for them by clicking on the payment. The last thing you will see in here is that you can update filters at the top. This will allow you to change the date range of your activity.
The Wallet Tab

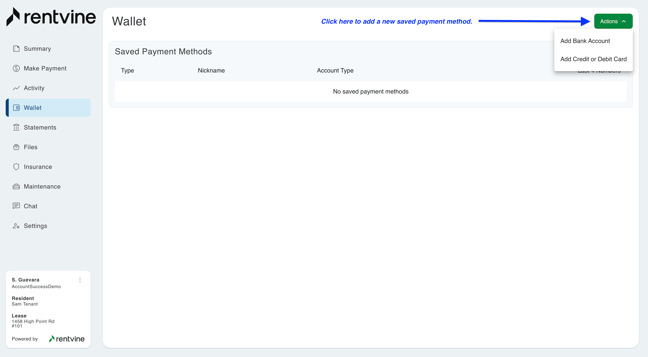
- In this tab you will be able to see all of your saved payment methods. If you already created one through the payment screen it will populate in this section. If you would like to add a payment method you can click on the green actions button in the top right and select if you would like to add an eCheck or Credit Card to the system. This will allow you to choose this payment method when making a payment or setting up a recurring payment.
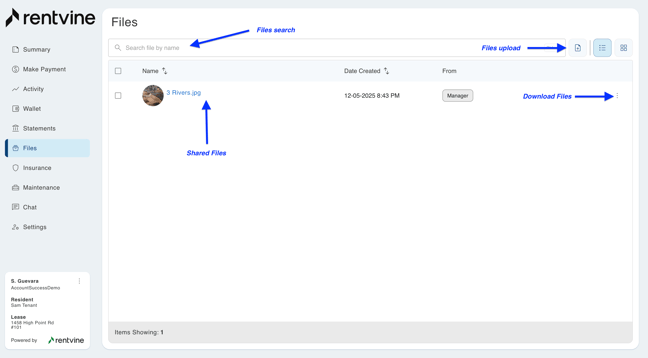
The Files Tab

- The files tab will hold every file that you upload or any files your property manager has shared with you. To upload files you can click on the perforated box to upload files straight from the device you are on, you can also drag and drop the file. You can search for specific files using the search bar at the top. If you would like to download certain files you can do this by clicking on the ellipses button and the download option will show on that specific file.
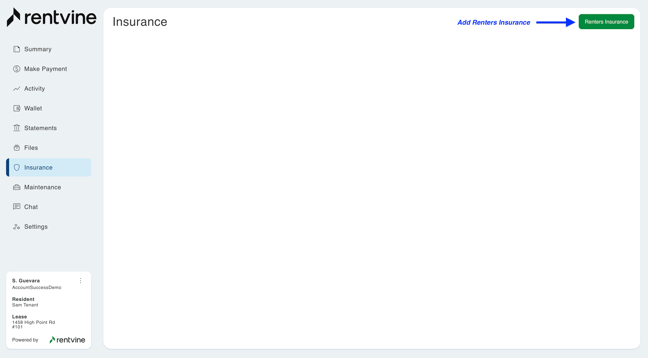
The Insurance Tab

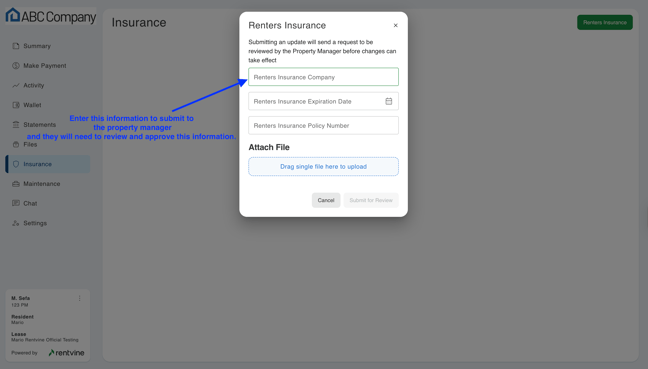
- This tab is how you can upload your renters insurance. The information you will need to have is the insurance company, expiration date, policy number, and the file. Once submitted, the property manager will need to review over the information submitted and approve of this on their end.
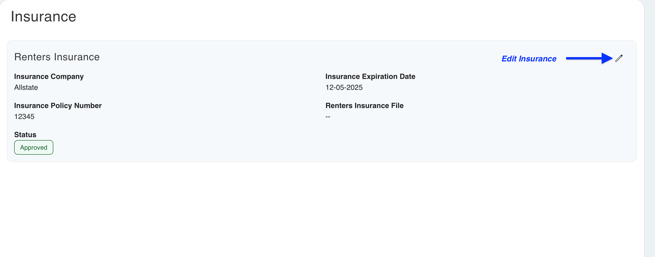
- To edit the renters insurance information, you will need to click the pencil icon button at the top right of the screen.
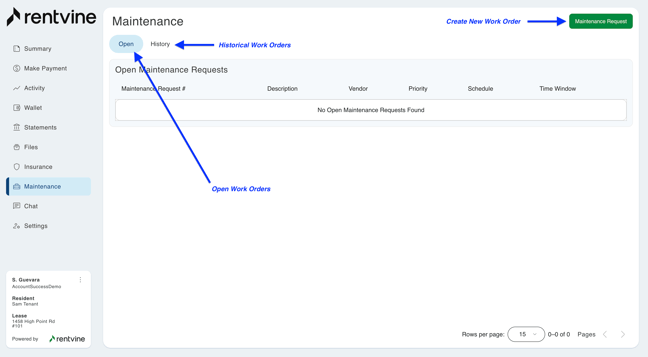
The Maintenance Tab
- The maintenance tab will allow you to view all of your service request that you have made or your property manager has made and shared with you. You can click Open to view all the currently open maintenance requests or click history will show all the past closed maintenance requests. You can also create a new service request by clicking the green create service request in the top right.
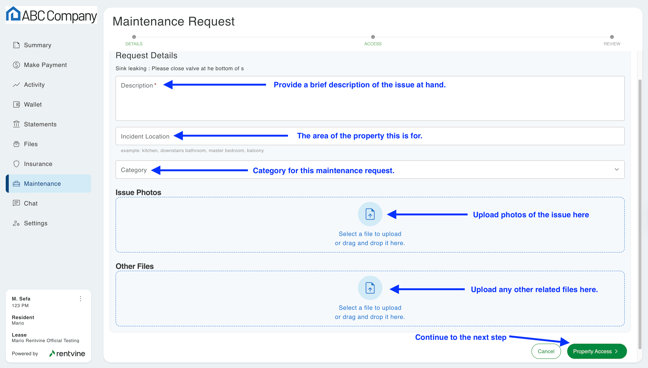
- When creating a new service request you can select the priority from high to low, put in the description, the incident location, the category of this maintenance request, and can upload files or images of the issue.
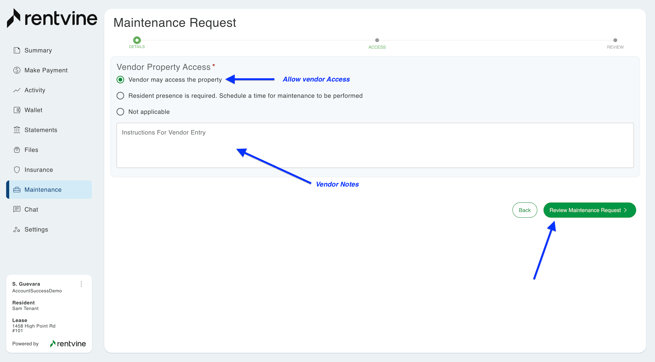
- The step will ask you about the property access. You can choose between vendor may access the property, resident presence is required. Schedule a time for maintenance to be performed, or not applicable.
- If you select vendor may access the property, this means you allow the vendor to access the property while you are not present. You can provide more information to entry of the property for the vendor in the text box below labeled Instruction for vendor entry.
- If you select, resident presence is required. Schedule a time for maintenance to be performed, then you will need to select 4 separate times for the vendor to select the best time of the 4 that works.
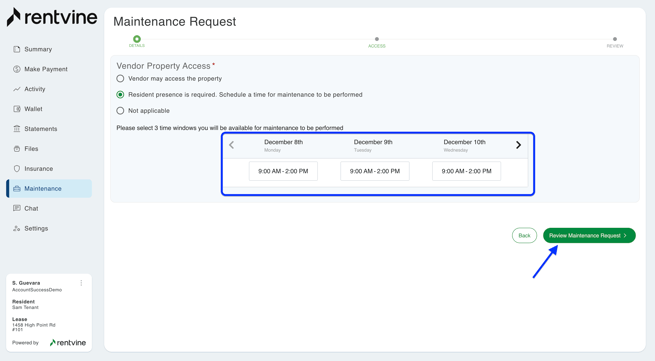
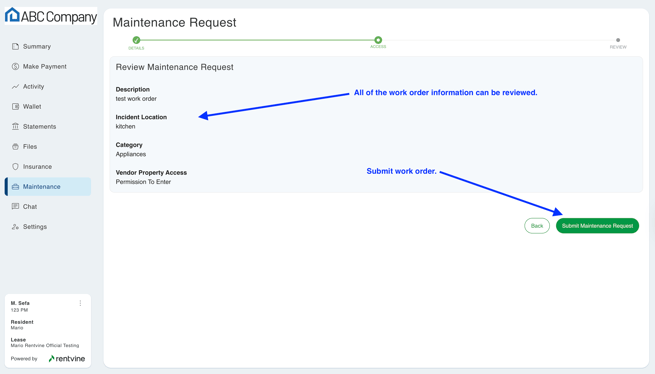
- The last step will review the entire work order information that was entered and you can review all this to confirm everything is correct. If everything is correct, you can select Submit Maintenance Request.
- The next screen will bring you to the details tab of the newly created work order and the information.
This will have all the work order details, vendor information, and the issue photos uploaded.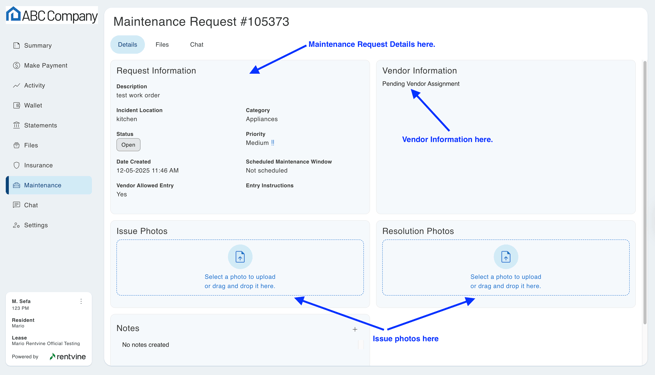
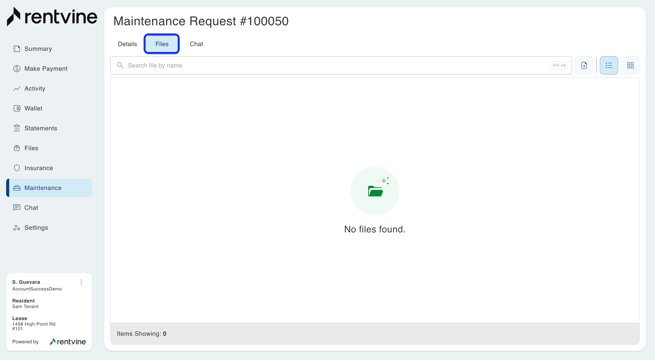
- The next tab of the maintenance request will be the files tab. Here you can view any files shared with you from the property manager related to this work order.
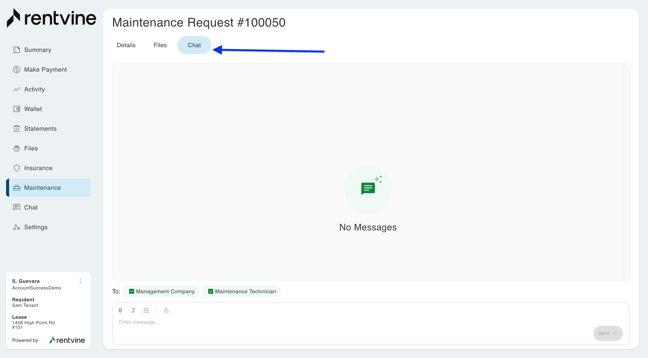
- The last tab within a specific work order is the chat tab. The chat tab is messages just for that specific work order. It will allow for communication between you, the property manager, and the vendor. Only send messages in this section that pertain to this specific work order.
The Chat Tab

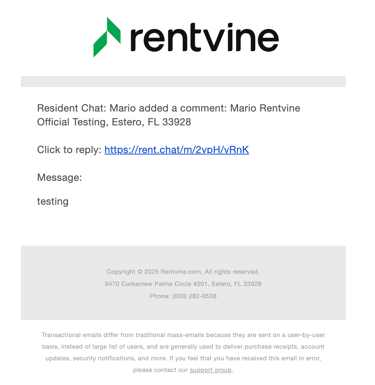
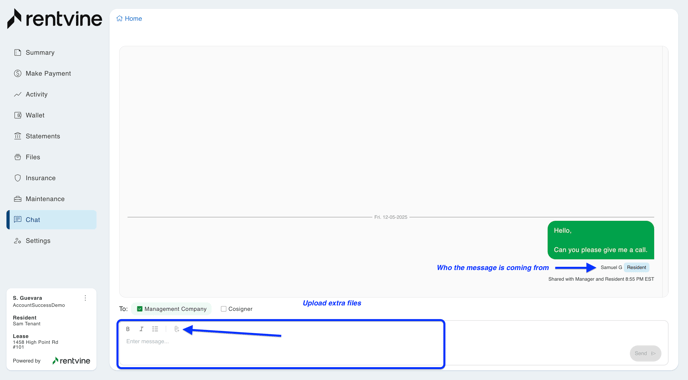
- The chat tab is a tab you can use to communicate with your property manager specifically. In here you will be able to view previous chat messages with the scrollable field, send new messages, and upload files straight to your property manager. The chat here is just through the portal and the only way to reply is through this tab. You will get notified by email or text when you receive a new chat message.
Example of the Email Notification when you get a New Chat Message
Please note that the chat functionality in the chat tab and the chat in a service request are two different chats. Please view this knowledge base article that explains the differences: Difference between service request chats and the chat tab