Quick View Guide
Setting Up Default Vendor Discounts
Hiding/Showing Discount Bill on Owner Statement
Setting Up Discount Settings
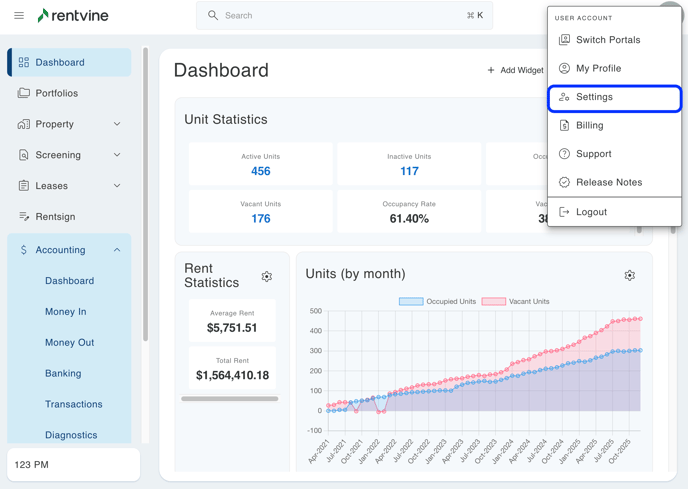
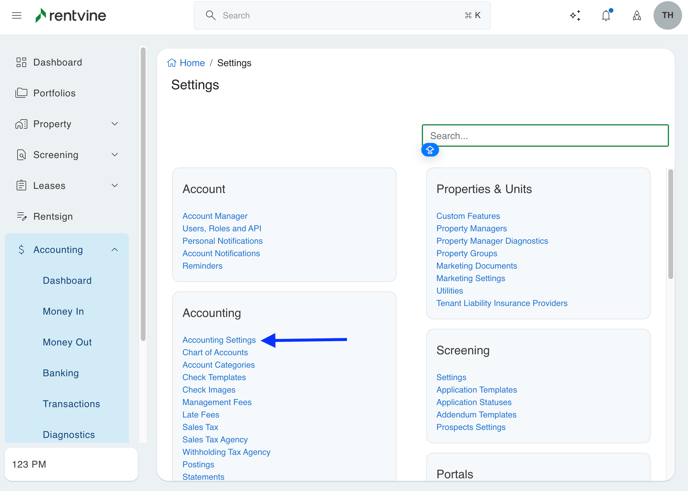
- To get started, you will first need to configure your accounting settings so discounts are enabled (This is usually done during onboarding, so if you already have this set up, skip to adding the discount). To set this up, you need to go to your global settings by clicking your initials in the top right and clicking "Settings". Then you will click "Accounting Settings."
- When in here, you will scroll down until you find the settings labeled "Billing". If the toggle is off for "Vendor Discounts Enabled," click on the edit button and make sure this is toggled on, and select a default vendor discount chart of account.
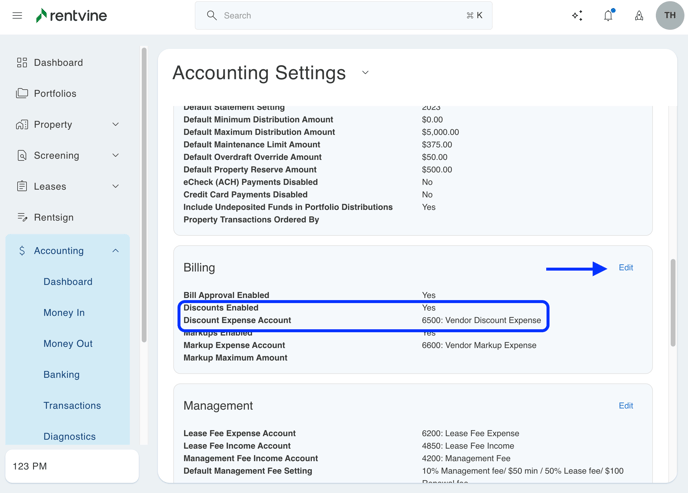
- If you do not have a designated vendor discount chart of account, you will want to create one first and then come back and select it as the default chart of account to use for vendor discounts. If this was not done during onboarding, you can follow this article on creating a COA by clicking here.
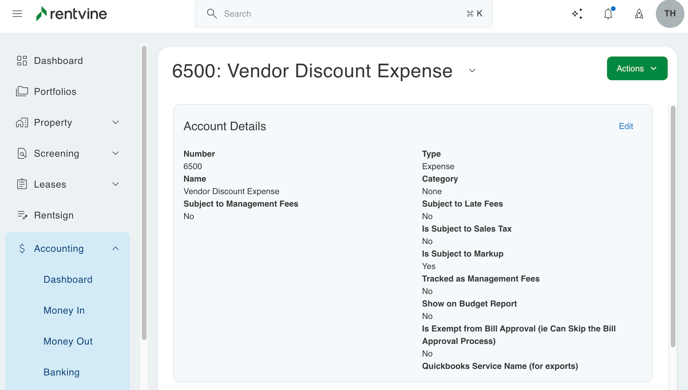
Here is an example of how the chart of accounts for vendor discount should be set up
Adding a Discount to a Bill
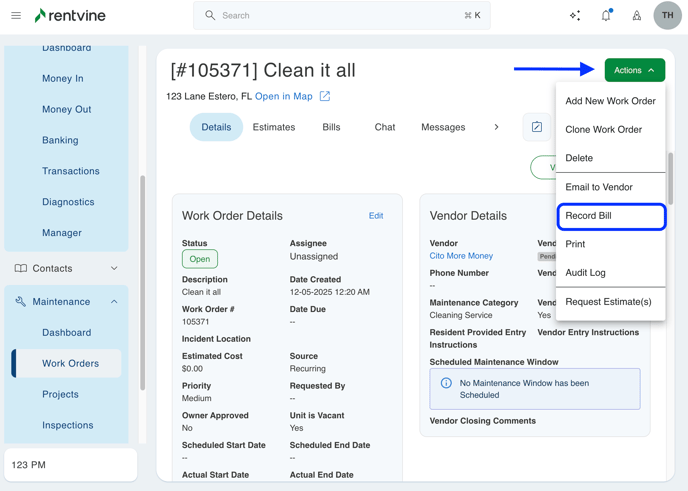
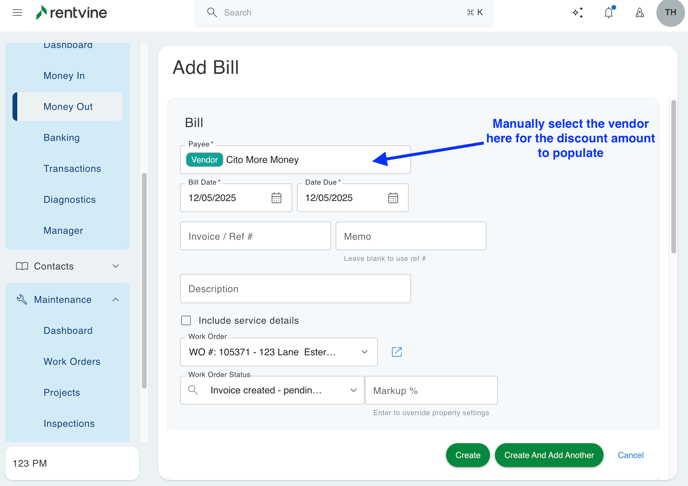
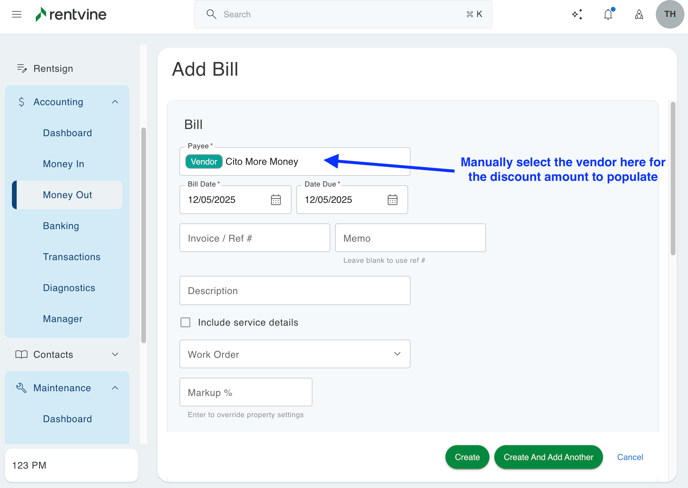
- Once the previous steps are complete, you can either go to a specific work order and add a bill or go to the accounting tab and add a bill. From a work order, click the green actions button and click record bill. This will automatically add the vendor as the payee on the bill. Since the vendor is already selected, you will see the field for Discount Amount. You can also manually adjust this amount if needed by selecting the field and entering the manual amount.
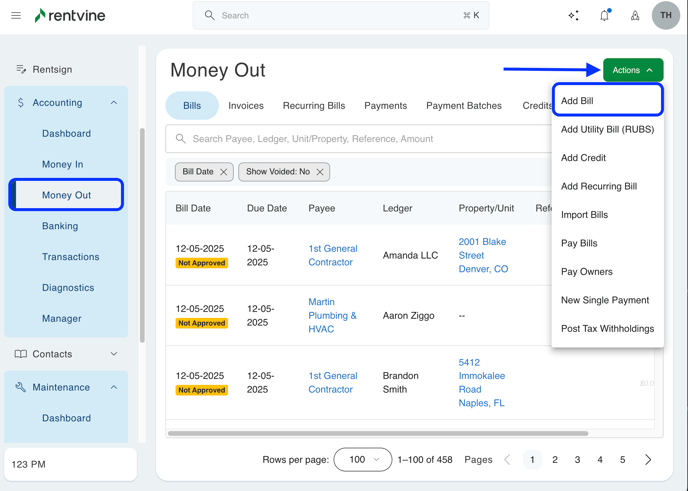
- Alternatively, you have the option to directly add a bill without the need for a work order. To do this, click the accounting tab and click money out. From here, click the green actions button and click "Add Bill". Once you select the vendor, you will see the field for Discount Amount. Again, the system will automatically reduce the bill by applying the discount tied to the vendor contact, or you can manually adjust the amount if needed.
How a Discount Amount Works
- Adding a discount amount will not reduce the amount the payer (typically the owner or unit) needs to pay on the bill. Instead, the owner or unit will be responsible for paying the full bill amount, while the vendor will receive a reduced payment based on the amount of the discount applied to the bill. The discounted portion of the payment that is withheld from the vendor will be allocated to your property management company. Consequently, the system will generate two bills for the owner: one for the vendor's specified amount and another for the discounted amount.
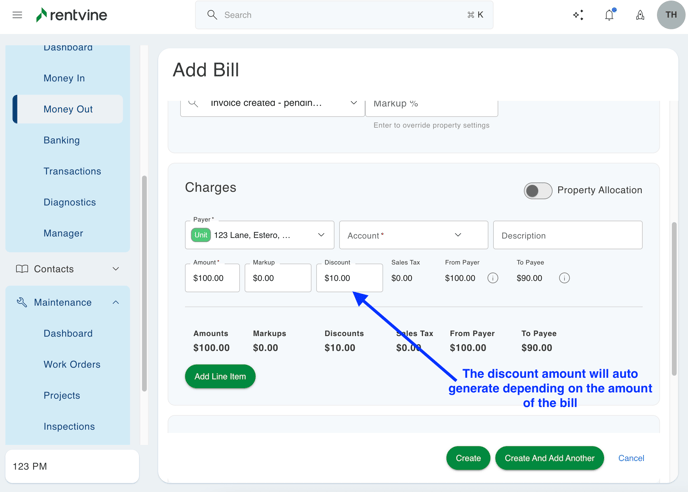
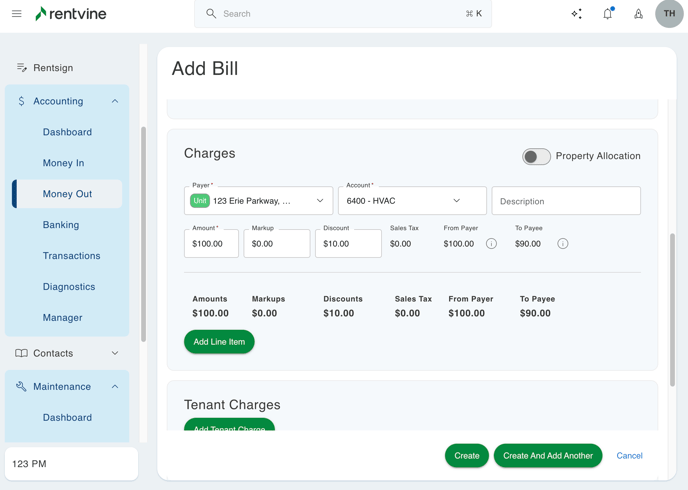
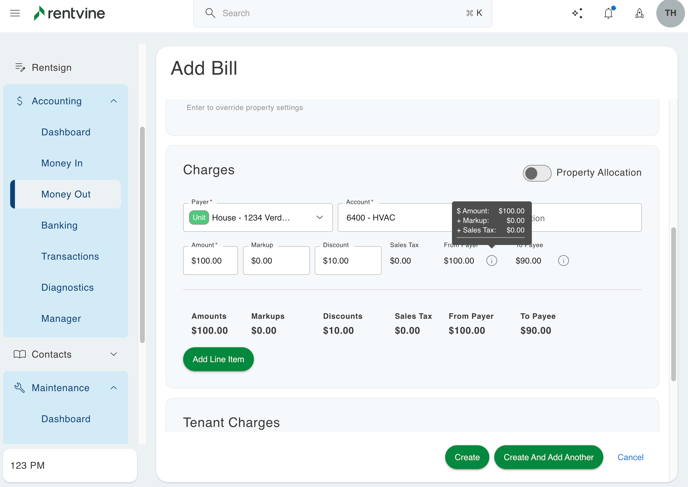
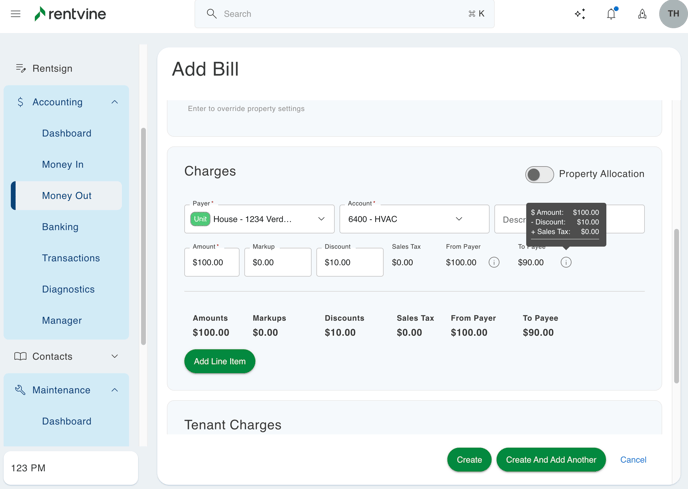
- Here is an example of this in action. Let's say there is a 10% discount applied to a $100 work order expense bill. Once you select the owner or unit paying this, the account, and the amount, you will be able to see the "To Payee" and the "Discount". The 'To Payee' amount is the amount that will go to the vendor. The 'Discount' amount is the amount that will go to your property management company. The "To Payer" is the amount that the owner or unit will pay.
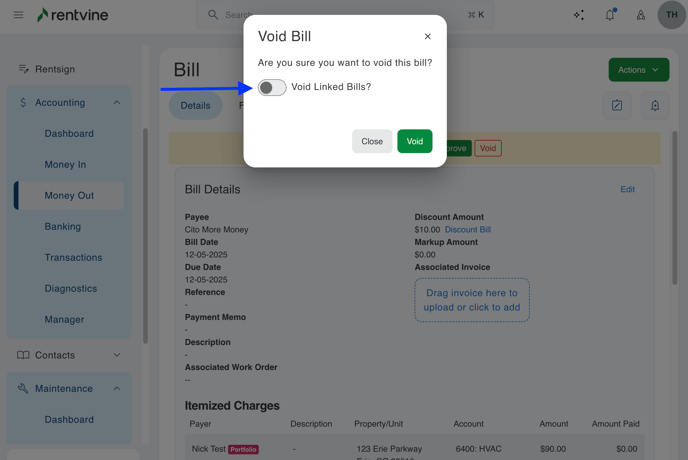
If you ever need to void a bill and a discount bill, you can click the green actions button and void one of the bills. This will give you the option to "Void Linked Bills". When this is toggled on, it will automatically void the original bill and the discount bill.
If you ever wonder why a discount is pulling or how the total number is being pulled from the system, you can hover over the 'i' icon of each field to see more information
For example:
Default Vendor Discount Amounts
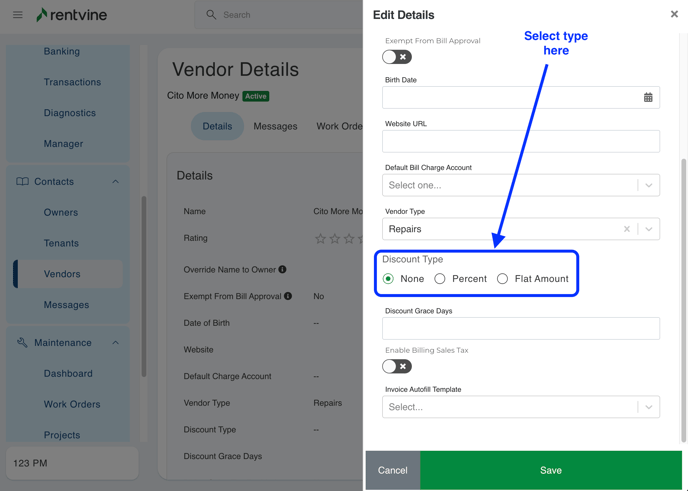
- If you want to have a vendor set with a default discount percentage, you can set this at the vendor contact details page. To do this, from the left navigation menu, go to contacts and click vendors. Click on a specific vendor to view their details. In the details box, you can click the pencil icon to edit. There is a field in here for discount percent or flat fee amount. The option entered here will automatically show on any bills where the vendor is selected as the payee.
This will need to be set on every vendor contact individually on all the vendors you would like to have a default discount percentage for.
- You can also add a minimum / maximum amount for a markup
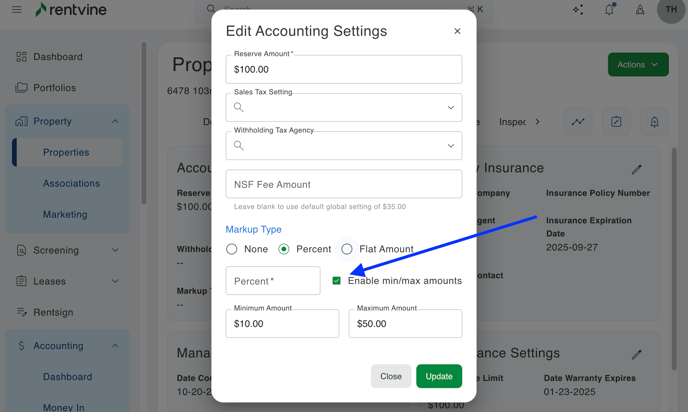
This means when creating a bill, a markup will automatically be a minimum of the amount entered, but will not go over the maximum amount.
This is only available for the percentage markup type.
Showing/Hiding Discount on Owner Statement
- The discount can be shown on the owner statement as it actually is. For the example above, $90 to the vendor and a $10 discount amount to your property management company. It can also show as combined, so the owner will only see the full $100 amount that they paid for that bill and not how it was split.
Showing Discount
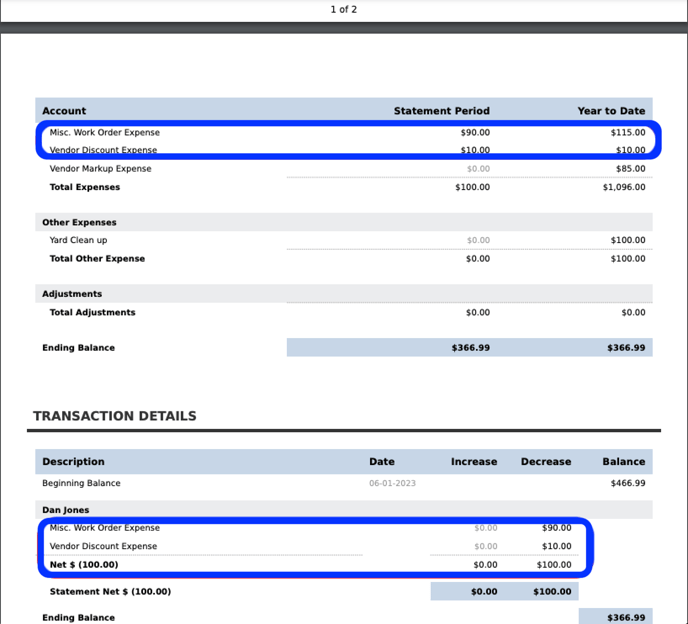
- If you would like the discount to show on the owner statement, you will need to go to the owner statement profile you have set up for the portfolio. You can get here by going to Settings/Statements and then clicking on the specific owner statement profile you want to edit. In the top statement settings box, click the edit button. Make sure the toggle for Combine Discount is turned off.
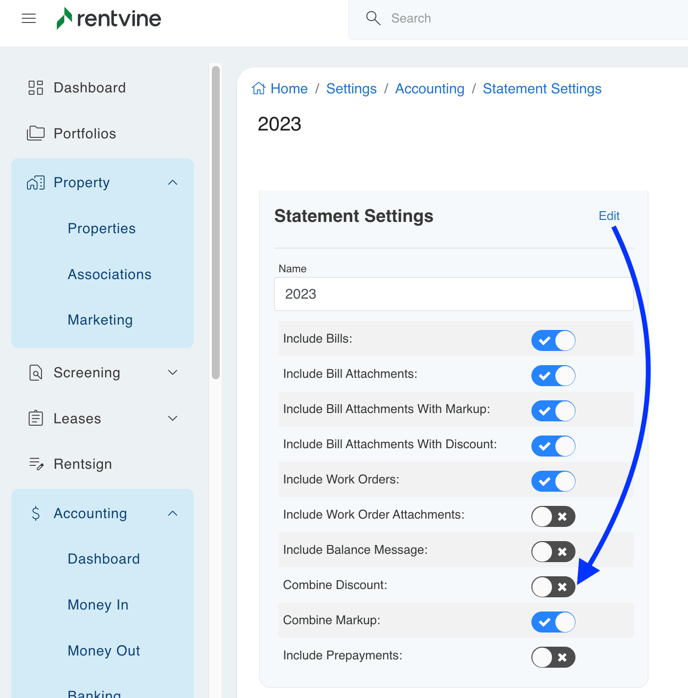
- This will make it so that on the statement, the owner will see two line items for each of the bills that were actually created. One will show an expense paying the vendor, and the second will show a bill paying for the vendor discount expense. Please see below for an example.
Combining Discount
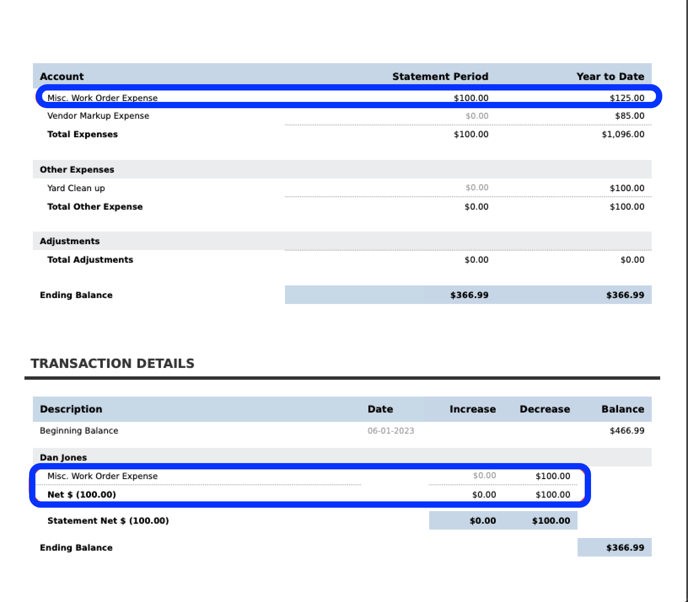
- If you would like to combine the discount so the owner can't see those separate line items, you can go to the same place under Settings / Statements, and the specific owner statement profile you would like to edit. When you click edit, make sure that the toggle is turned on for Combine Discount.

- This will make it so the owner sees one line item for paying the vendor for that whole amount instead of those two separate bills. Please see below for an example of how that will look on an owner statement.
Combining the Discount in the Owner Portal
- Another section where you can combine the discount is on the owner portal. For this, you will need to navigate to the owner portal settings.

- Here you will see the option for "Combine Discount". With this toggled on, it will combine the discount on the owner's live ledger (if enabled) and under their bills section (if enabled).


