Get more information on (FIRE) Filing Information Returns Electronically with the IRS
Rentvine does NOT submit the 1099's to the IRS for you. Rentvine can generate the 1099's (electronically or printable) for you so you can then submit it to the IRS
Rentvine does NOT generate a 1096 form if you are filing by mail. For more information on the form, please visit the IRS website here
Step 1: Configure Tax Settings
Fill out your company's IRS information and choose if you want to include Prepayments on the 1099's
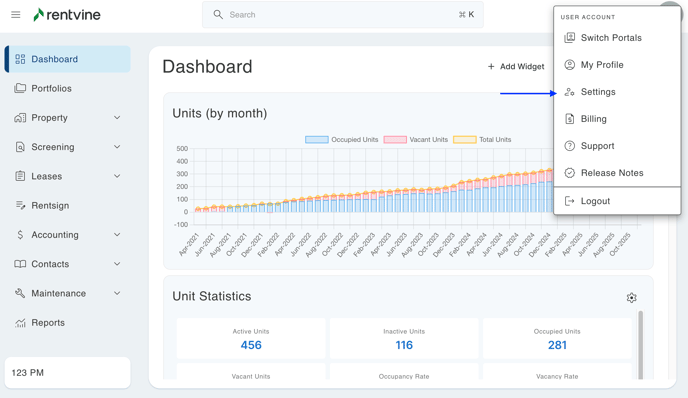
- Go to the settings page (click on your initials in the top right of the page and select Settings)
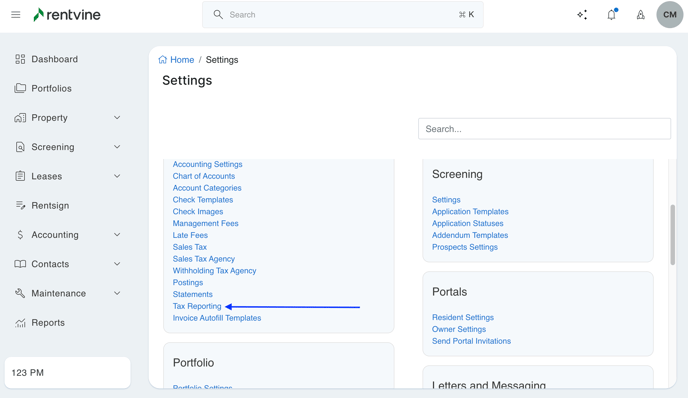
- Click on Tax Reporting
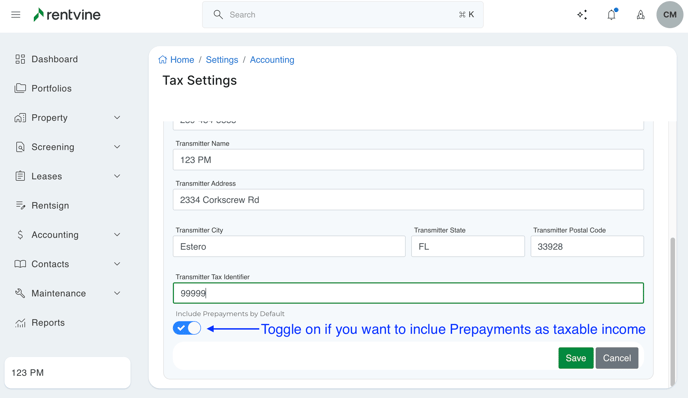
- Fill out the Tax Settings form with your company information, i.e., transmitter and contact information. Toggle on "Include Prepayments by Default" if you want to include Prepayments on the 1099's. Click Save
The IRS will supply you with a Transmitter Control Code and Transmitter Name Control if you plan to file electronically. If you do not have this information and are not planning to file electronically, please fill out the two fields with false information so the form will save (You can just type "99999" in both fields). This will not affect your 1099's if you are not filing electronically.
1099's will not generate if Step 1 is not completed. You will receive an error message later in the process when you try to generate 1099's.
Step 2: Review which Chart of Accounts are subject to 1099 reporting (reported as income)
Make sure you have the correct chart of accounts that are subject to 1099 reporting
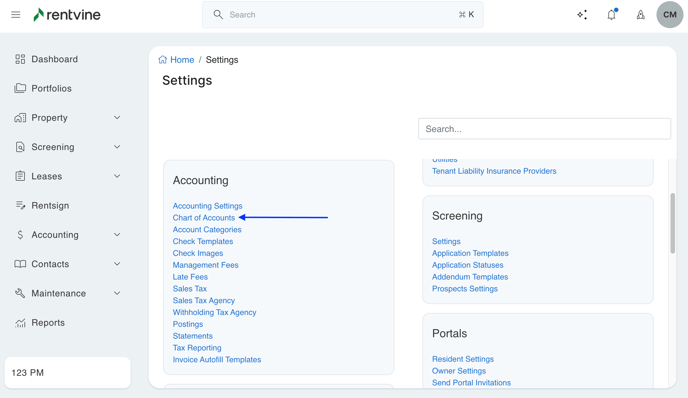
- Go to the settings page (click on the ellipsis next to your name in the lower left corner of the page and select Settings)
- Click on Chart of Accounts
-
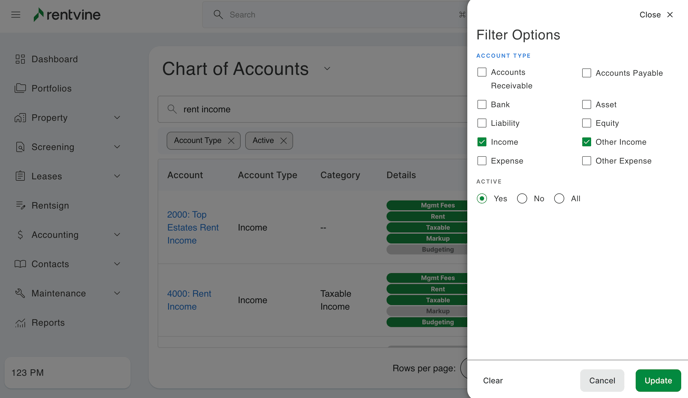
Filter the list by Account Type and select Income and Other Income. Click update
-
Go through the list of income accounts and review which income accounts are set as Taxable (report as income). If Taxable is green, it means the account is subject to 1099 reporting (report as income).
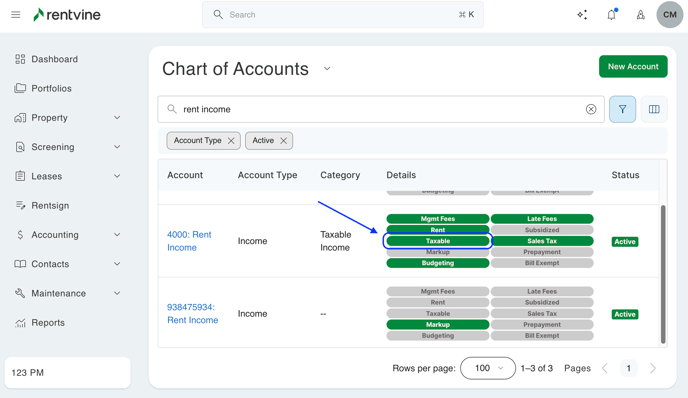
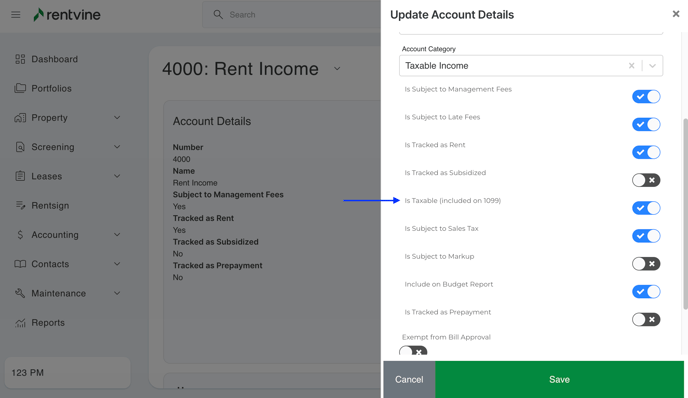
- If you need to make a chart of accounts Taxable, click on it so you can modify it. Click EDIT and toggle on isTaxable. Click Save.
Step 3: Review Owner and Vendor contact information
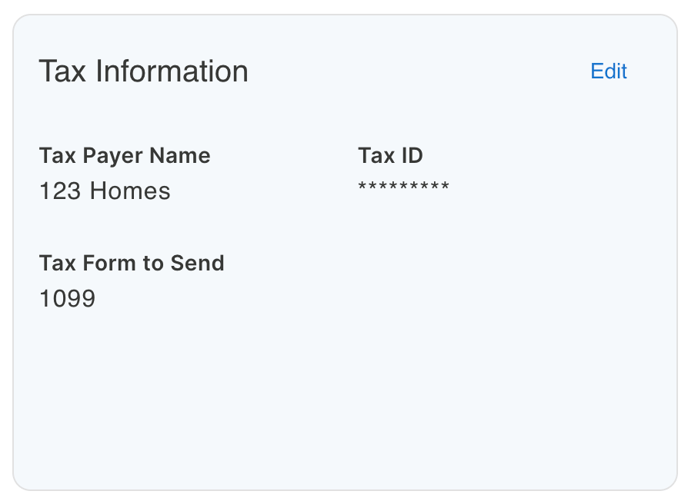
Make sure you have the address and tax ID information entered for your owners and vendors. You can run an owner or vendor report in the Reports section of Rentvine to see which ones may be missing address and taxpayer name information. If you find some that are missing information, you can search for the owner or vendor name in the global search and update the information in the contact details page. Be sure to select the Tax Form to Send as 1099. If it's set to NONE, a 1099 will not be generated for that owner or vendor
Step 4: Set Parameters to Compile 1099 information
Compile a list of owners and vendors that will be used to generate the 1099's.
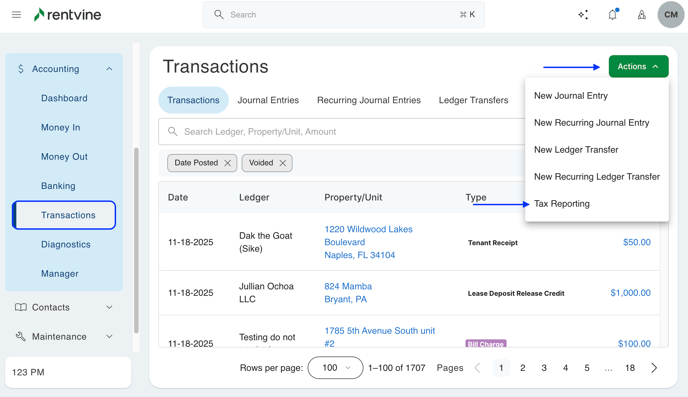
- From the left navigation menu, click on Accounting / Transactions. Click on the green Actions button and select Tax Reporting.
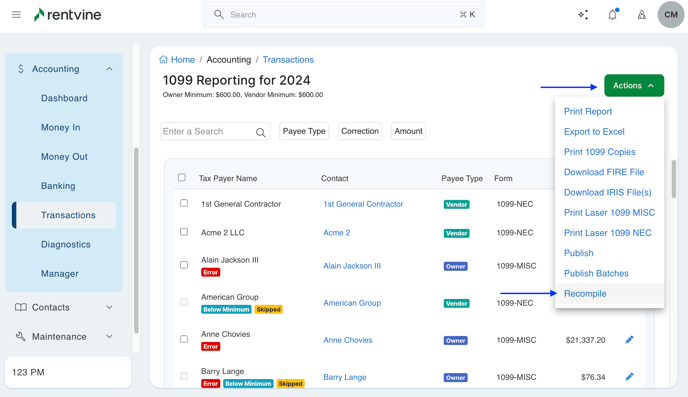
- This will take you to the 1099 Reporting page. Click on the green Actions button and select Recompile.
If this is the first time that you are accessing the page, it will take you straight to the Compile page.
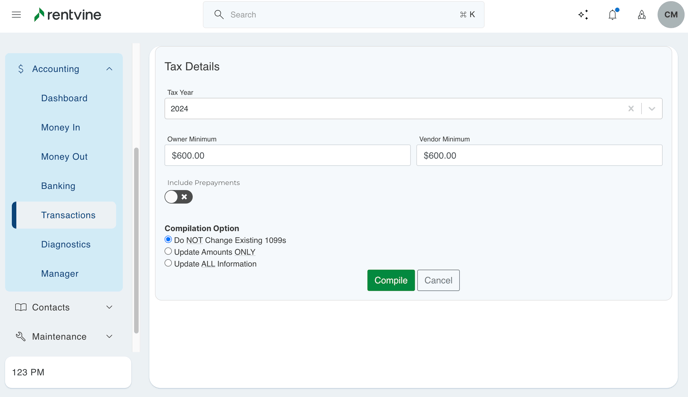
- The Compile page allows you to set parameters for what you want to report. Based on what you select, it will gather the relevant tax information from your Rentvine account.
-
- Tax Year - Select the year that you want to report
- Owner and Vendor Minimum - Enter the minimum amounts to report
- Include Prepayments - This will already be on if you selected to include Prepayment by default in your Tax Settings. Leave it on to include Prepayments. Otherwise, turn it off to not include Prepayments.
- Compilation Option - Select what information you want to compile.
- Do NOT Change Existing 1099's - Select this option to update the owner and vendor minimum only. This will not update the taxable amounts and owner/vendor address and tax id information.
- Update Amounts ONLY - Select this option to update both the owner/vendor minimums and taxable amounts. This will not update the owner/vendor address and tax ID information.
- Update All Information - Select this option to update Owner/Vendor minimums, taxable amounts and address / tax ID information.
If this is your first time on this page, select Update All Information.
- Click Compile once you have set all parameters.
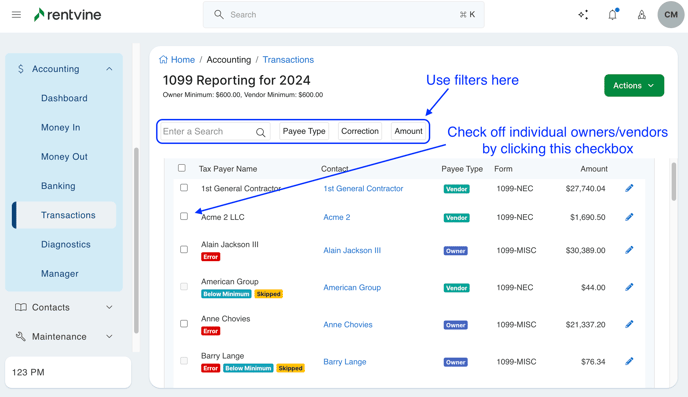
Step 5: Review and Check for Errors
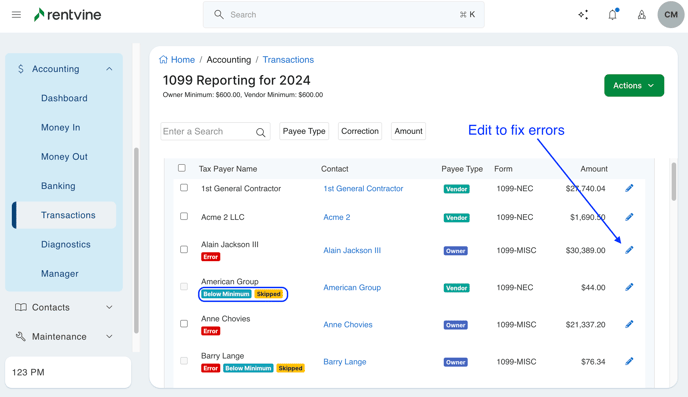
After compilation is complete, review the list for any errors. This allows you to find which owners or vendors may not have the proper information needed to generate the 1099. You can also print a report before you generate the 1099's
- There are three possible tags that may be associated with an owner or vendor on the list
-
Below Minimum - The owner or vendor did not meet the minimum amount specified.
-
Skipped - The owner or vendor will not be included when you generate the 1099's. Click on the pencil icon at the end of the row if you do not want to skip this owner or vendor. A pop-up will appear, uncheck "isSkipped" at the bottom of the page, and click Save.
- Error - The owner or vendor is either missing address/tax id information or has the wrong tax ID format. This has to be corrected in order to generate their 1099. Click on the pencil icon at the end of the row. A pop-up window will appear, letting you know what the errors are, allowing you to fix the error(s).
-
If the owner or vendor does not have any tags associated with it then they are ready to have their 1099 generated.
You can also click on the pencil icon to see the details of how the amount was calculated (Taxable Income + Prepayment (if applicable) + Adjustments)
- Optionally, you can print a 1099 report for your review. Click on the green Actions button on the top right of the page and select Print Report. This will show you the Tax ID, Taxable Income, Prepayment (if applicable), Adjustments, and Total Reporting.
- Once you have corrected any errors, you are now ready to generate the 1099's
Step 6: Generate 1099's
- Select the owner or vendors that you want to generate 1099's for. You can filter the list using the search and filter options.
- Click on the green Actions button on the top right. You will have several options to choose from. Select what is applicable.

-
- Print Report - Generates a 1099 report in PDF format
- Export to Excel - Downloads a 1099 report in Excel format
- Print 1099 Copies - Generates a PDF of 1099's that you can print on paper. you will be given the option to only show the last 4 numbers of the tax ID or not just before generation.
- Download FIRE file - Generates a FIRE file that can be used to upload to the IRS. It will download to your device.
If the Fire File does not download, be sure that there are no errors on any of the payees that are selected. Either deselect or correct errors on the payees. Try the download again.
-
- Download IRIS File(s)- this will download an IRIS file for you to then upload to the IRS website.
- Print Laser 1099 MISC - Generates a PDF laser 1099 MISC that you can print on 1099 MISC laser forms.
- Print Laser 1099 NEC - Generates a PDF laser 1099 NEC that you can print on 1099 NEC laser forms.
If when printing Laser 1099's the print out is not lining up correctly on the forms, please check the settings on your printer. It may be the scaling size or the paper size. Be sure that it is set to "Actual Size" or something similar.
-
- Publish - Generates a PDF 1099 copy that is published to the owner or vendor portal.
- Publish Batches - Takes you to a page where you can view the 1099s that have been published to the owner or vendor portals
- Recompile - Takes you back to the compile page.