Has an owner contact already been created in the system, but there is information that needs to be changed or added? Following this article will help you get that information changed or added.
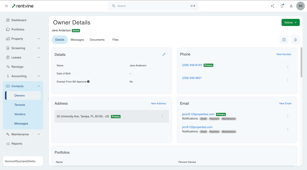
How do I find the Owner's Information?

The owner's information can be found in a few different ways. Below are four examples of how to find owner contact information.
- Use the global search to locate the owner. This is at the top of EVERY page in Rentvine. This is an intuitive search. The more you type, the fewer results you will see. There will be a colored object type next to each item returned in the search to identify what that object is. ie: Owner Contact
- Portfolios are essentially ownership groups. Each portfolio will have one or more owners. Go to the correct Portfolio and click on the owner name under Owner Contacts.
- Each property will have an owner contact associated with it. In Property Details, you will see a "Portfolio Details" card with Current Portfolio and Owners. Click on the owner's name to see the owner information.
- Contacts is essentially your online rolodex. Under the main contacts section click on owners and click on the owner name in the list or search contacts for the owner.
Jump to a Section:
- Name
- Phone
- Address
- Tax Information
- Payment Information
- Tax Adjustments
- Custom Fields
- Portal Access & Invitations
- Tags
How To Edit The Owner Name
To edit the Owners name click on the Pencil Like Icon button at the top right of the Details. This will pop out a window allowing you to edit the owner's name.
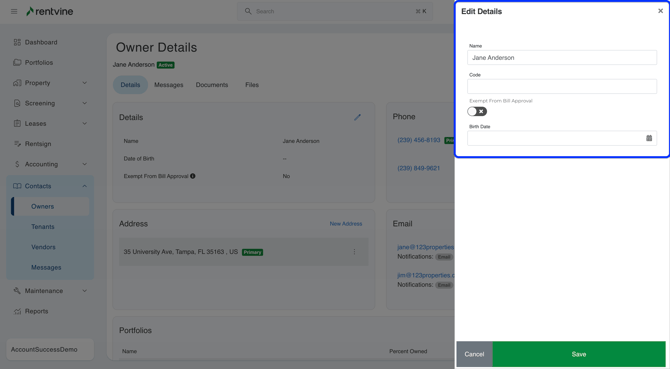
Enter the correct owner name and hit save.
Owner Contact Email Address & Notifications
 An owner contact can have one or many email addresses. Each email address can also be associated with various types of notifications. This will allow you to send different notifications to different email addresses if needed.
The selected notifications for that email address will be shown below in BLUE.
Notification Options for each email address:
- Send Email Notifications Yes or No
- Send Payment Notifications Yes or No
- Send Maintenance Notifications Yes or No

IF you have a larger ownership group as one owner contact please be sure to have the correct notifications going to the correct email addresses.
Edit an existing email address:
In the EMAIL section, click the ellipsis button on the right of the email address that you wish to update and select Edit
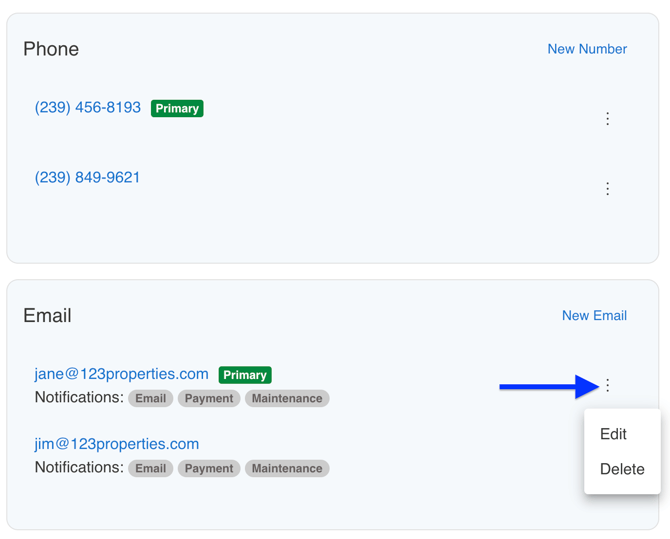
The edit screen will allow you to modify the email address and the notifications settings. You will see below that this email address will receive general notifications you wish to share with the owner but no payment or maintenance notifications.
To Add a new Email Address to an Existing Owner Contact:
Each owner contact or ownership group can have one or many email addresses. If you need to add another email address click on New Email.
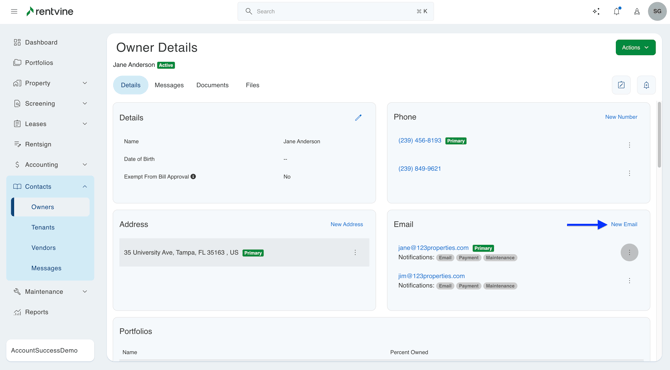
Enter the new email address. Select the correct options for notifications for this email address. More than one address can receive the same notifications. Don't forget to click Save. 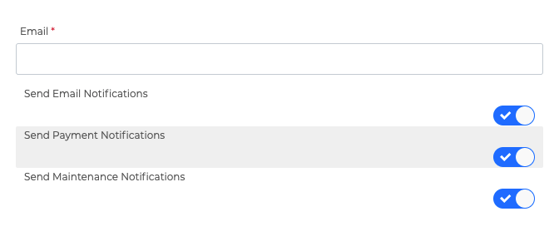
Owner Contact Phone Number
Just like emails, owner contacts can have one or many phone numbers. Each phone number can have a Type and a Description.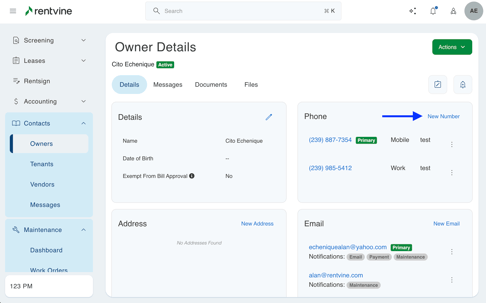
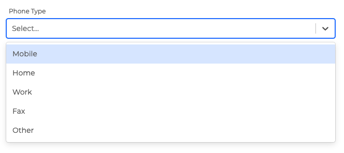
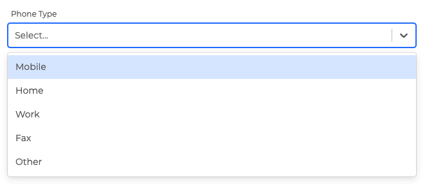
Phone Type Options:
- Mobile
- Home
- Work
- Fax
- Other
Update an Existing Owner Contact Phone Number
Click on the ellipse (...) next to the phone number that you wish to update. Click Edit.
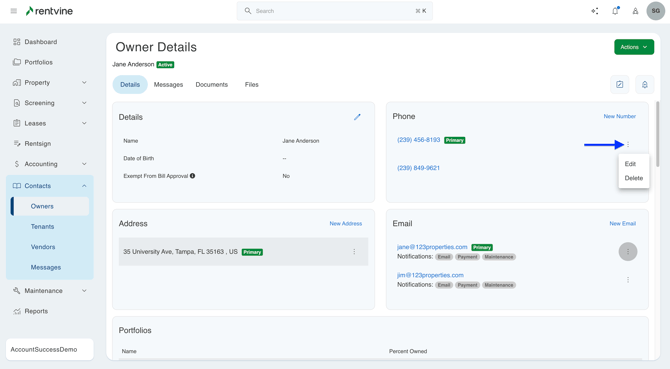
Update the phone number, select a phone type, and enter a description as necessary. Click Save.

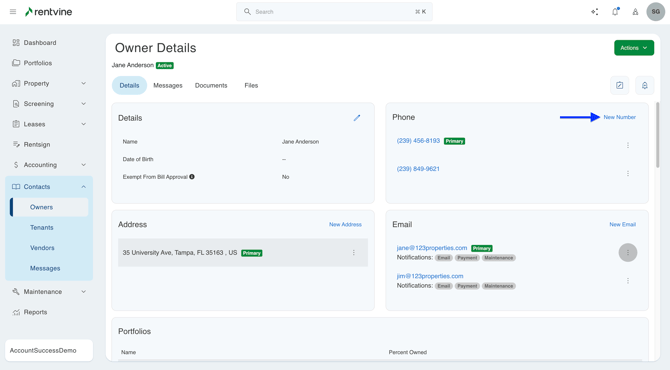
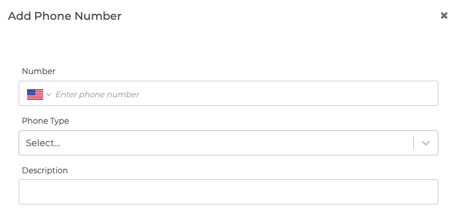
To Add a New Owner Contact Phone Number:
Locate the owner's contact. Click on New Number. Enter the number including area code. Select a phone type. Add a phone description. These are optional settings but are recommended.
Phone Type Options:
- Mobile
- Home
- Work
- Fax
- Other
Enter the phone number, select a phone type and enter a description as necessary. Click Save.
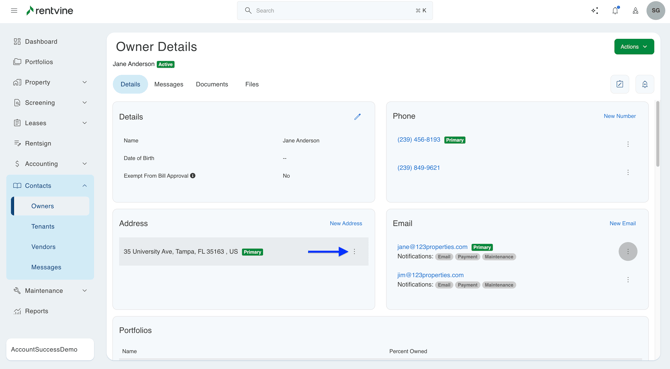
Owner Contact Address
 Owner contacts can have one or many addresses. The first owner contact address in the list will be the DEFAULT address used for this owner contact. If you are utilizing the Rentvine Remote Check service, the default address will be where the check payments are sent.
To Edit an Existing Address:
In the Address section, click the ellipsis button on the right of the corresponding address and select Edit.
Update the existing Address and click Save.

To Add a New Address:
If your owner contact has more than one address you can add another. In the Address section, click the New Address button. The first address in the list will be the default address used for Rentvine's Remote Check service.
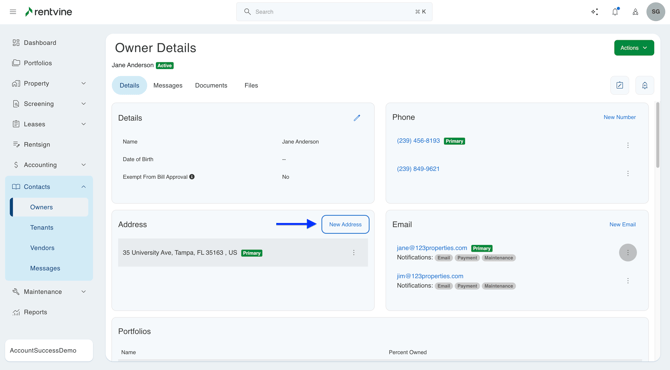
Enter the New Address and click the Save button.

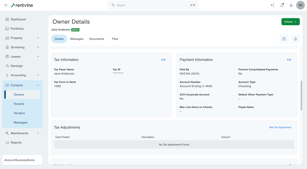
Owner Tax Information

Owner tax information is required for end-of-year 1099 tax filing.
Required information:
- Payee Name
- Tax ID or Social Security Number
- Tax form selection
Tax Form Options:
- None - if selected, a 1099 will not be generated
- 1099 - if selected, a 1099 will be generated
Edit Existing Owner Contact Tax Information
Each owner contact will only have one set of tax information. To update the existing information click on the Edit button.
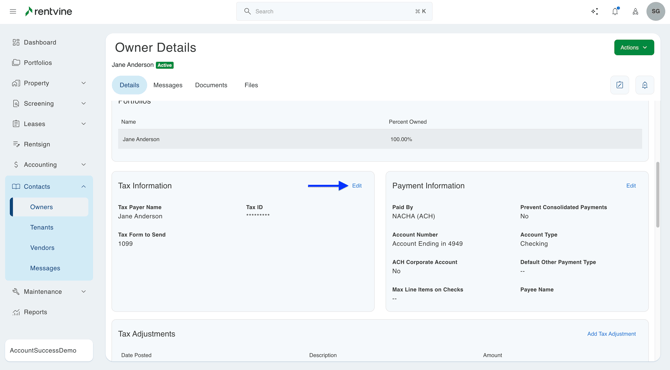
Update the Payee Name, Tax ID, or Social Security number, and Select the tax form that will be used for this owner contact.

 Owner Payment Information
Owner contacts will have only one default payment method.
Payment Options:
- Check - Option to print a check to your printer or send a check using our Remote Check Printing Service *Additional Cost per check when using Remote Check Printing Service*
- eCheck (ACH) - Payments are automatically processed through our electronic payment processing service.
- NACHA (ACH) - Produces a NACHA file that you can download and then upload to your bank to process the payment.
Prevent Consolidated Payments
Each owner contact also allows you to enable to disable a setting to prevent consolidated payments.
ie: If prevent consolidated payments is turned on, owners will see multiple payouts instead of just one. For example say you are paying 5 bills and the same owner is the payee on each of those bills ($100 each) and you choose to pay all the those bills at the same time it will create 5 payouts to the owner of $100 each (5 separate checks or 5 separate ECheck/ACH transactions). If prevent consolidated payments was turned off it would have created just one $500 payout to the owner.
If an owner is part of several portfolios, even with consolidated payments enabled, they will have multiple payments, one from each portfolio that is applicable.
How To Edit Payment Information
To edit payment information click on the Edit button.
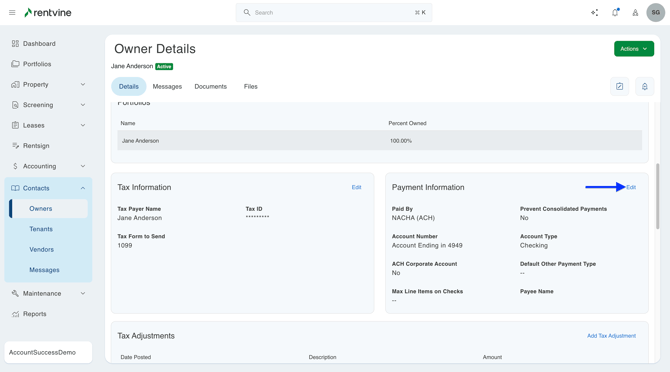
From the dropdown option, select the payment Information

For Check Option:
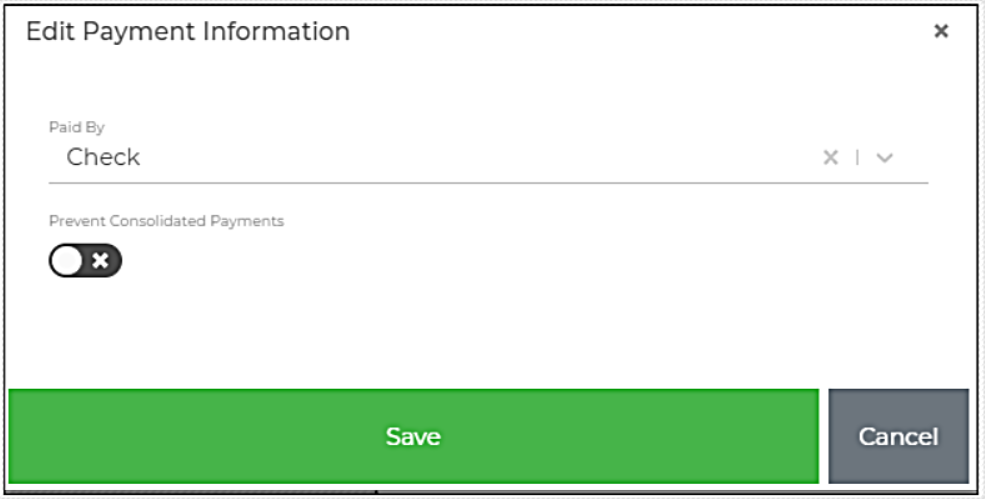
After you pay Owners you will have the option to print a check. If you have the Remote Check processing service enabled you will have the option the print a remote check (the check will be printed and physically mailed to the default owner address)
Click the toggle button if you wish to Prevent Consolidated Payments. If selected it will be a blue checkmark. Click the Save Button to save your changes.no worries
**Consolidate Payments example: If prevent consolidated payments is turned on, owners will see multiple payouts instead of just one. For example say you are paying 5 bills and the same owner is the payee on each of those bills ($100 each) and you choose to pay all the those bills at the same time it will create 5 payouts to the owner of $100 each (5 separate checks or 5 separate ECheck/ACH transactions). If prevent consolidated payments was turned off it would have created just one $500 payout to the owner.
For eCheck (ACH) Option:
eCheck is Rentvine's electronic processing service. The payment is delivered via ACH.
- Select ECheck from the drop-down list. Click the toggle button if you wish to Prevent Consolidated Payments. If selected this option will show as a blue checkmark. **see the example above
- Enter the Account Number
- Enter the Routing Number (9 characters)
- Select the Account Type
- Click the Save Button
For NACHA (ACH) Option:
Select NACHA (this is ACH) from the drop-down list. A NACHA file is a set of instructions that triggers a batch of ACH payments as soon as it is uploaded into a bank portal. NACHA file format is the protocol for structuring those instructions in a way that successfully initiates the payments. Rentvine will provide a perfectly formatted NACHA file for upload to your bank at each month's closeout.
Click the toggle button if you wish to Prevent Consolidated Payments. This option when selected will show as a blue checkmark.
- Enter the Account Number
- Enter the Routing Number
- Select the Account Type (Checking or Savings)
- Click the toggle button if you would like to use ACH Corporate Account
- Click the Save button
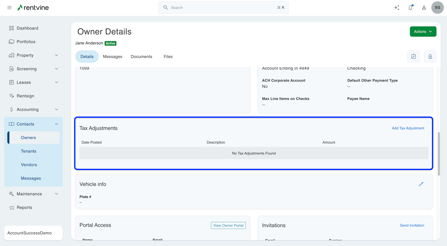
Tax Adjustments
Edit Tax Adjustments
In the Tax Adjustment section, click the ellipsis button on the right and select Edit
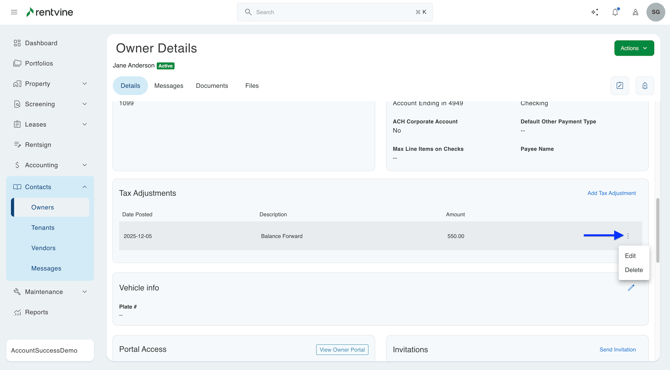

Every tax adjustment will have an amount, the date of the adjustment, and a description.
Enter the Amount
Enter Date
Enter Description
Click the Save button to save your changes.
Add a New Tax Adjustment
![]() An owner contact can have as many tax adjustments as needed. To add a new adjustment click on the Add Tax Adjustment button. Enter the amount, the date of the adjustment, and the description. Be clear on your description so when it is tax time you will be able to clearly remember why that adjustment was made. Click save to add your new adjustment.
An owner contact can have as many tax adjustments as needed. To add a new adjustment click on the Add Tax Adjustment button. Enter the amount, the date of the adjustment, and the description. Be clear on your description so when it is tax time you will be able to clearly remember why that adjustment was made. Click save to add your new adjustment.
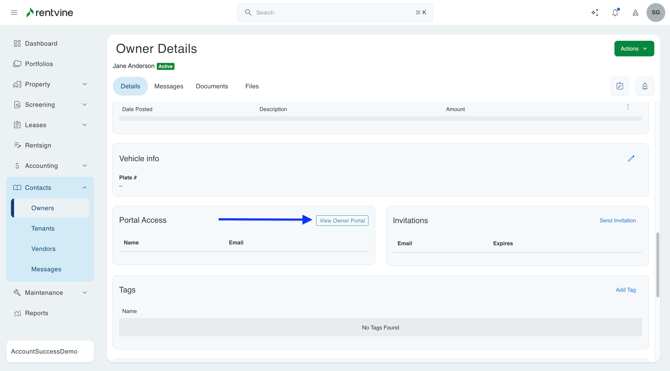
Owner Portal Access

Owner portals are a critical feature/benefit that you can offer to your clients. To see an owner portal for a specific owner you can impersonate them.
How To Impersonate an Owner
If an owner's name appears under portal access this means that the owner has accepted access to the portal. You can now impersonate the owner to see the portal exactly as they see it. You will not be able to make changes through the portal to the owner's information. This is a view-only impersonation.
Click View Owner Portal to open the portal for this specific owner.
Invite an Owner to their Owner Portal
If you do not see an owner's name listed under portal access it means that the owner has not accepted access to their portal. To invite the owner to accept, in the Invitations section, click the Send Invitation button. 
Enter the email address of the owner that you wish to invite to the portal. By default, the primary owner's email address should populate here for you. Click invite to send the email to the owner to invite them to accept access to their portal.
If you have one owner that would like to access multiple owner portals from the same email address they must be sent an invite from each "owner contact" and accept each from that same email address.

Expired Invitations
Invitations expire after 3 days if not accepted or if a new portal invitation is sent to the owner. If the owner has not accepted the invite after 3 days, the invite will need to be resent to that owner contact.
Owner Contact Tags

A tag is a keyword or term assigned to a piece of information. Most object types such as owners within Rentvine allow for tags. This kind of metadata helps describe an item and allows it to be found again by browsing or searching. Tags can be filtered and reported on but are much more limited than custom fields.
*note: the tags pet and pets are two different tags.
Add a Tag
Click Add Tag. Select the tag from the drop-down list. This list is generated from your global settings. In an attempt to reduce user error and misspelling errors with tags, Rentvine requires tags to be created in global settings and then selected within each owner.
If you have important information to track and report from we recommend custom fields over tags.