Do you need to have one person enter bills and then another person approve those bills so they can be paid by your accountant or accounting team? This article will show you how to configure bill approval to accomplish this.
Step 1 - Enable bill approval in the global settings
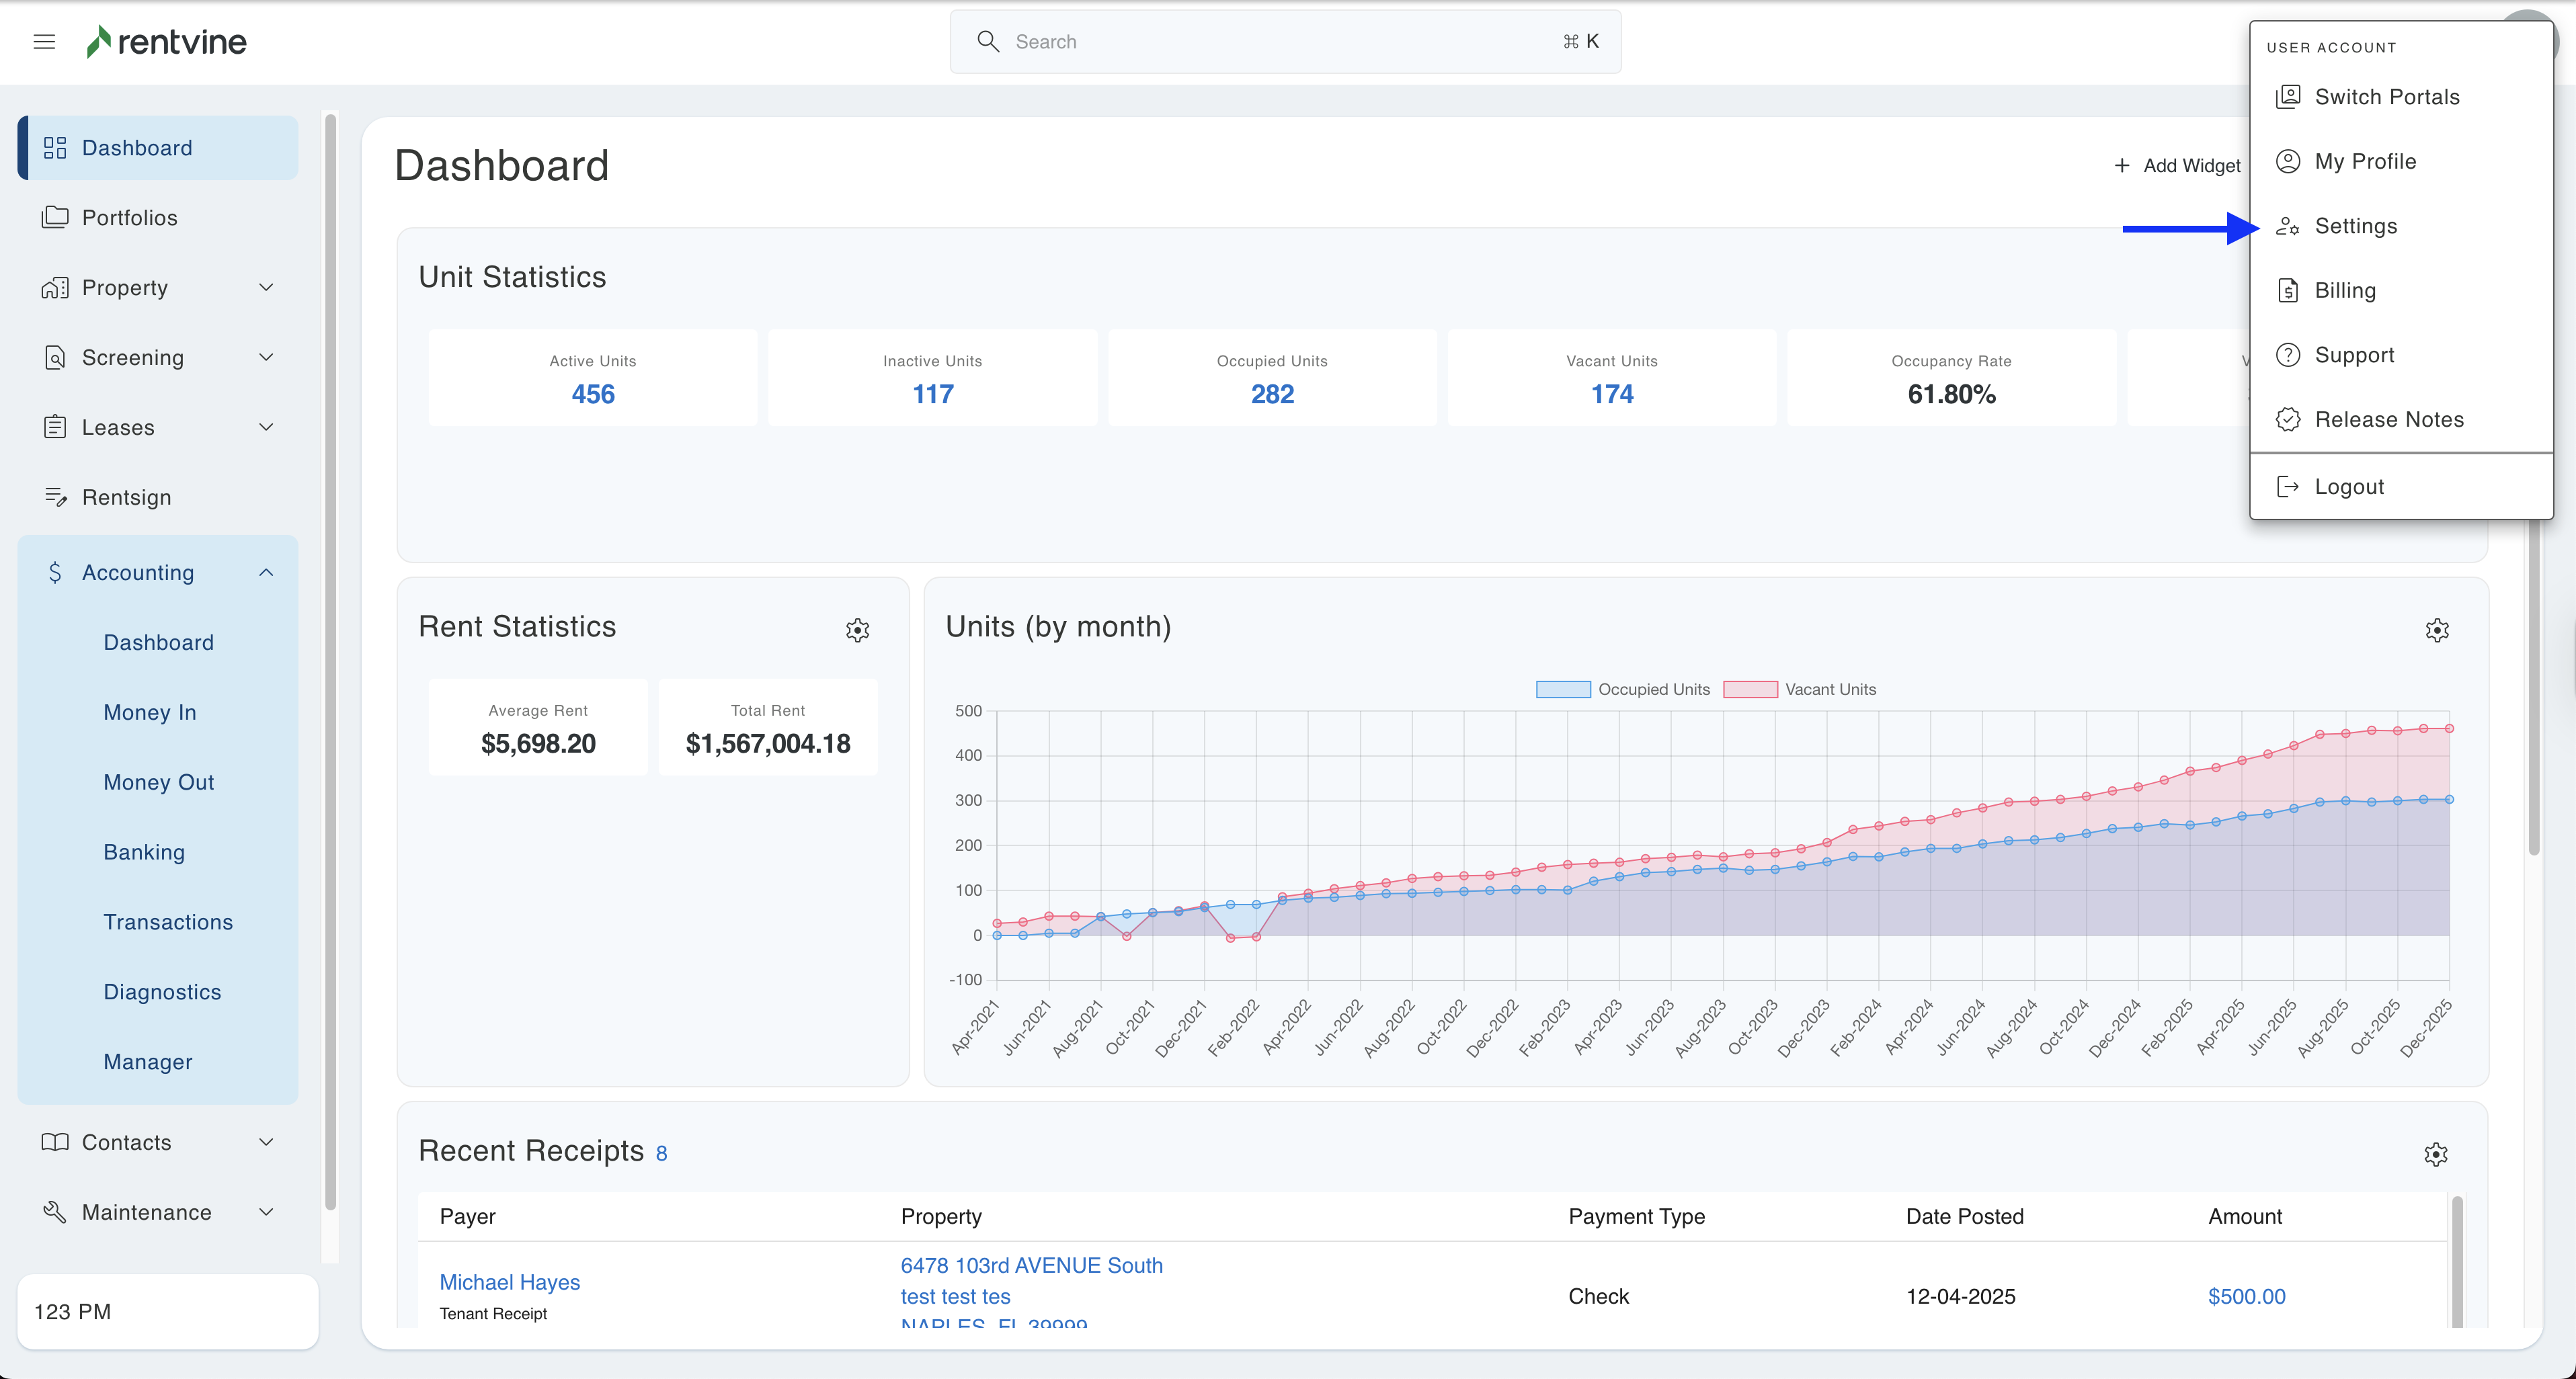
- Go to the settings page (click on your initials in the top right corner of the page and select Settings)
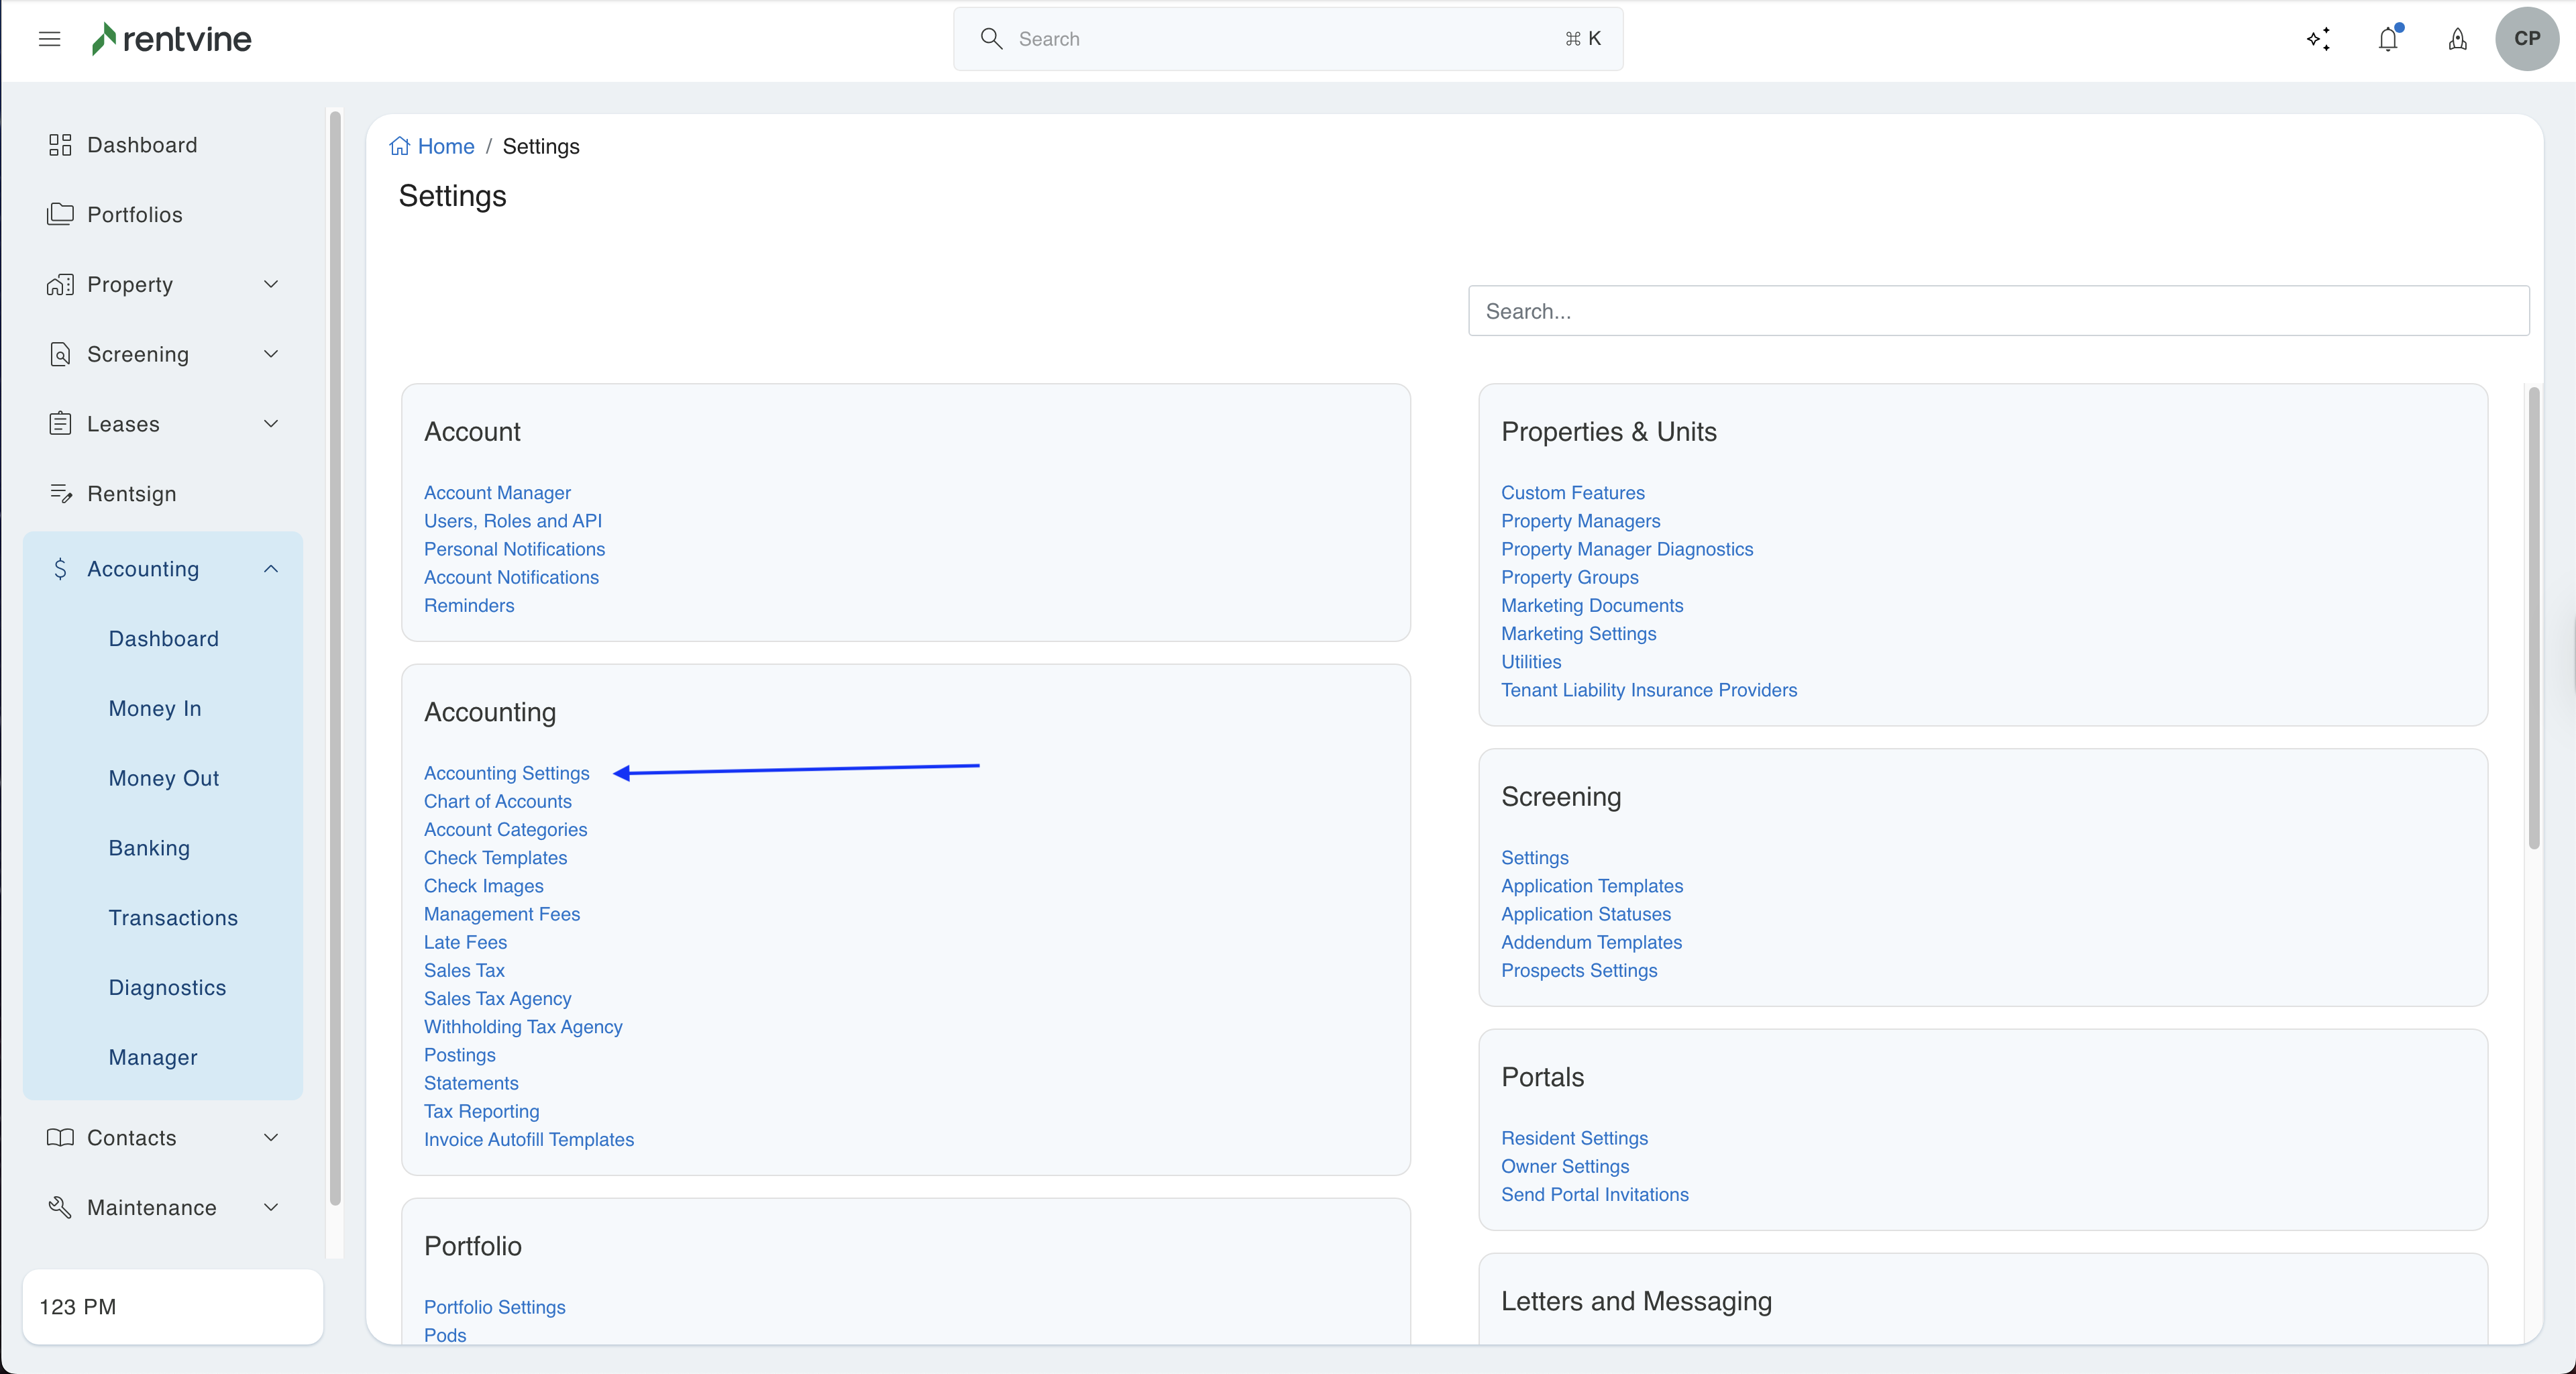
- Click on Accounting Settings from the Accounting section
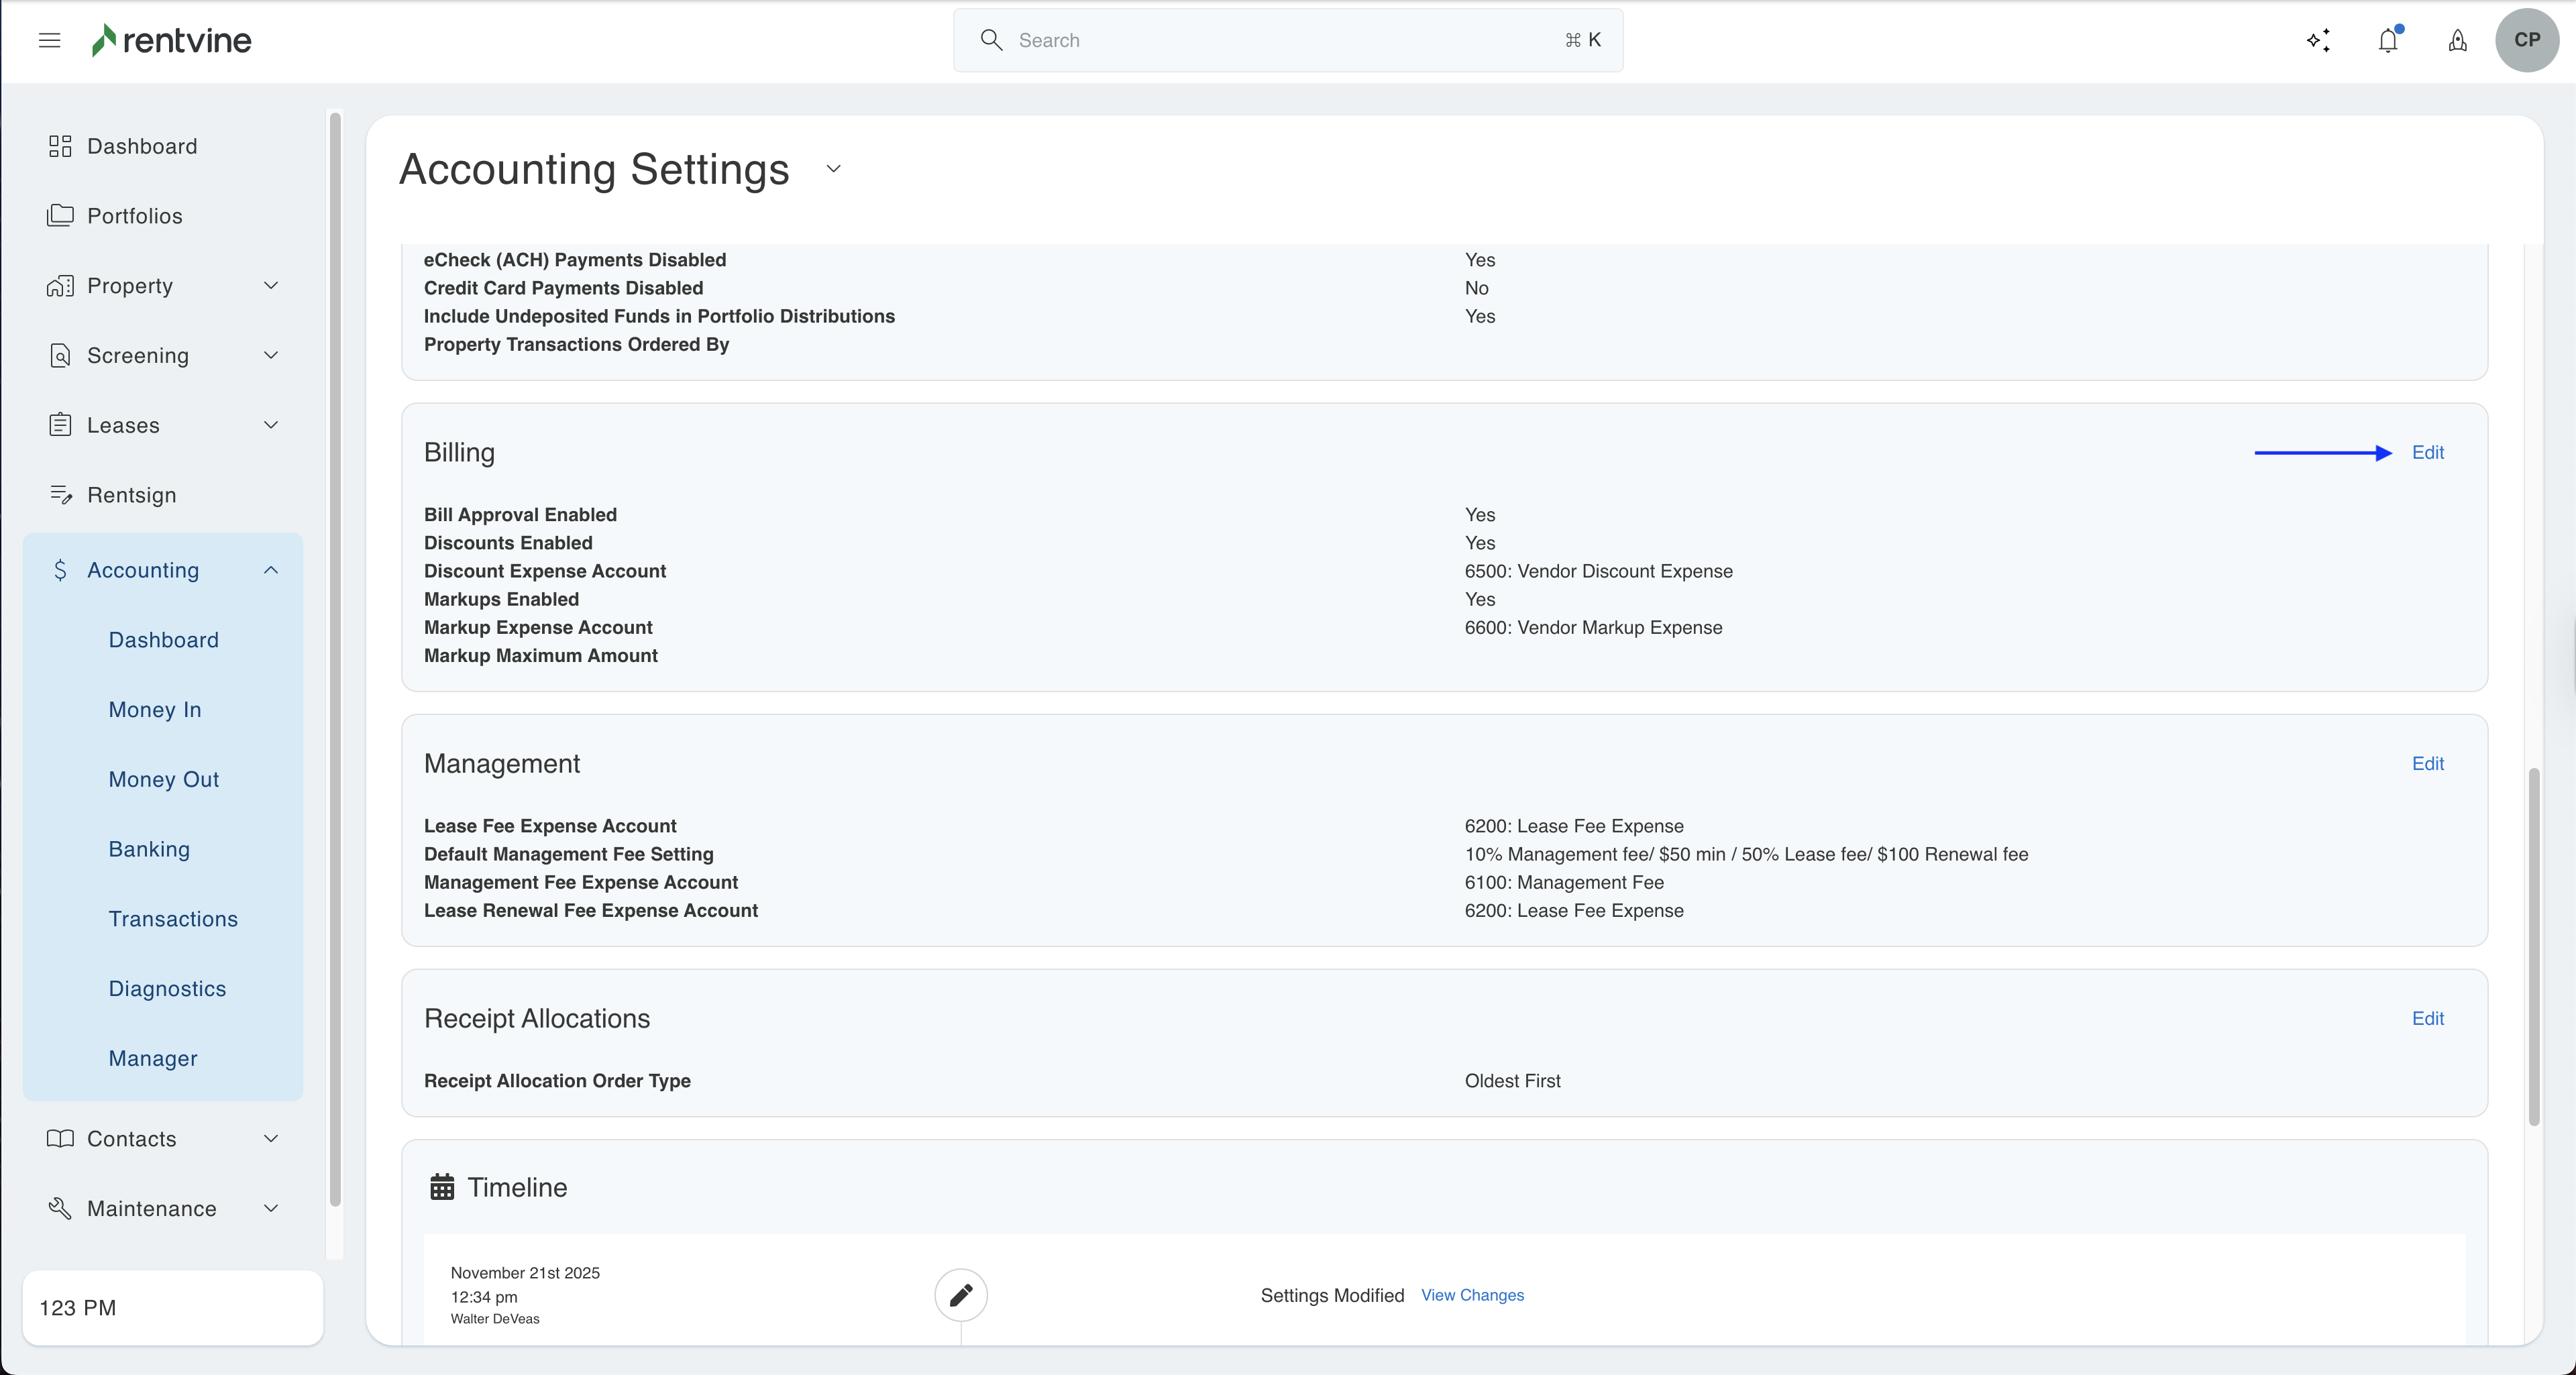
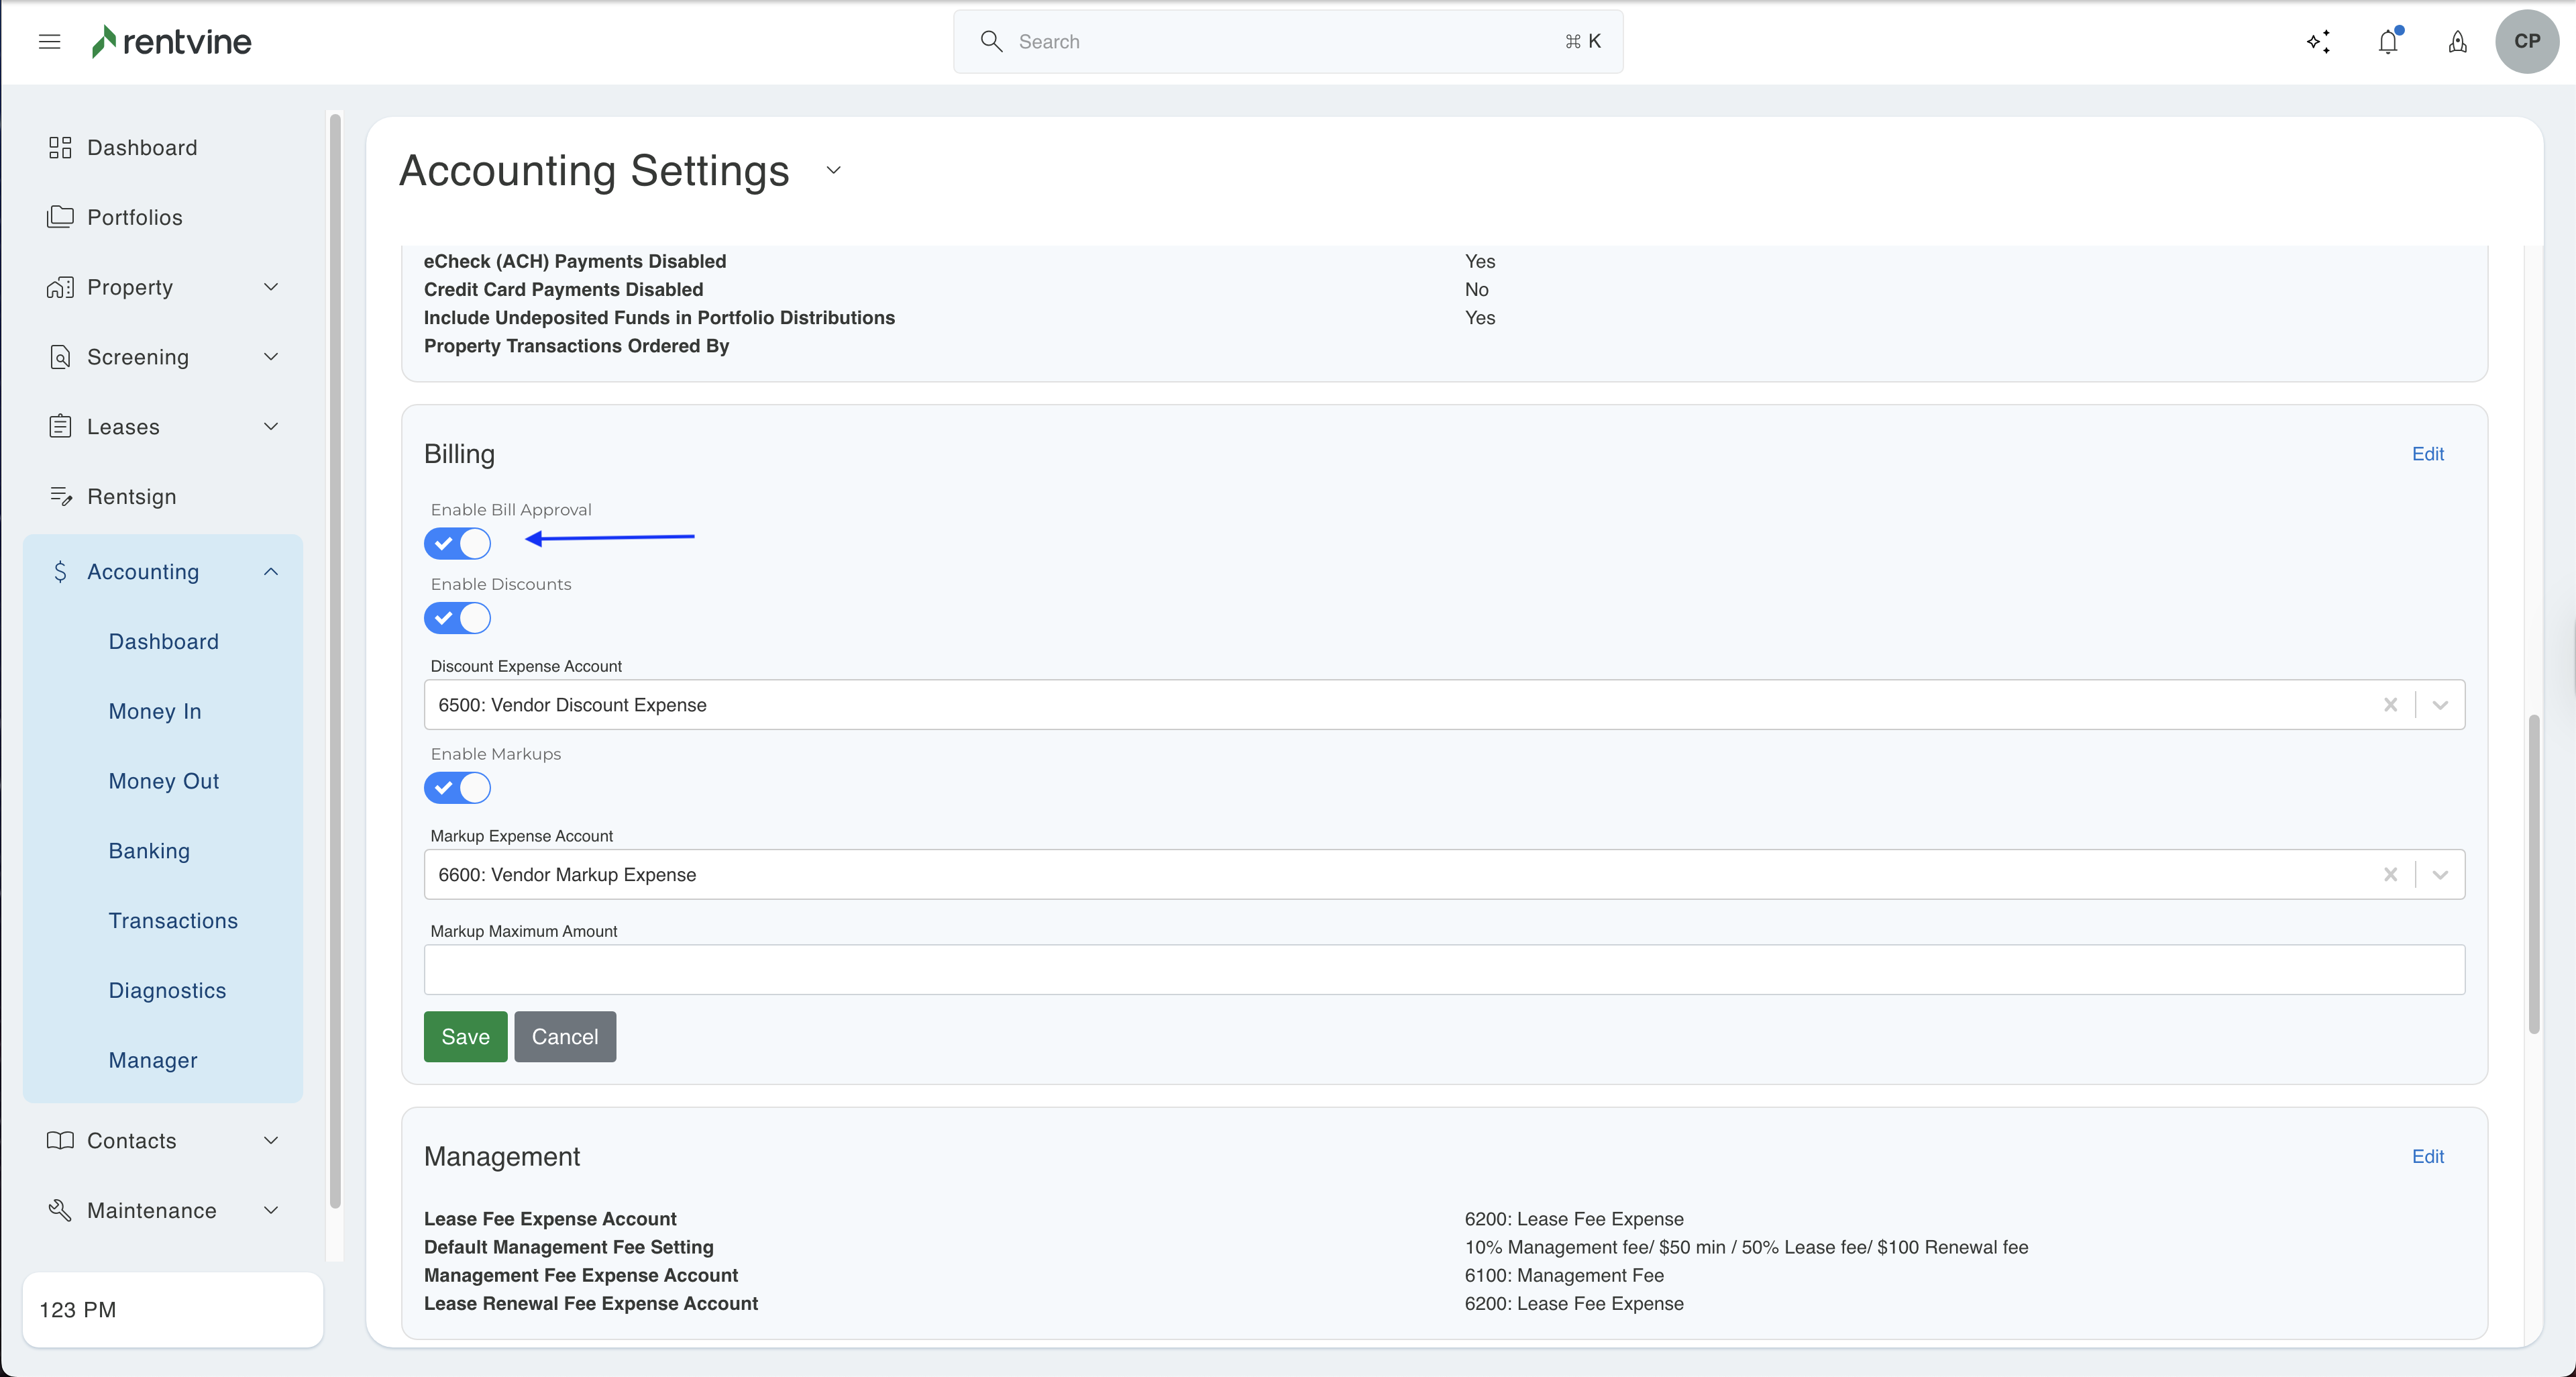
- In the Billing section, click on the Edit button and toggle on Enable Bill Approval. Click Save.
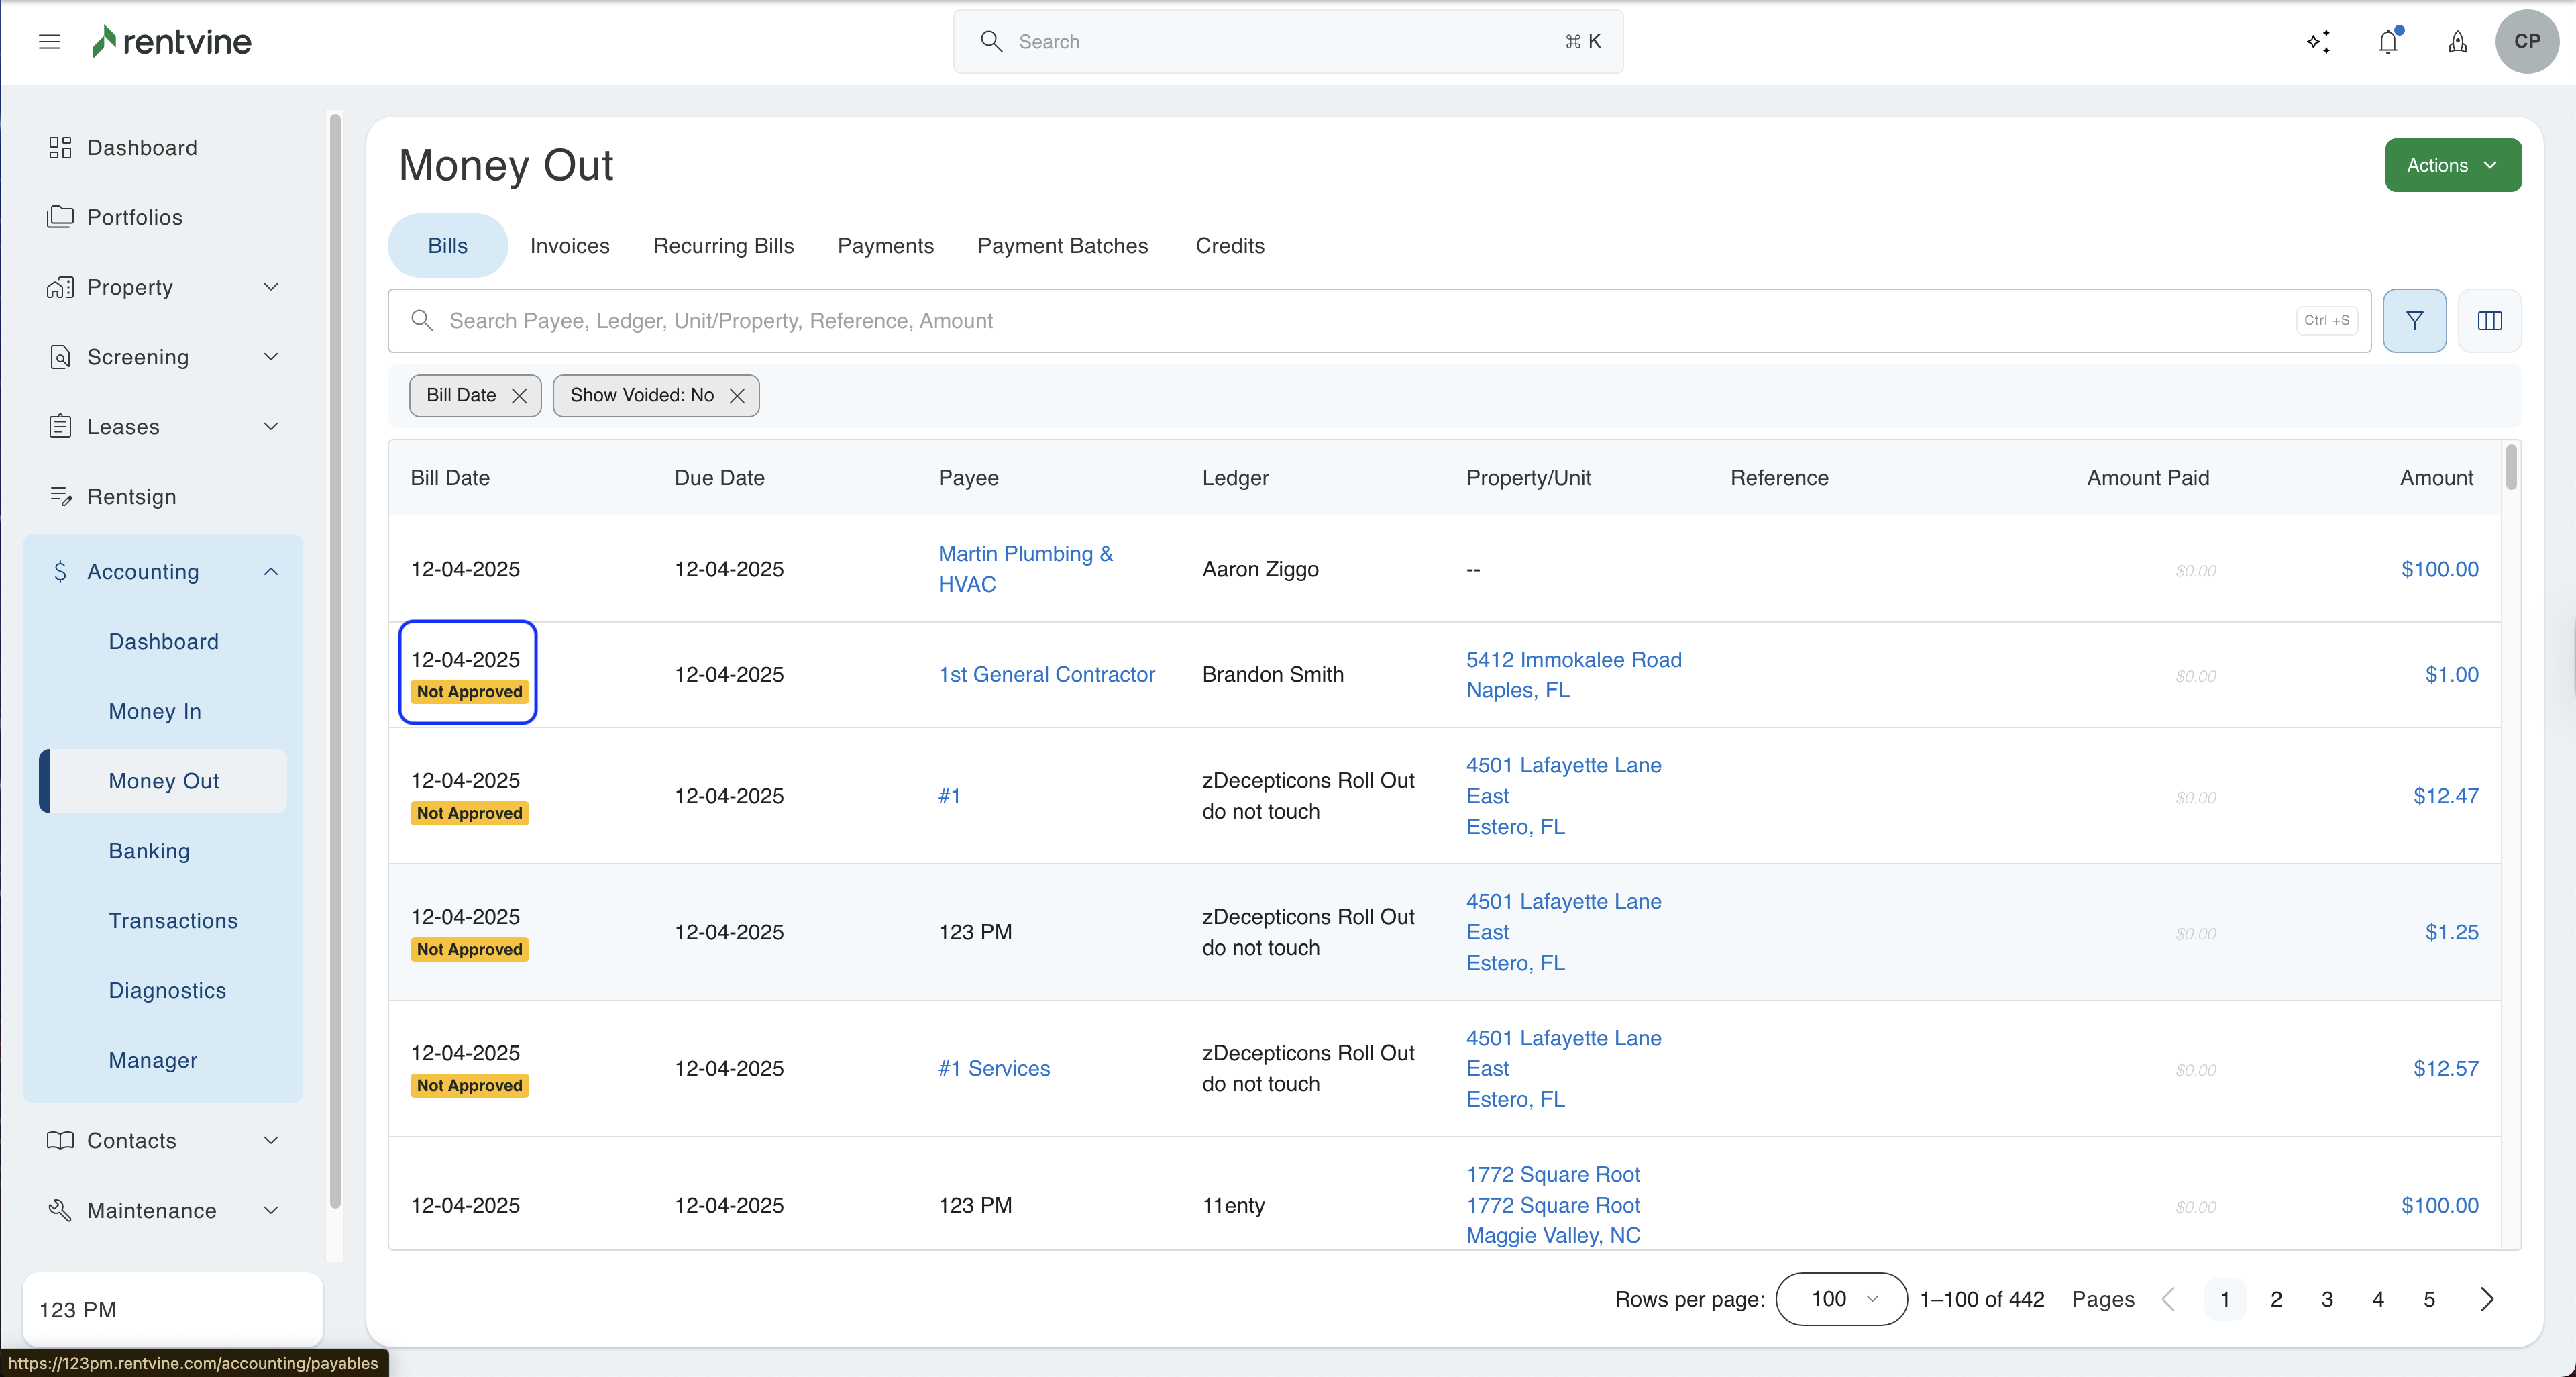
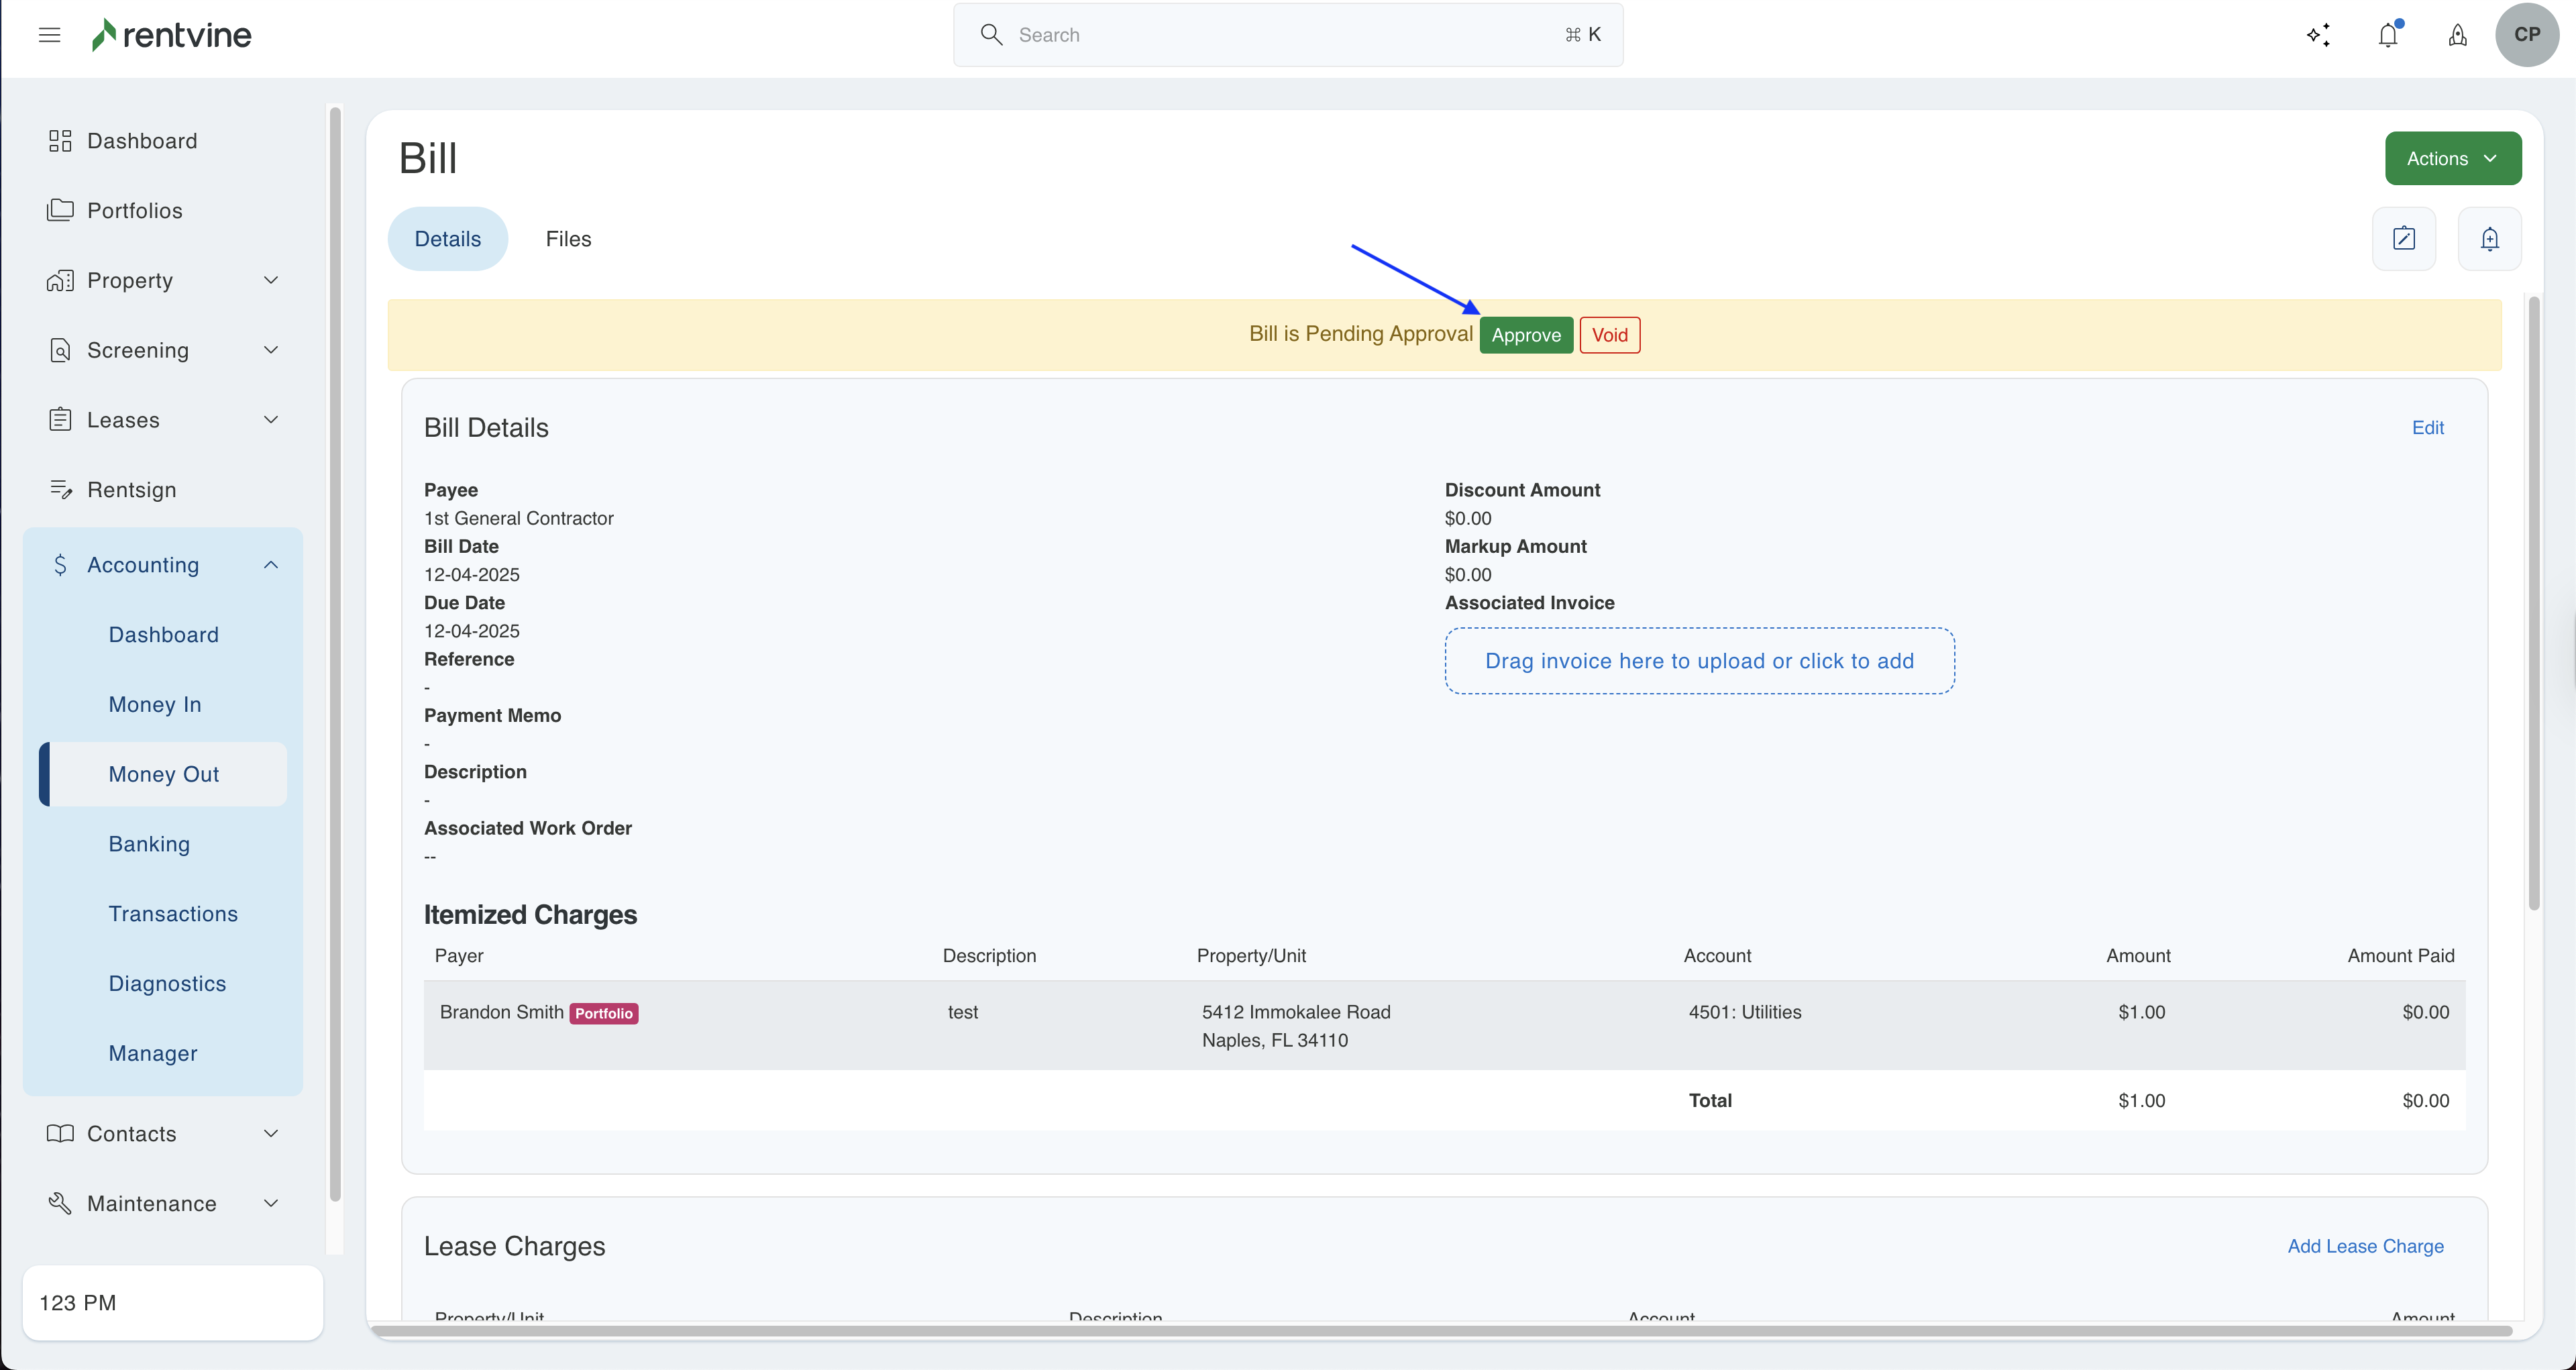
- Once this has been enabled, all new bills will require approval. Users will need the Approve Bill permission in order to approve a bill. The next step shows you how to do that. The screenshot below is an example of a bill that needs approval. Depending on the user's permission, the relevant buttons will appear: Approve or Void.
Step 2 - Set permissions
- In the global settings click on Users, Roles, and API.
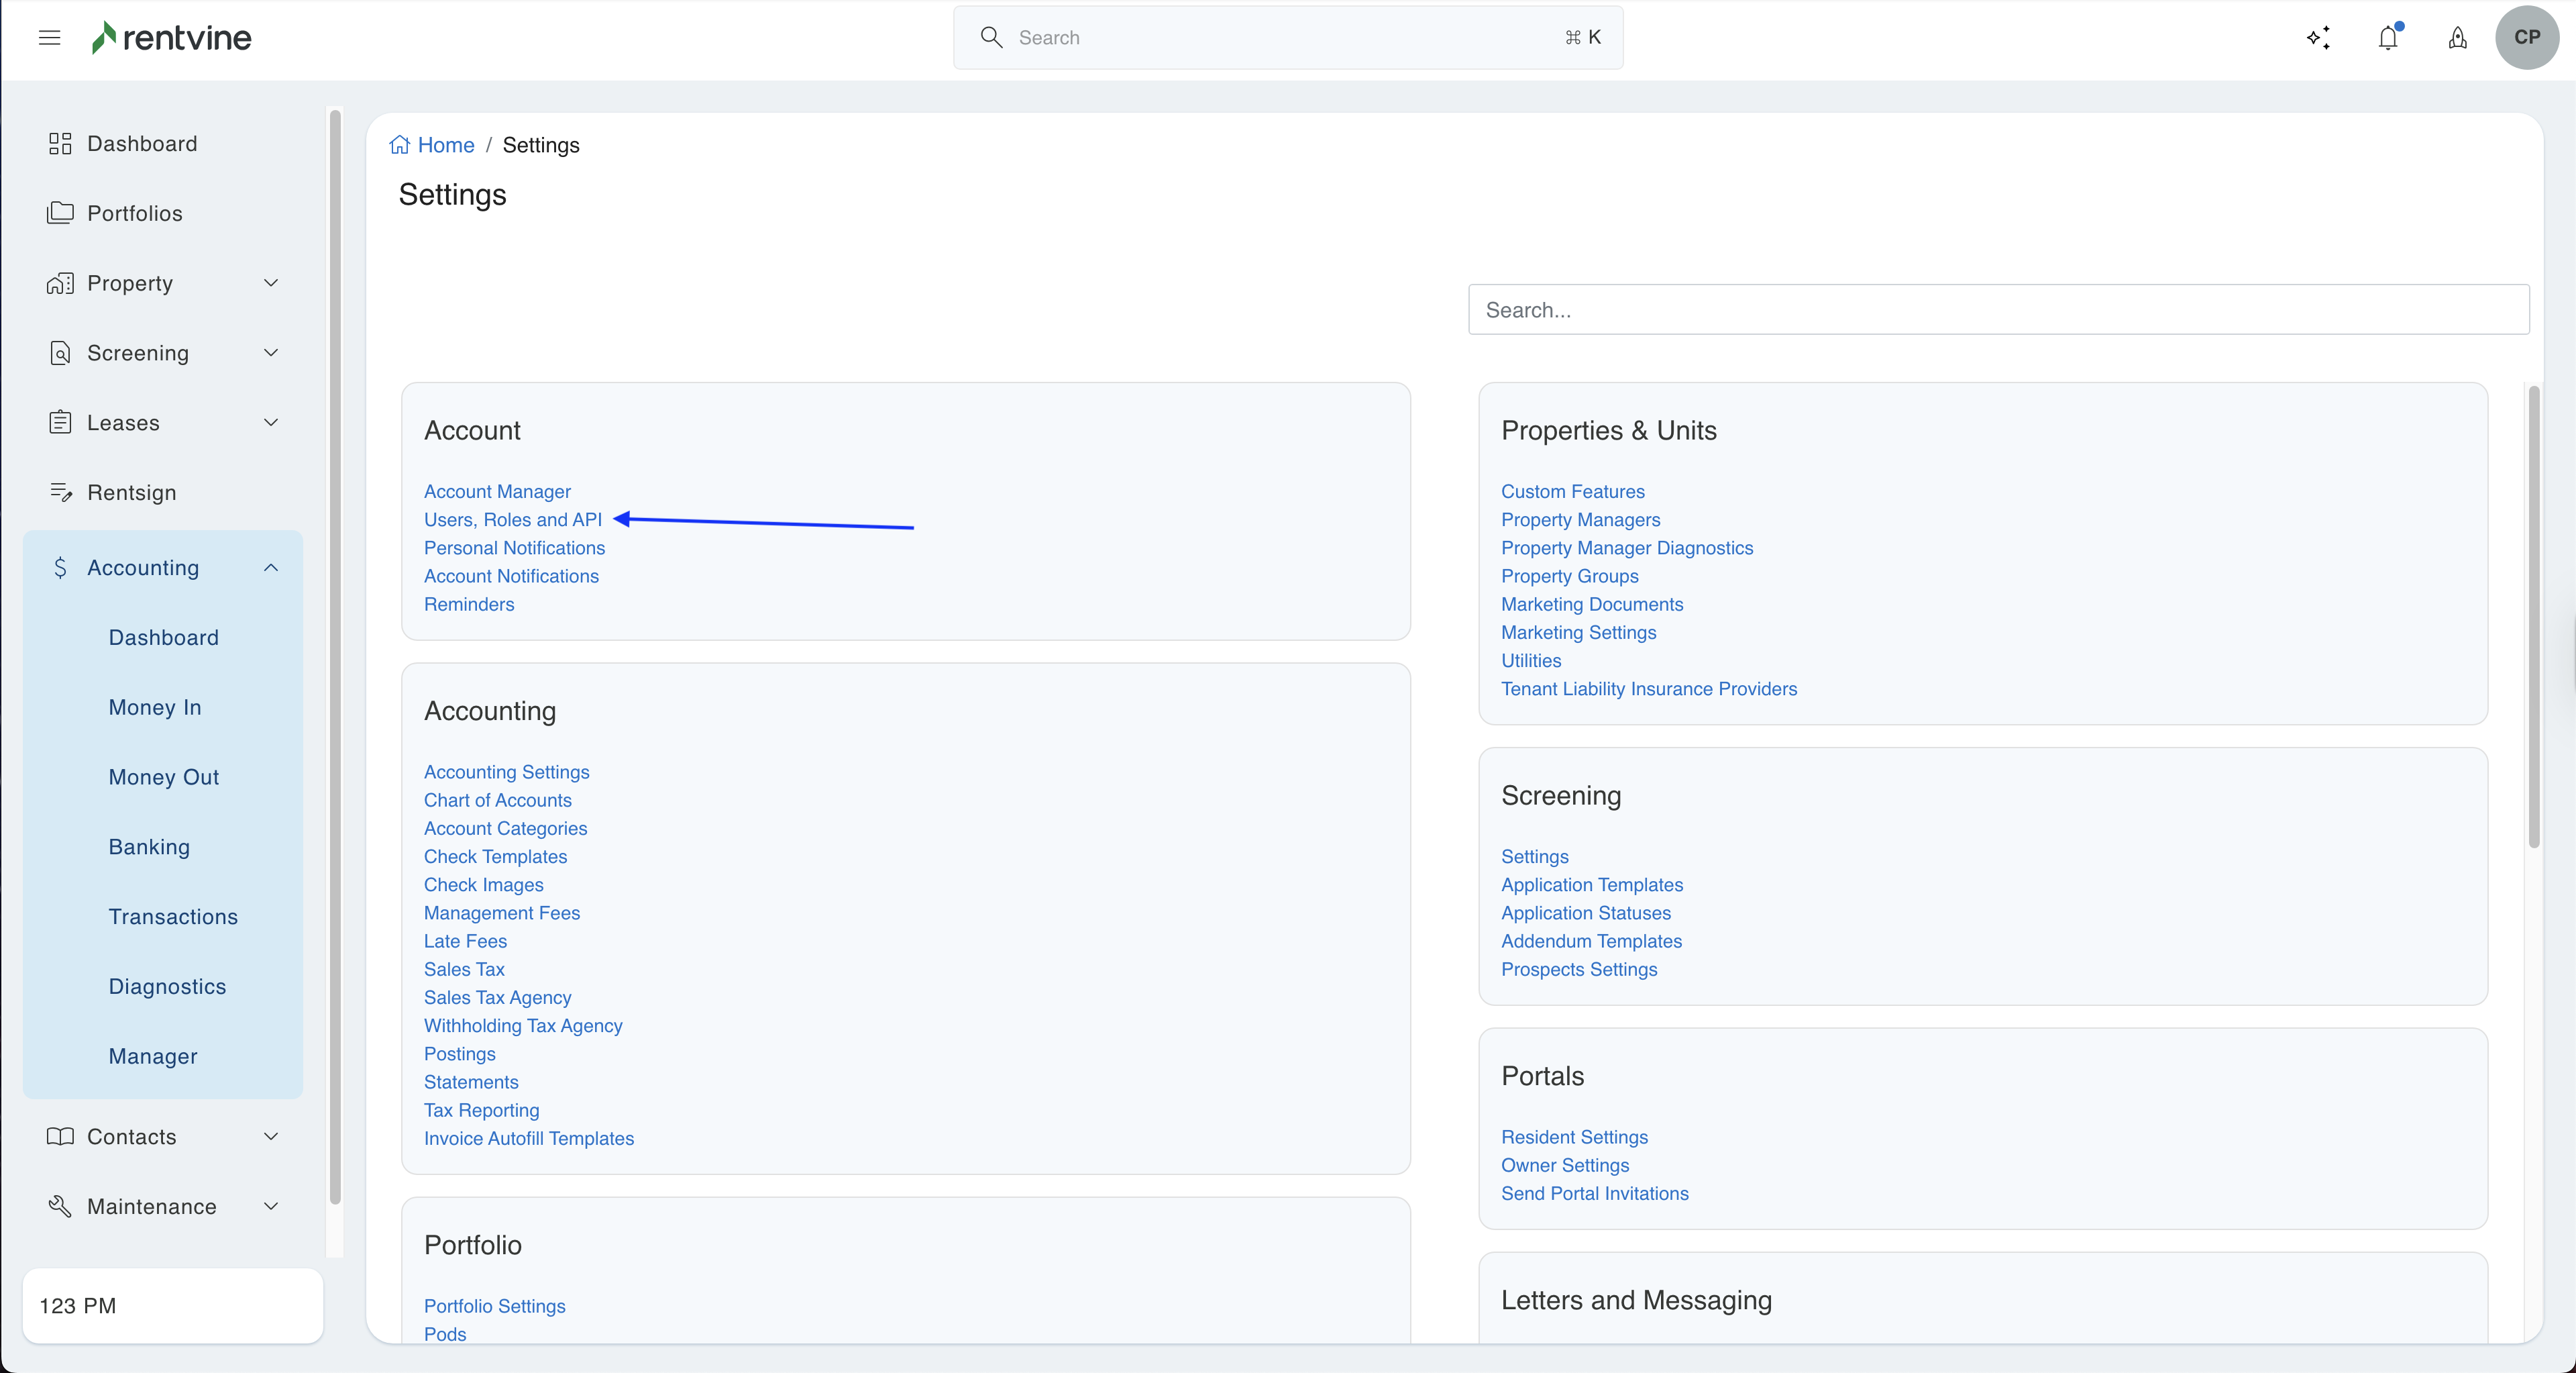
- Click on the Roles tab and select the role that you want to update or create a new role by clicking on the New Role button.
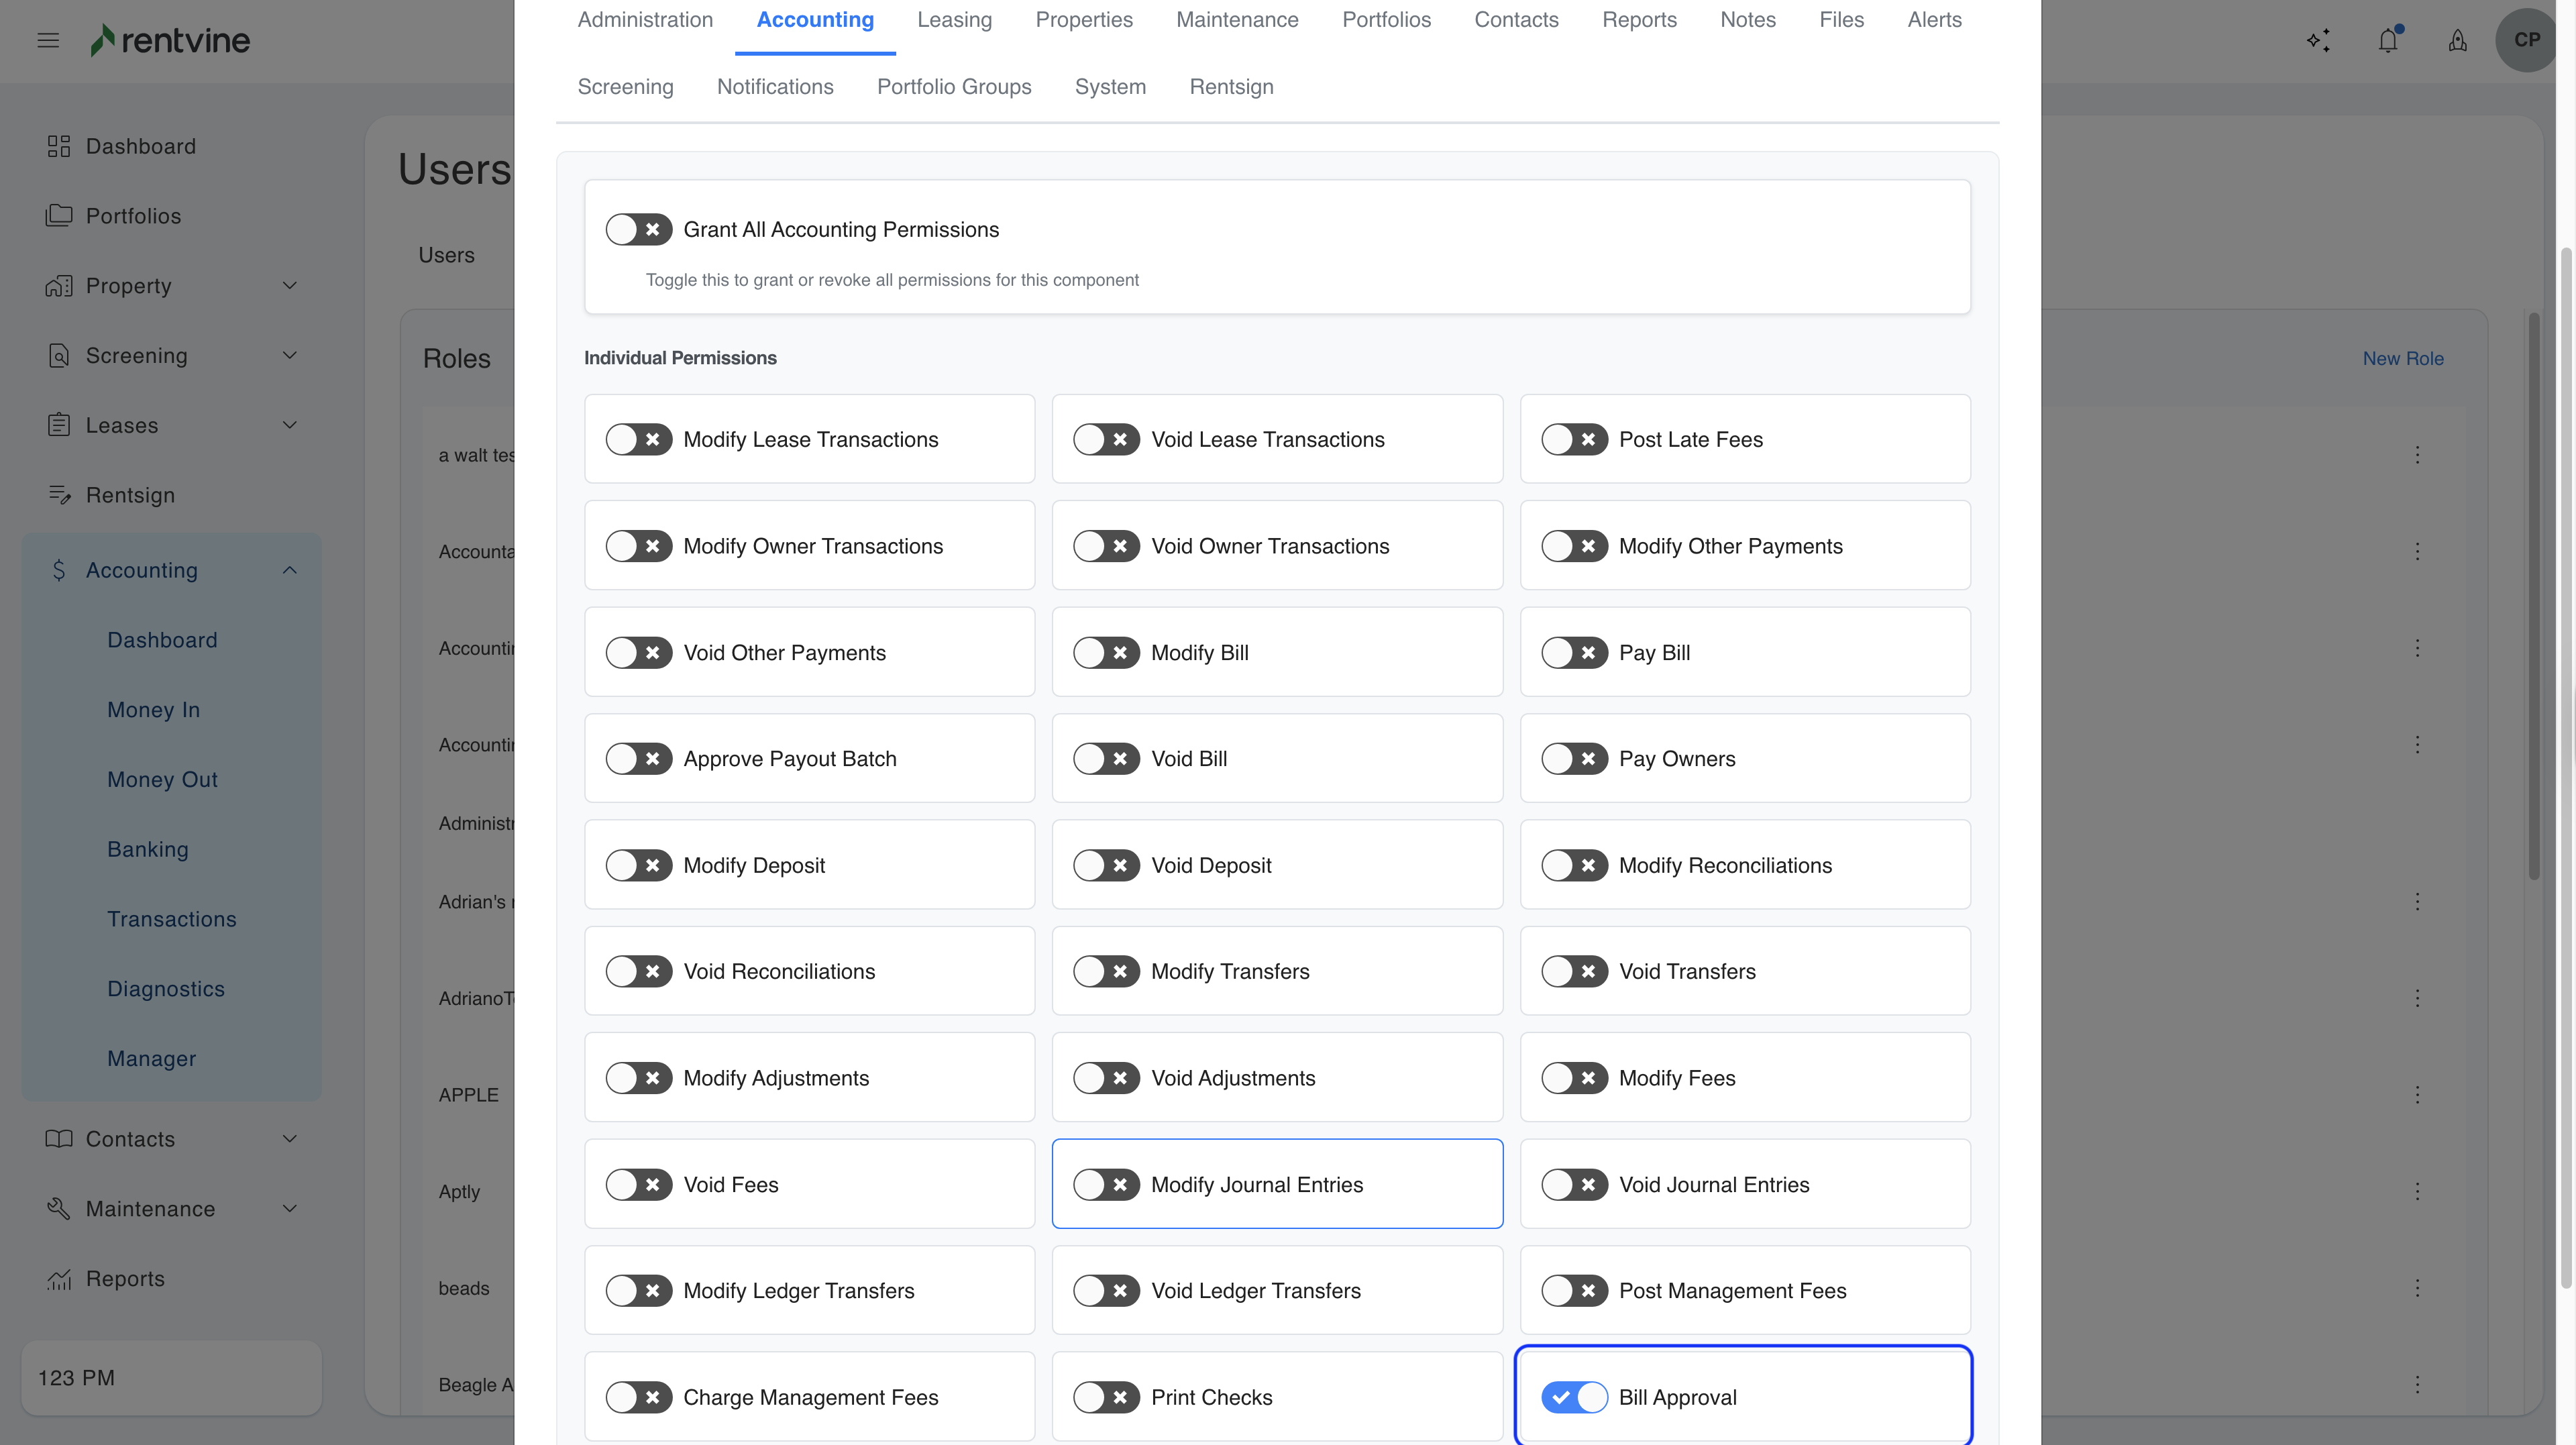
- In the Accounting section, look for the Approve Bill permission and turn it on to give the user(s) the ability to approve bills.
- In addition, you can also grant other permissions:
- Create Bill - give the user(s) the ability to create bills.
- Modify Bill - give the user(s) the ability to create and edit bills.
- Void Bill - give the user(s) the ability to delete bills.
Step 3 (optional) - Set certain vendors or chart of accounts as excluded from the bill approval process.
You may want to exclude some vendors or HOAs from the bill approval process. You can also exclude certain chart of accounts from the bill approval process as well. Those bills that have an excluded vendor and a chart of account will not require approval.
In order for a bill to be excluded from the bill approval process, both the vendor and the chart of account on that bill must be excluded.
NOTE: The Management Company is automatically excluded from the bill approval process. If you need management fee bills excluded, you will still need to exclude the Chart of Account. You can do this by clicking here.
Exclude Vendor or HOA
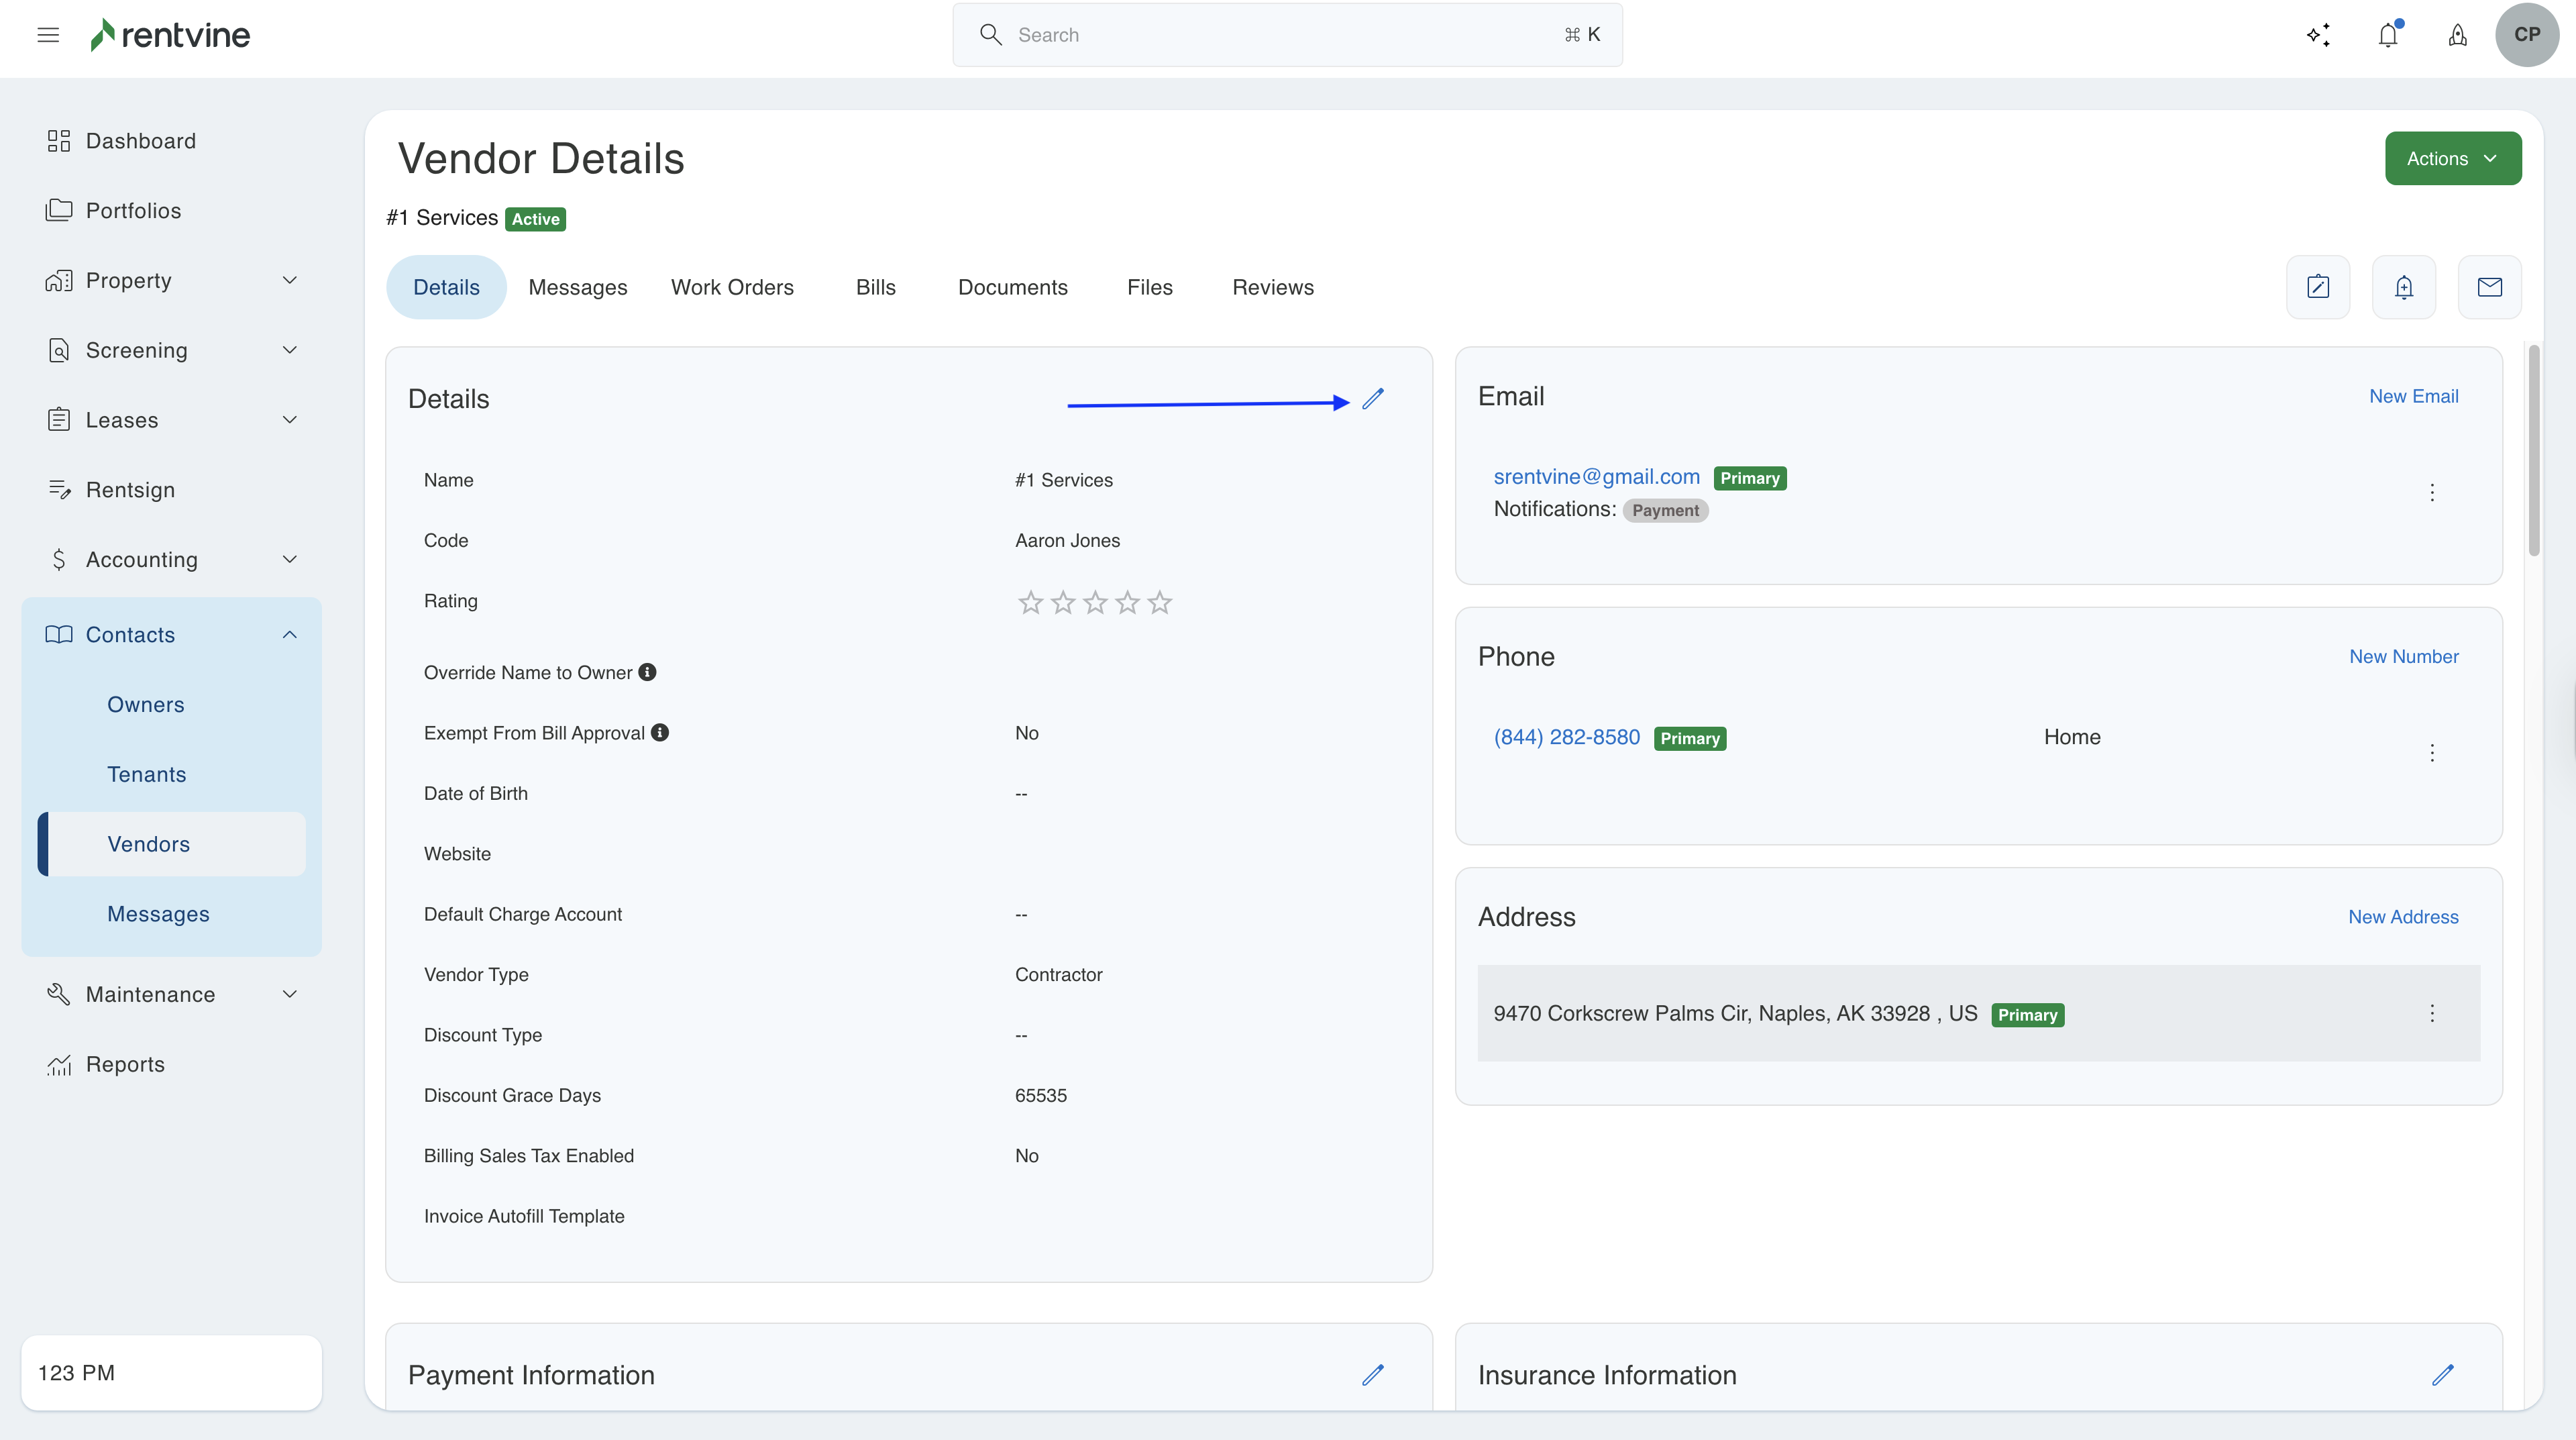
- To exclude a vendor or HOA, go to their contact details page. From the left navigation menu, click on Property / Associations and select the HOA from the list, or click on Contacts / Vendors and select the vendor from the list.
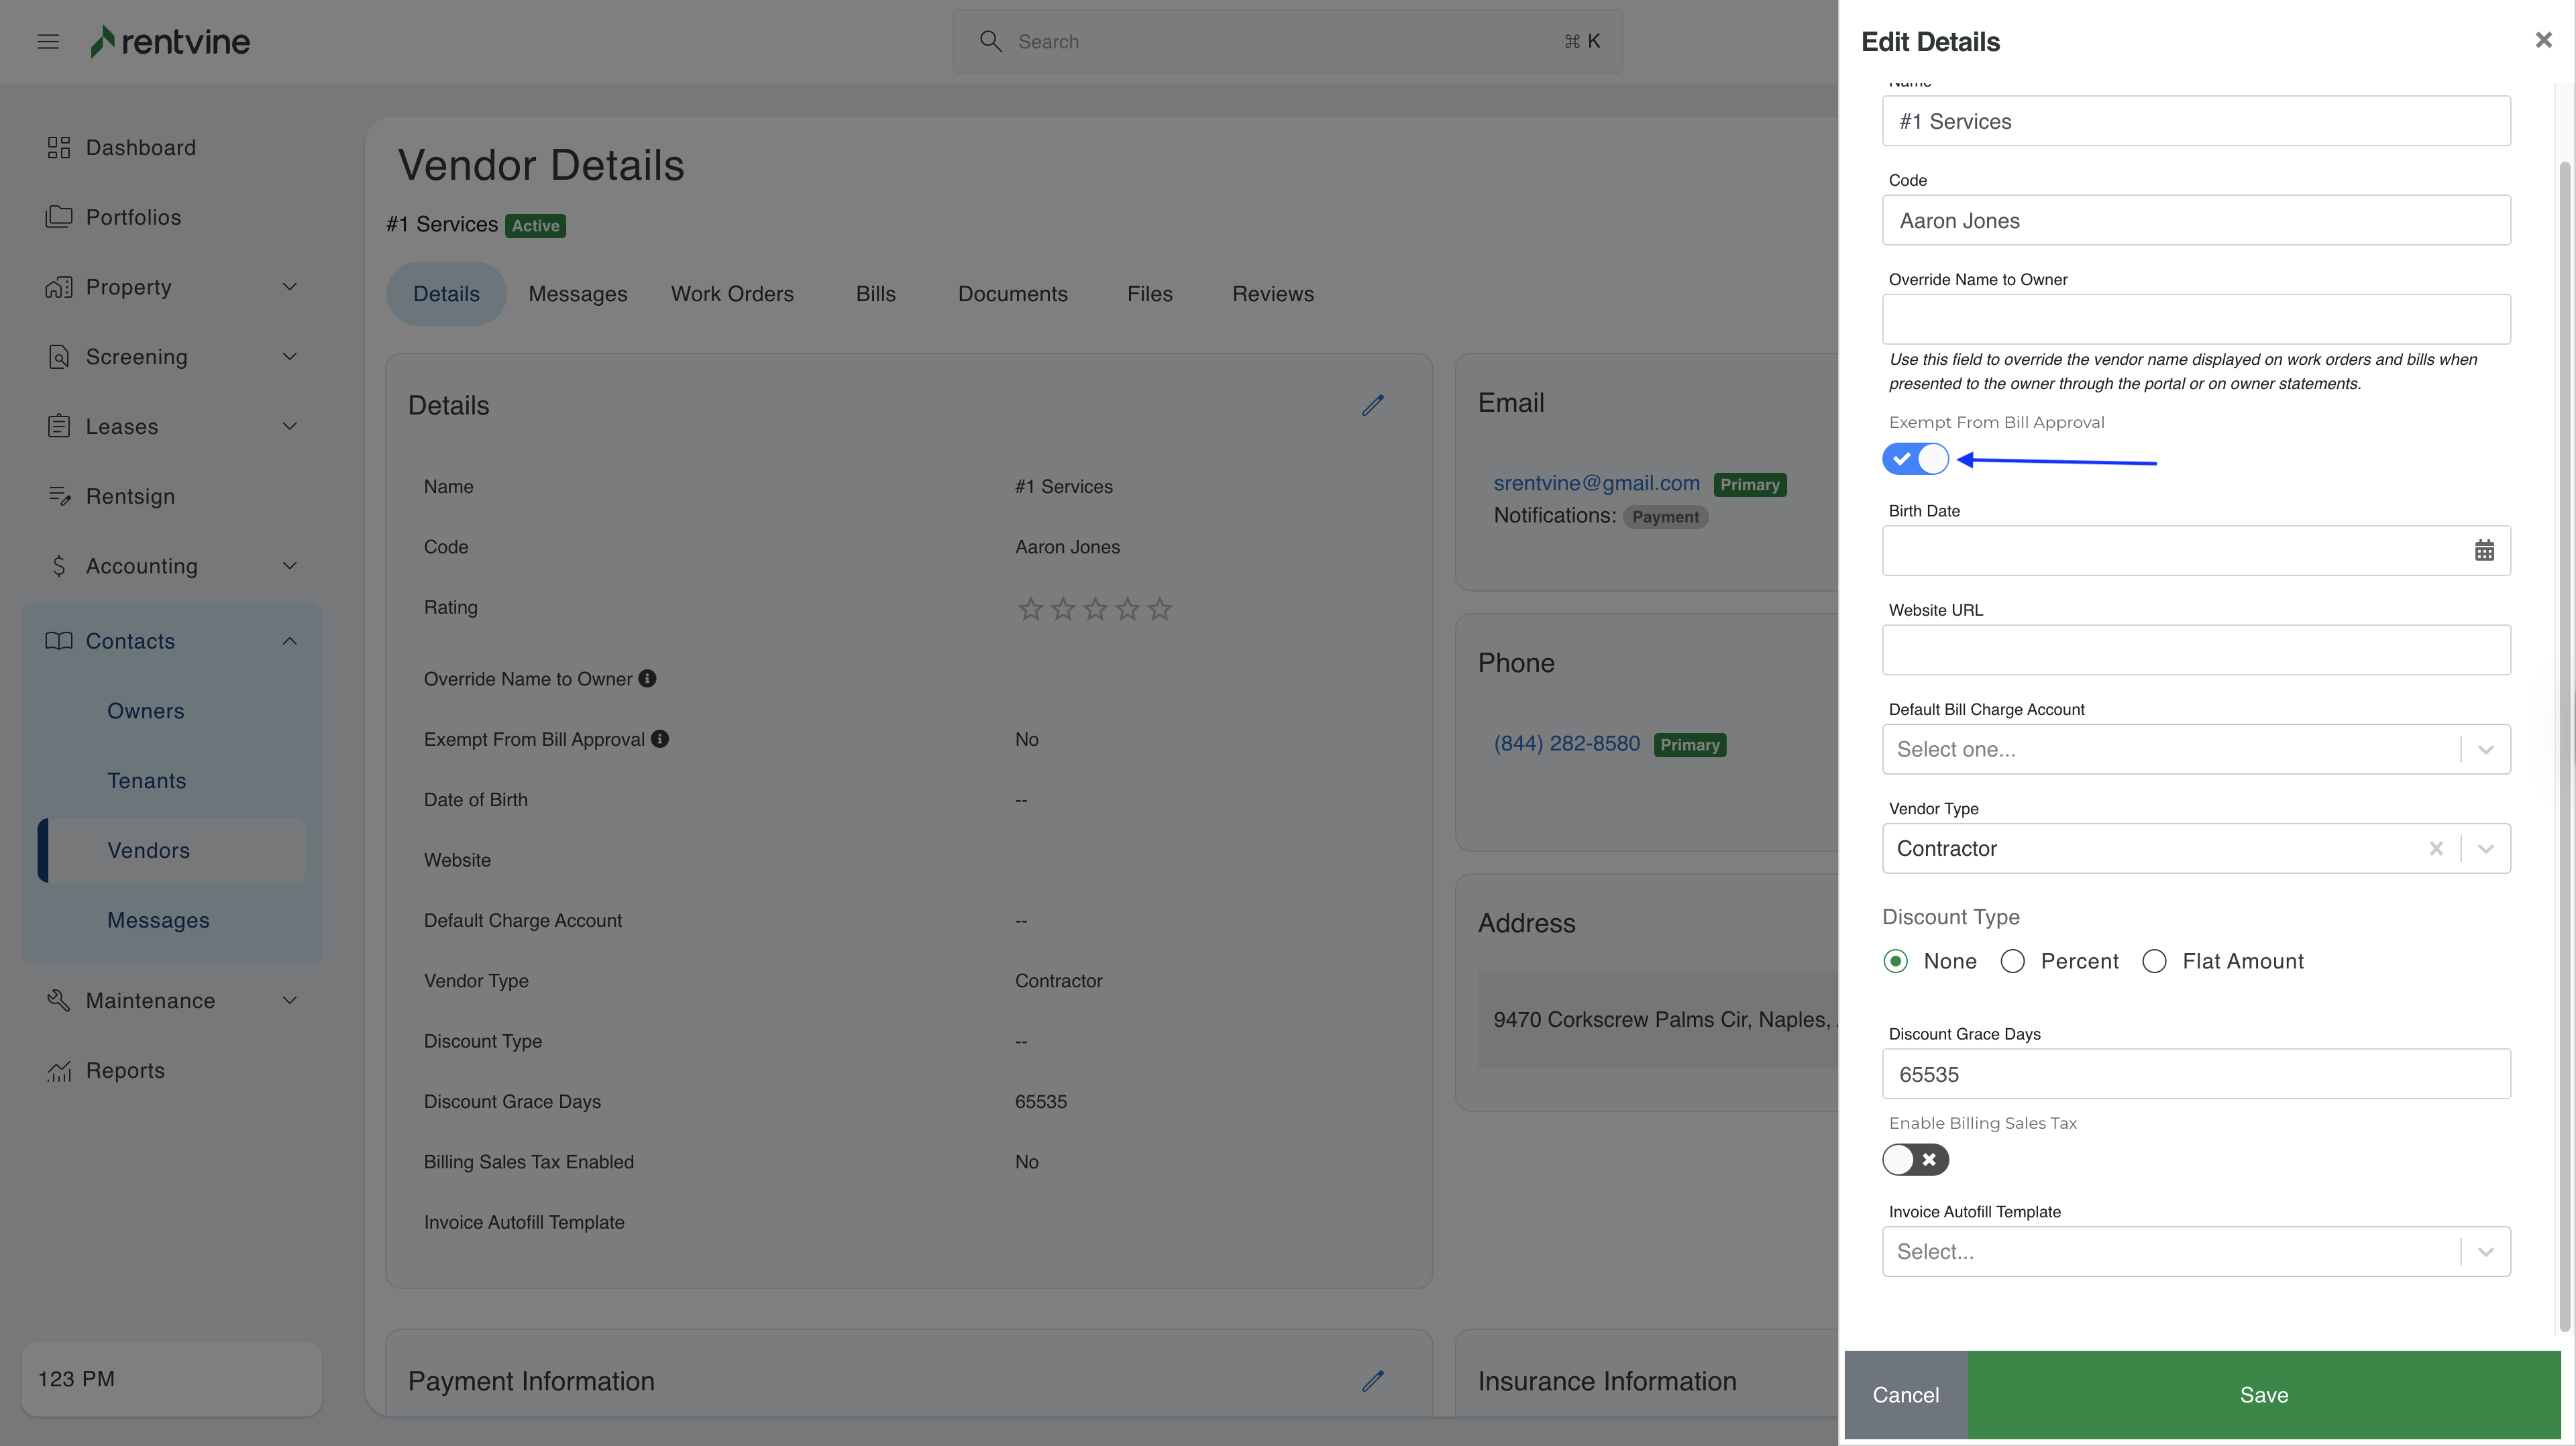
- In the Details page of the contact, click on Edit and toggle on Exempt From Bill Approval. Click Save.
The user will require the Update Bill Approval Exemption permission in order to exclude a vendor or HOA. This permission can be found under the Contacts tab of a role.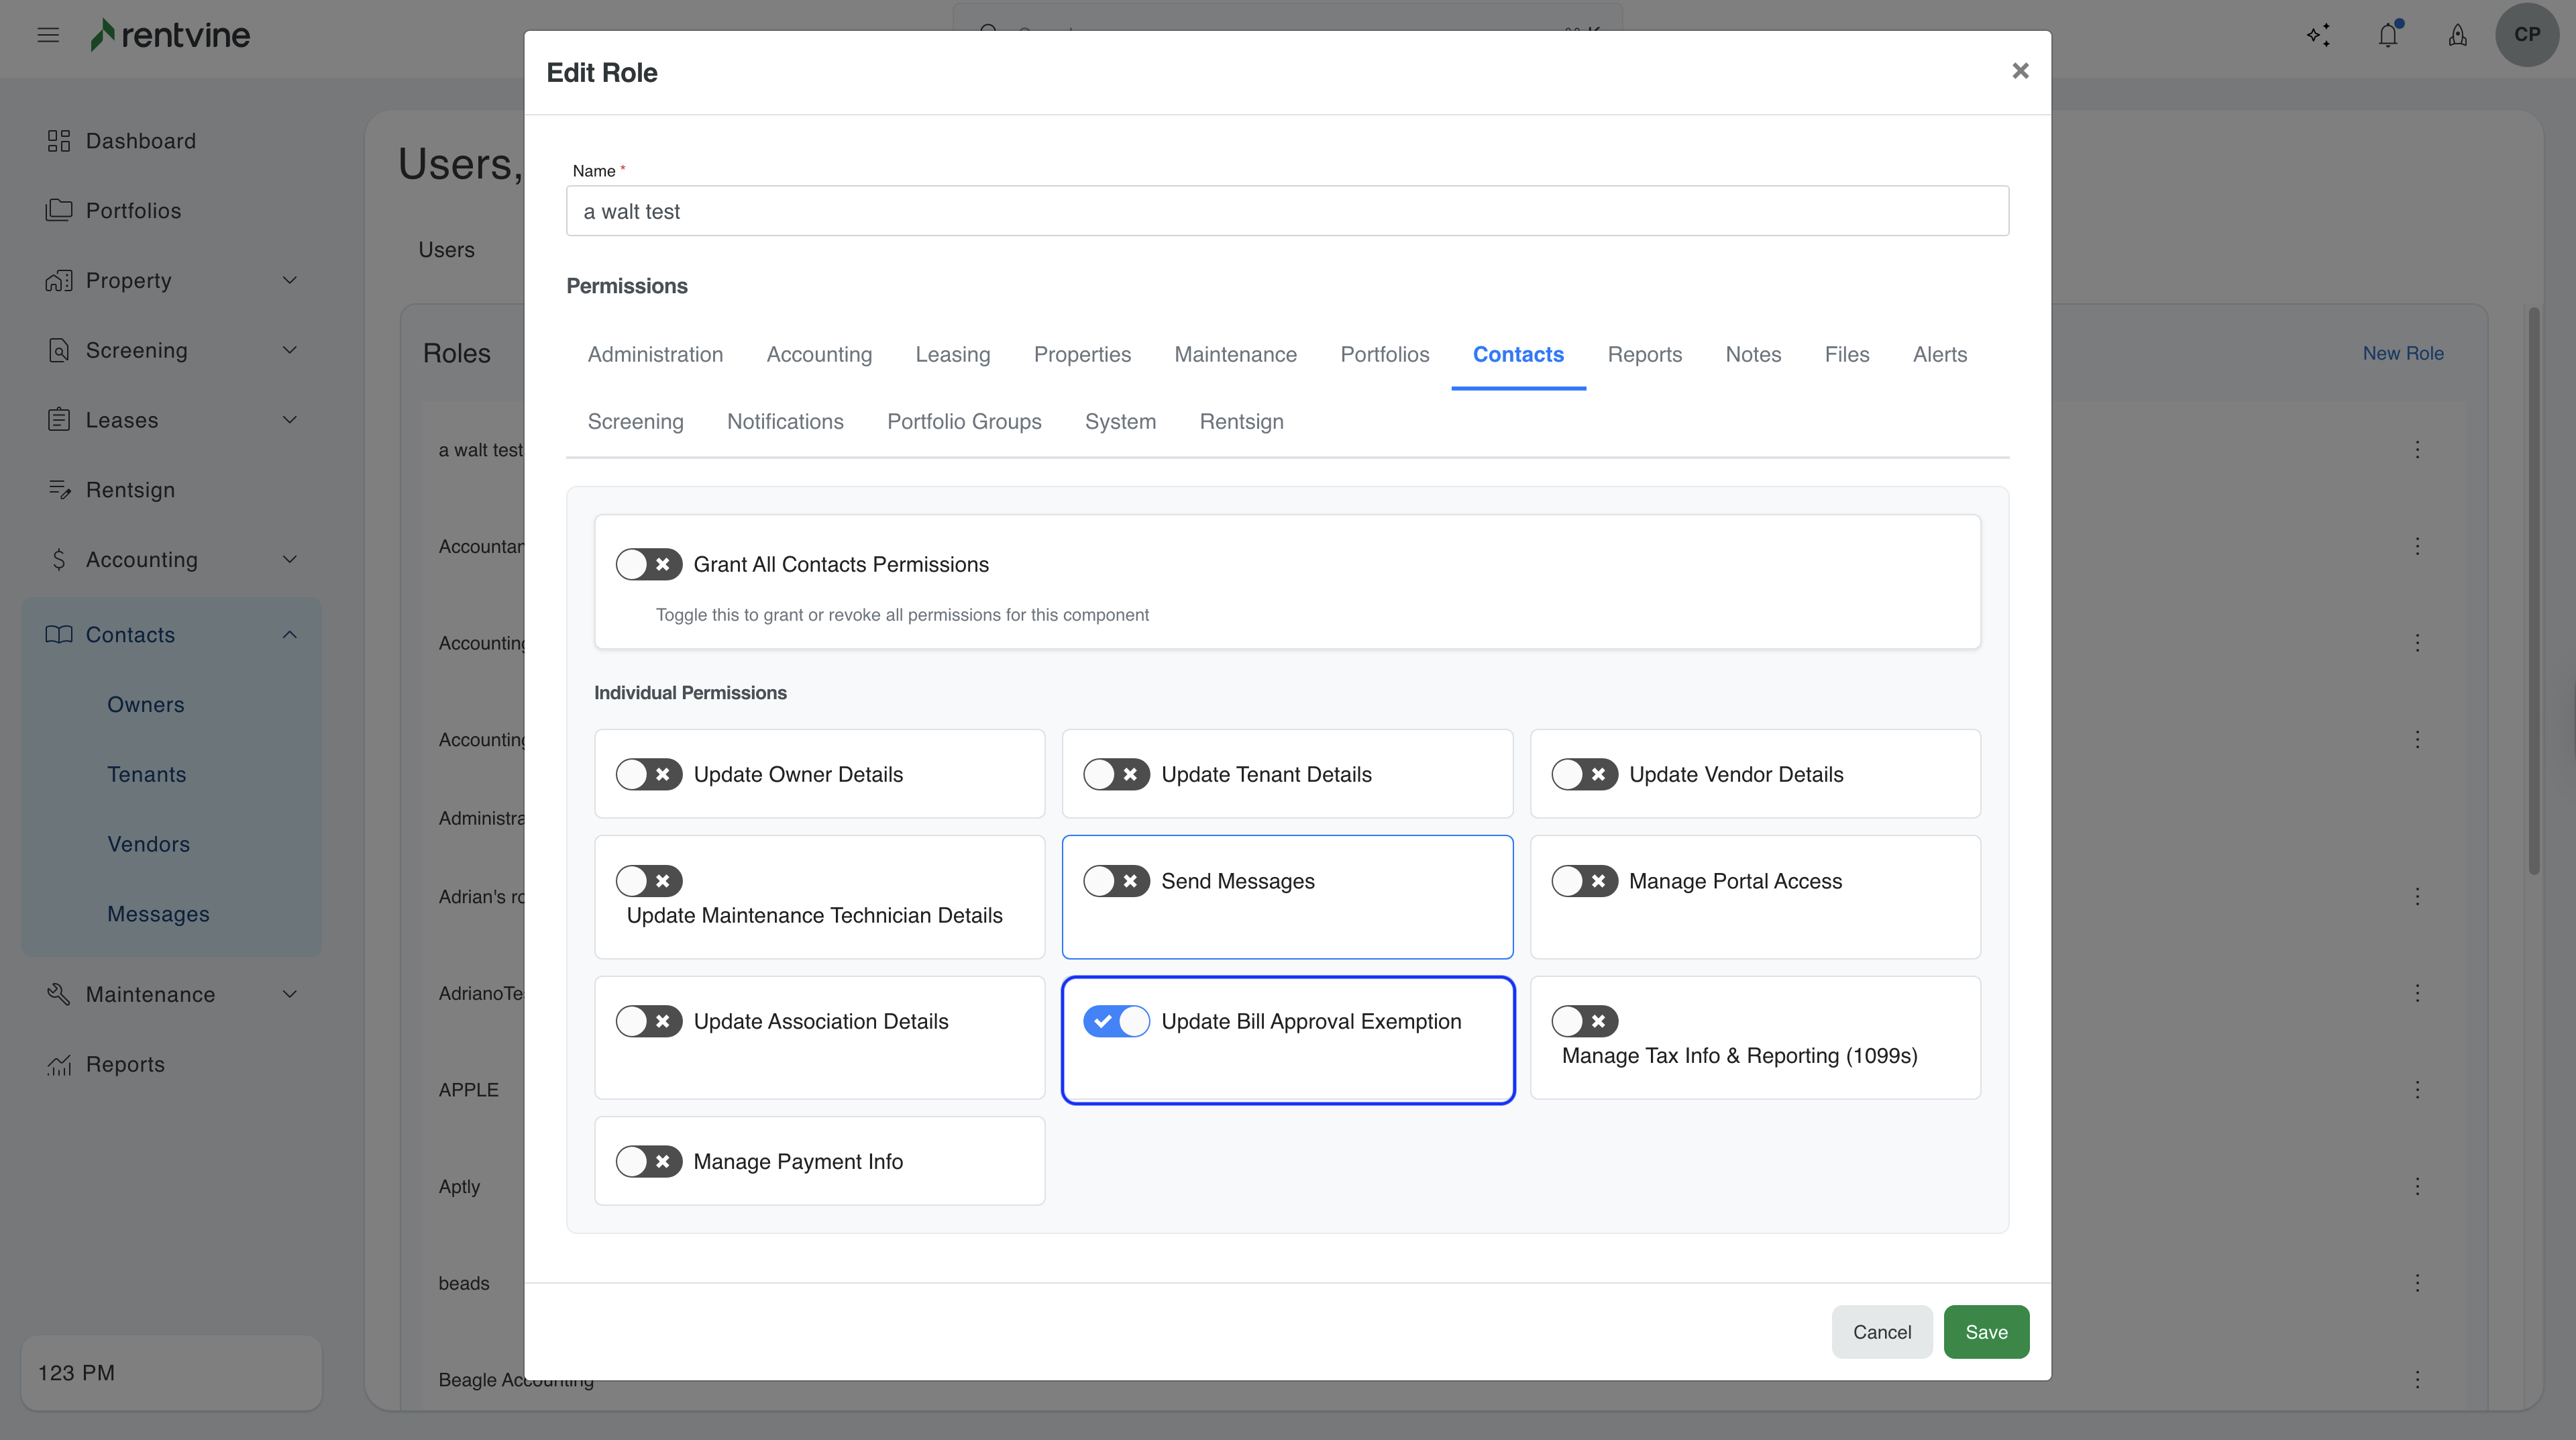
Exclude the Chart of Account
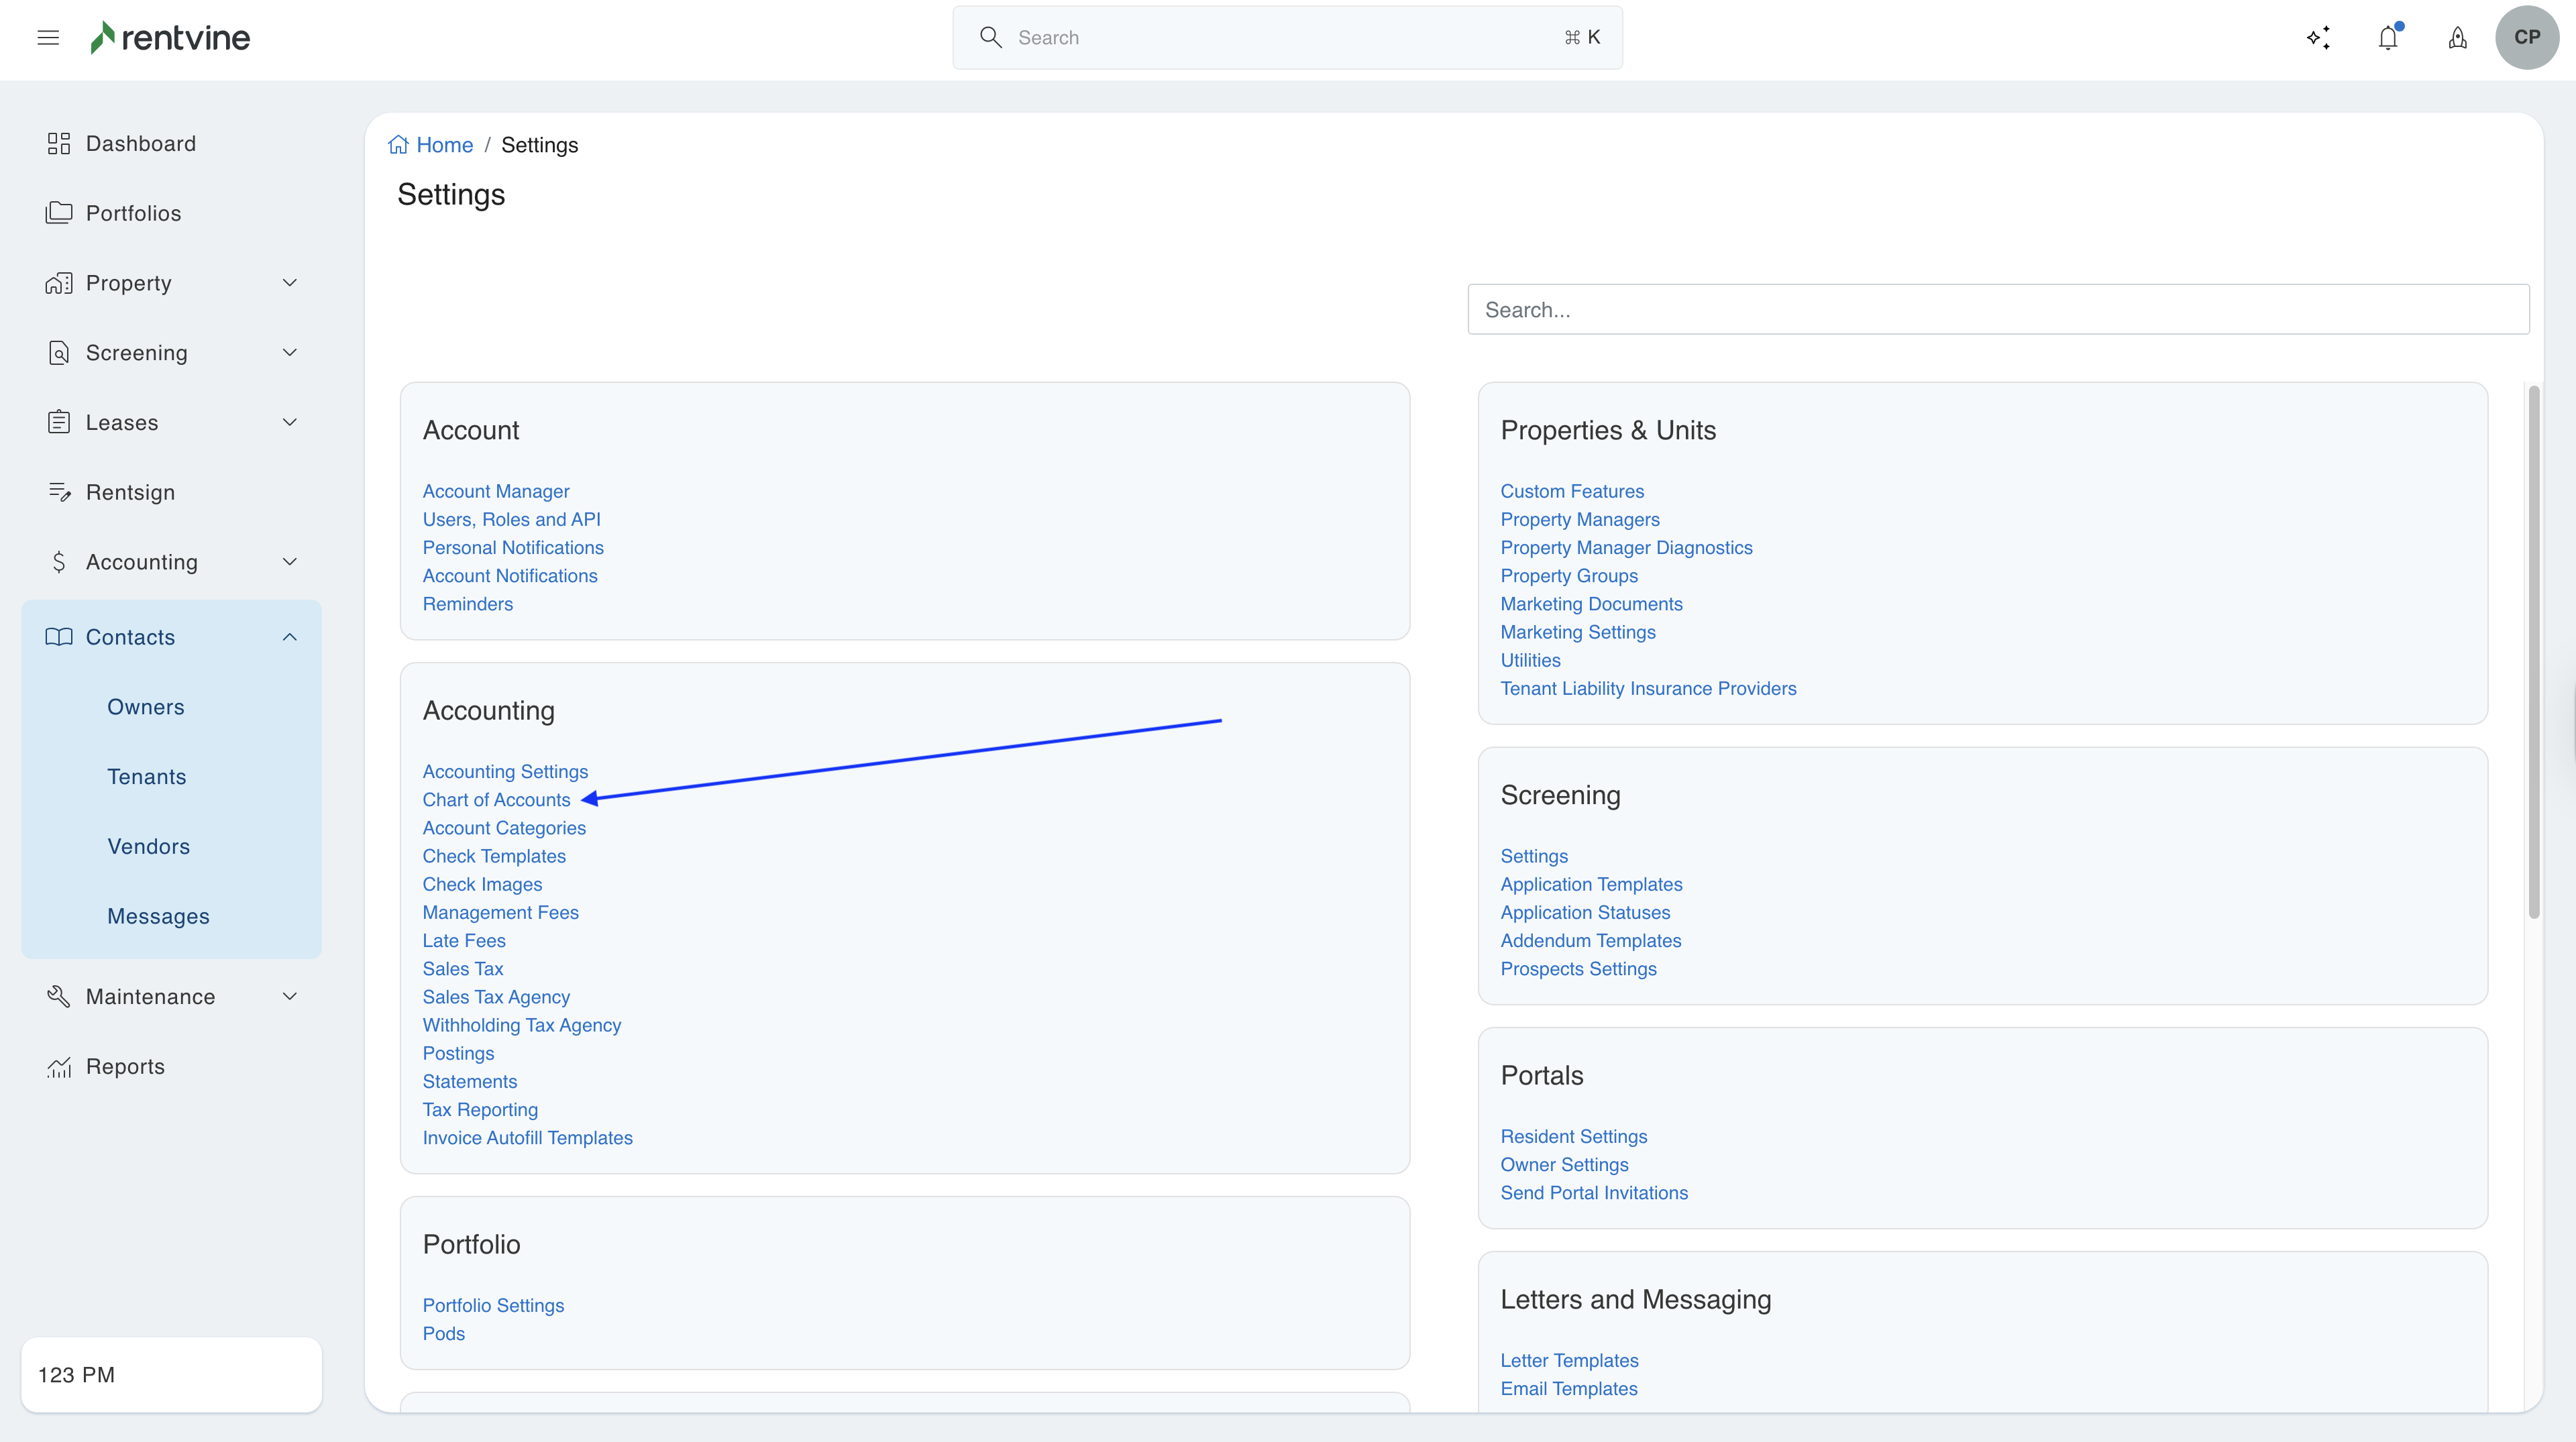
- To exclude a chart of account, in the global settings, click on Chart of Accounts.
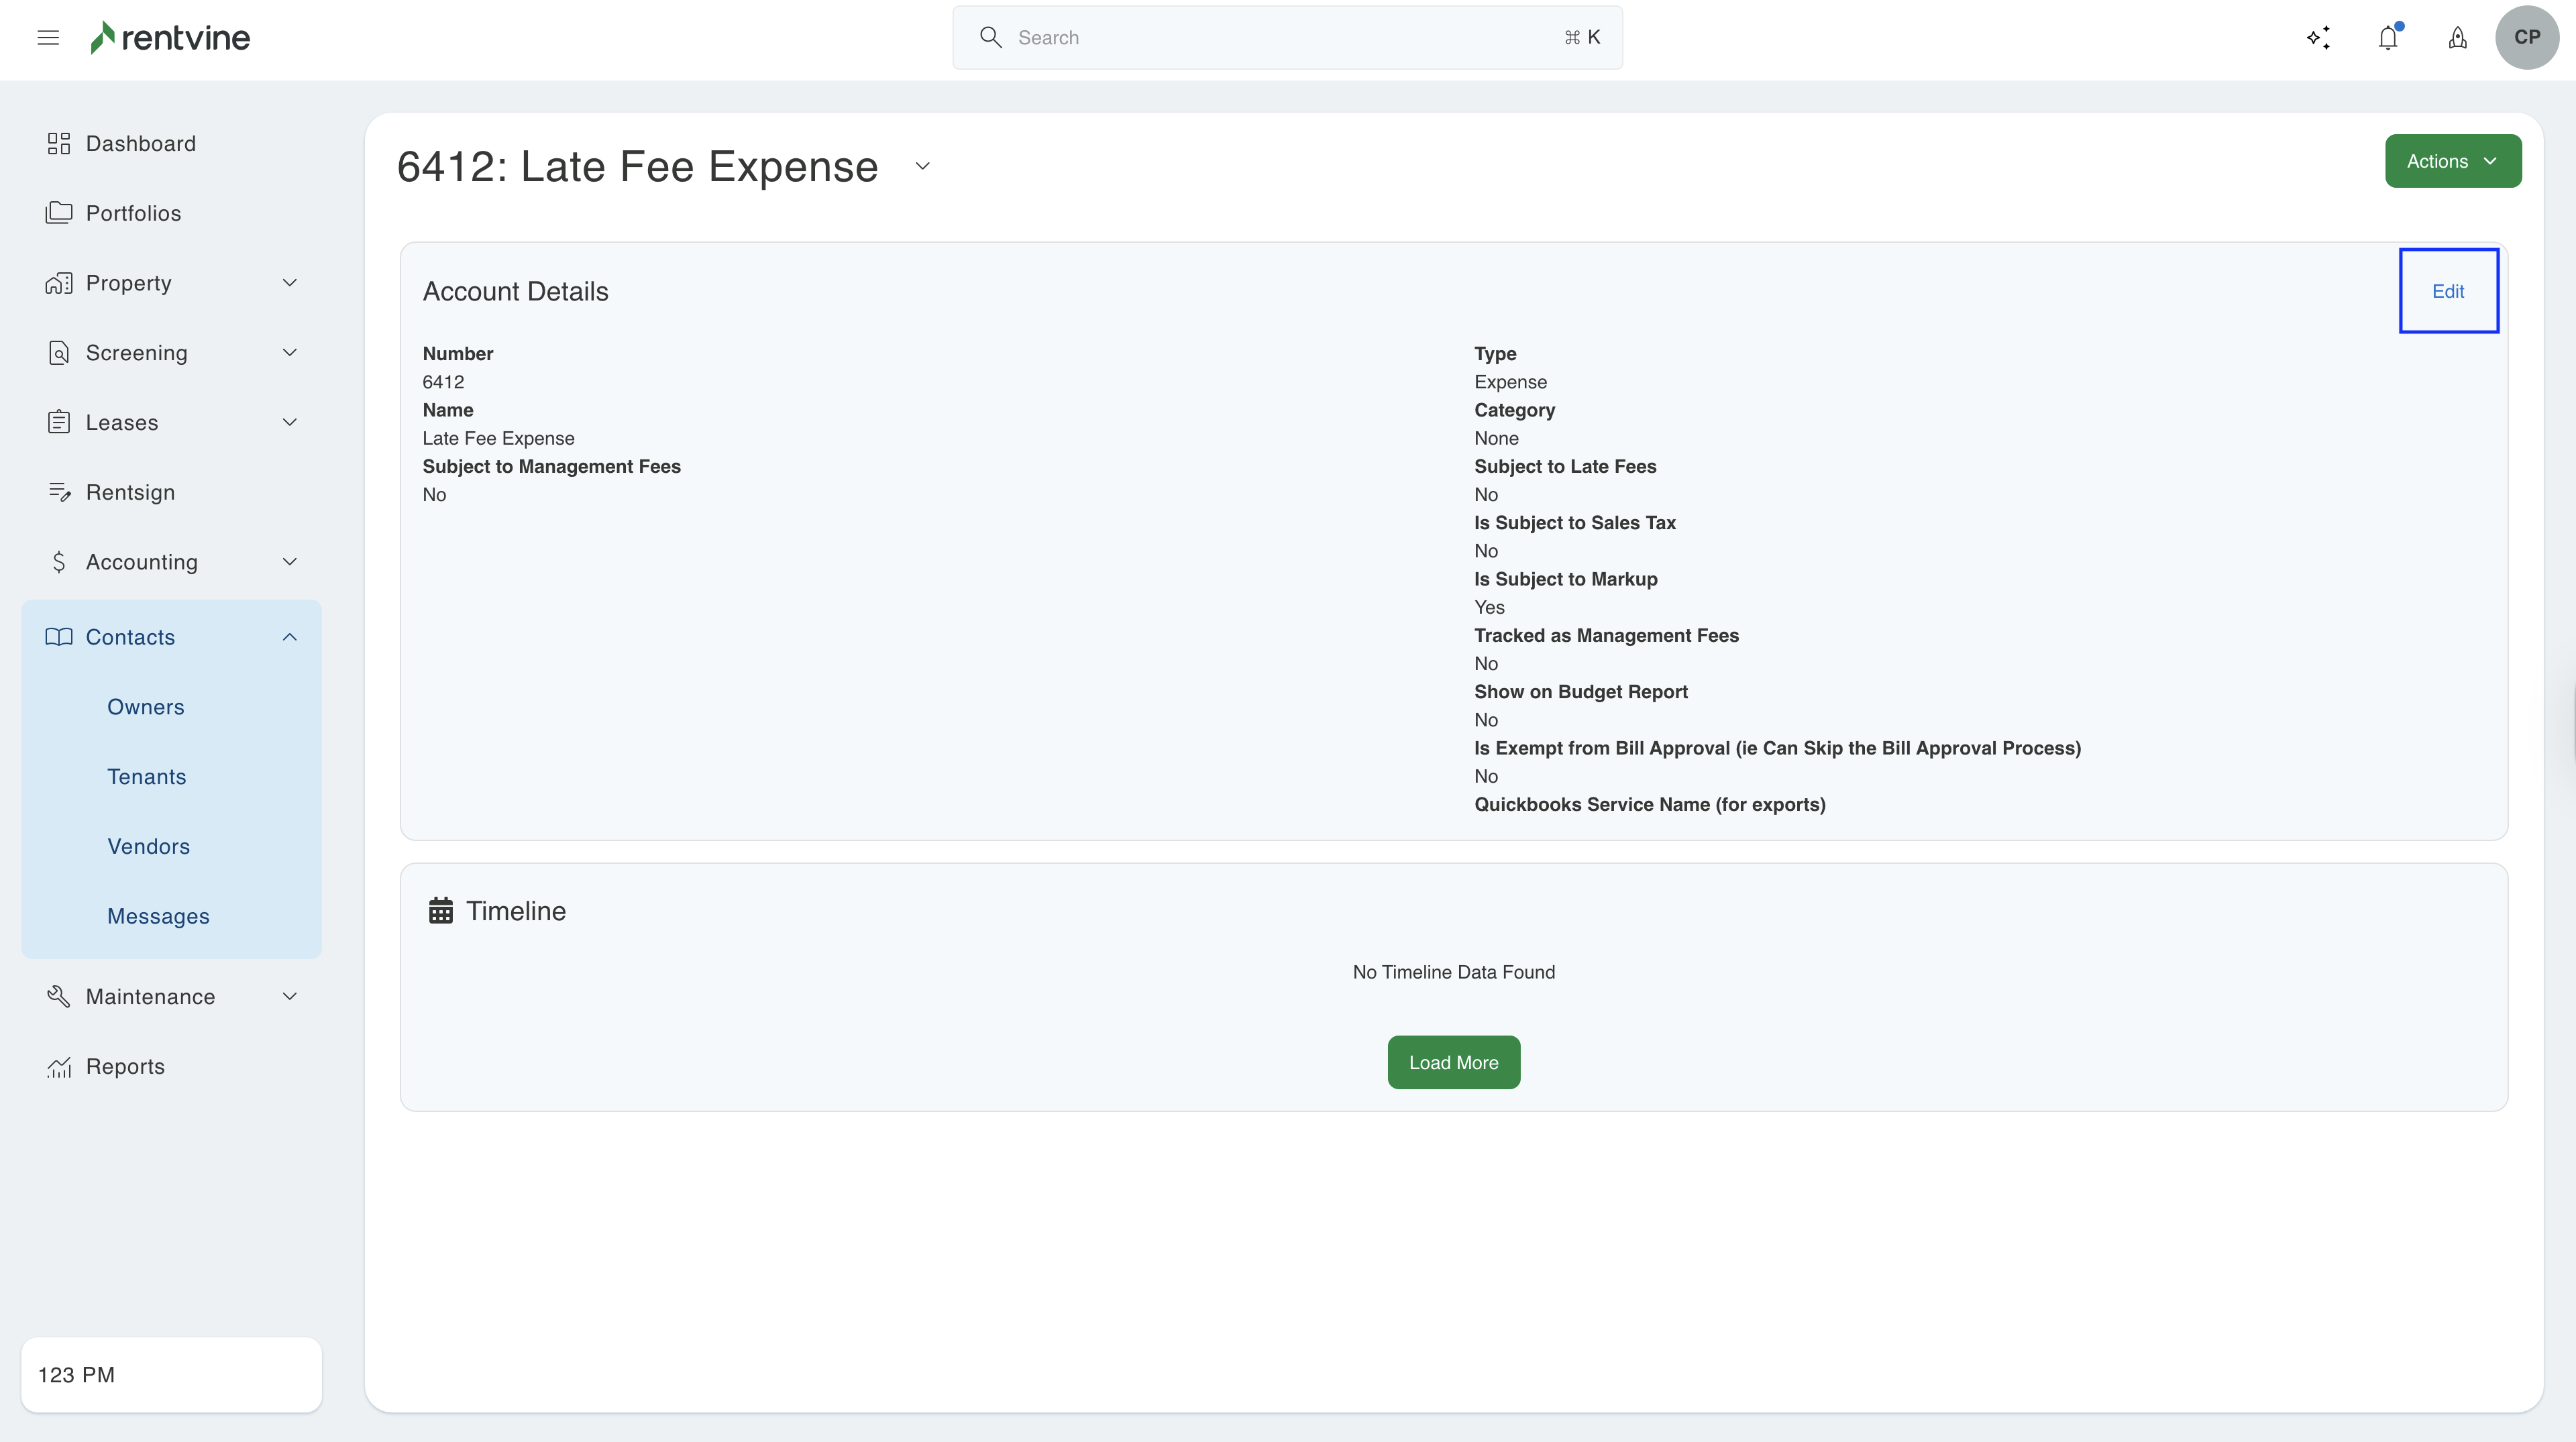
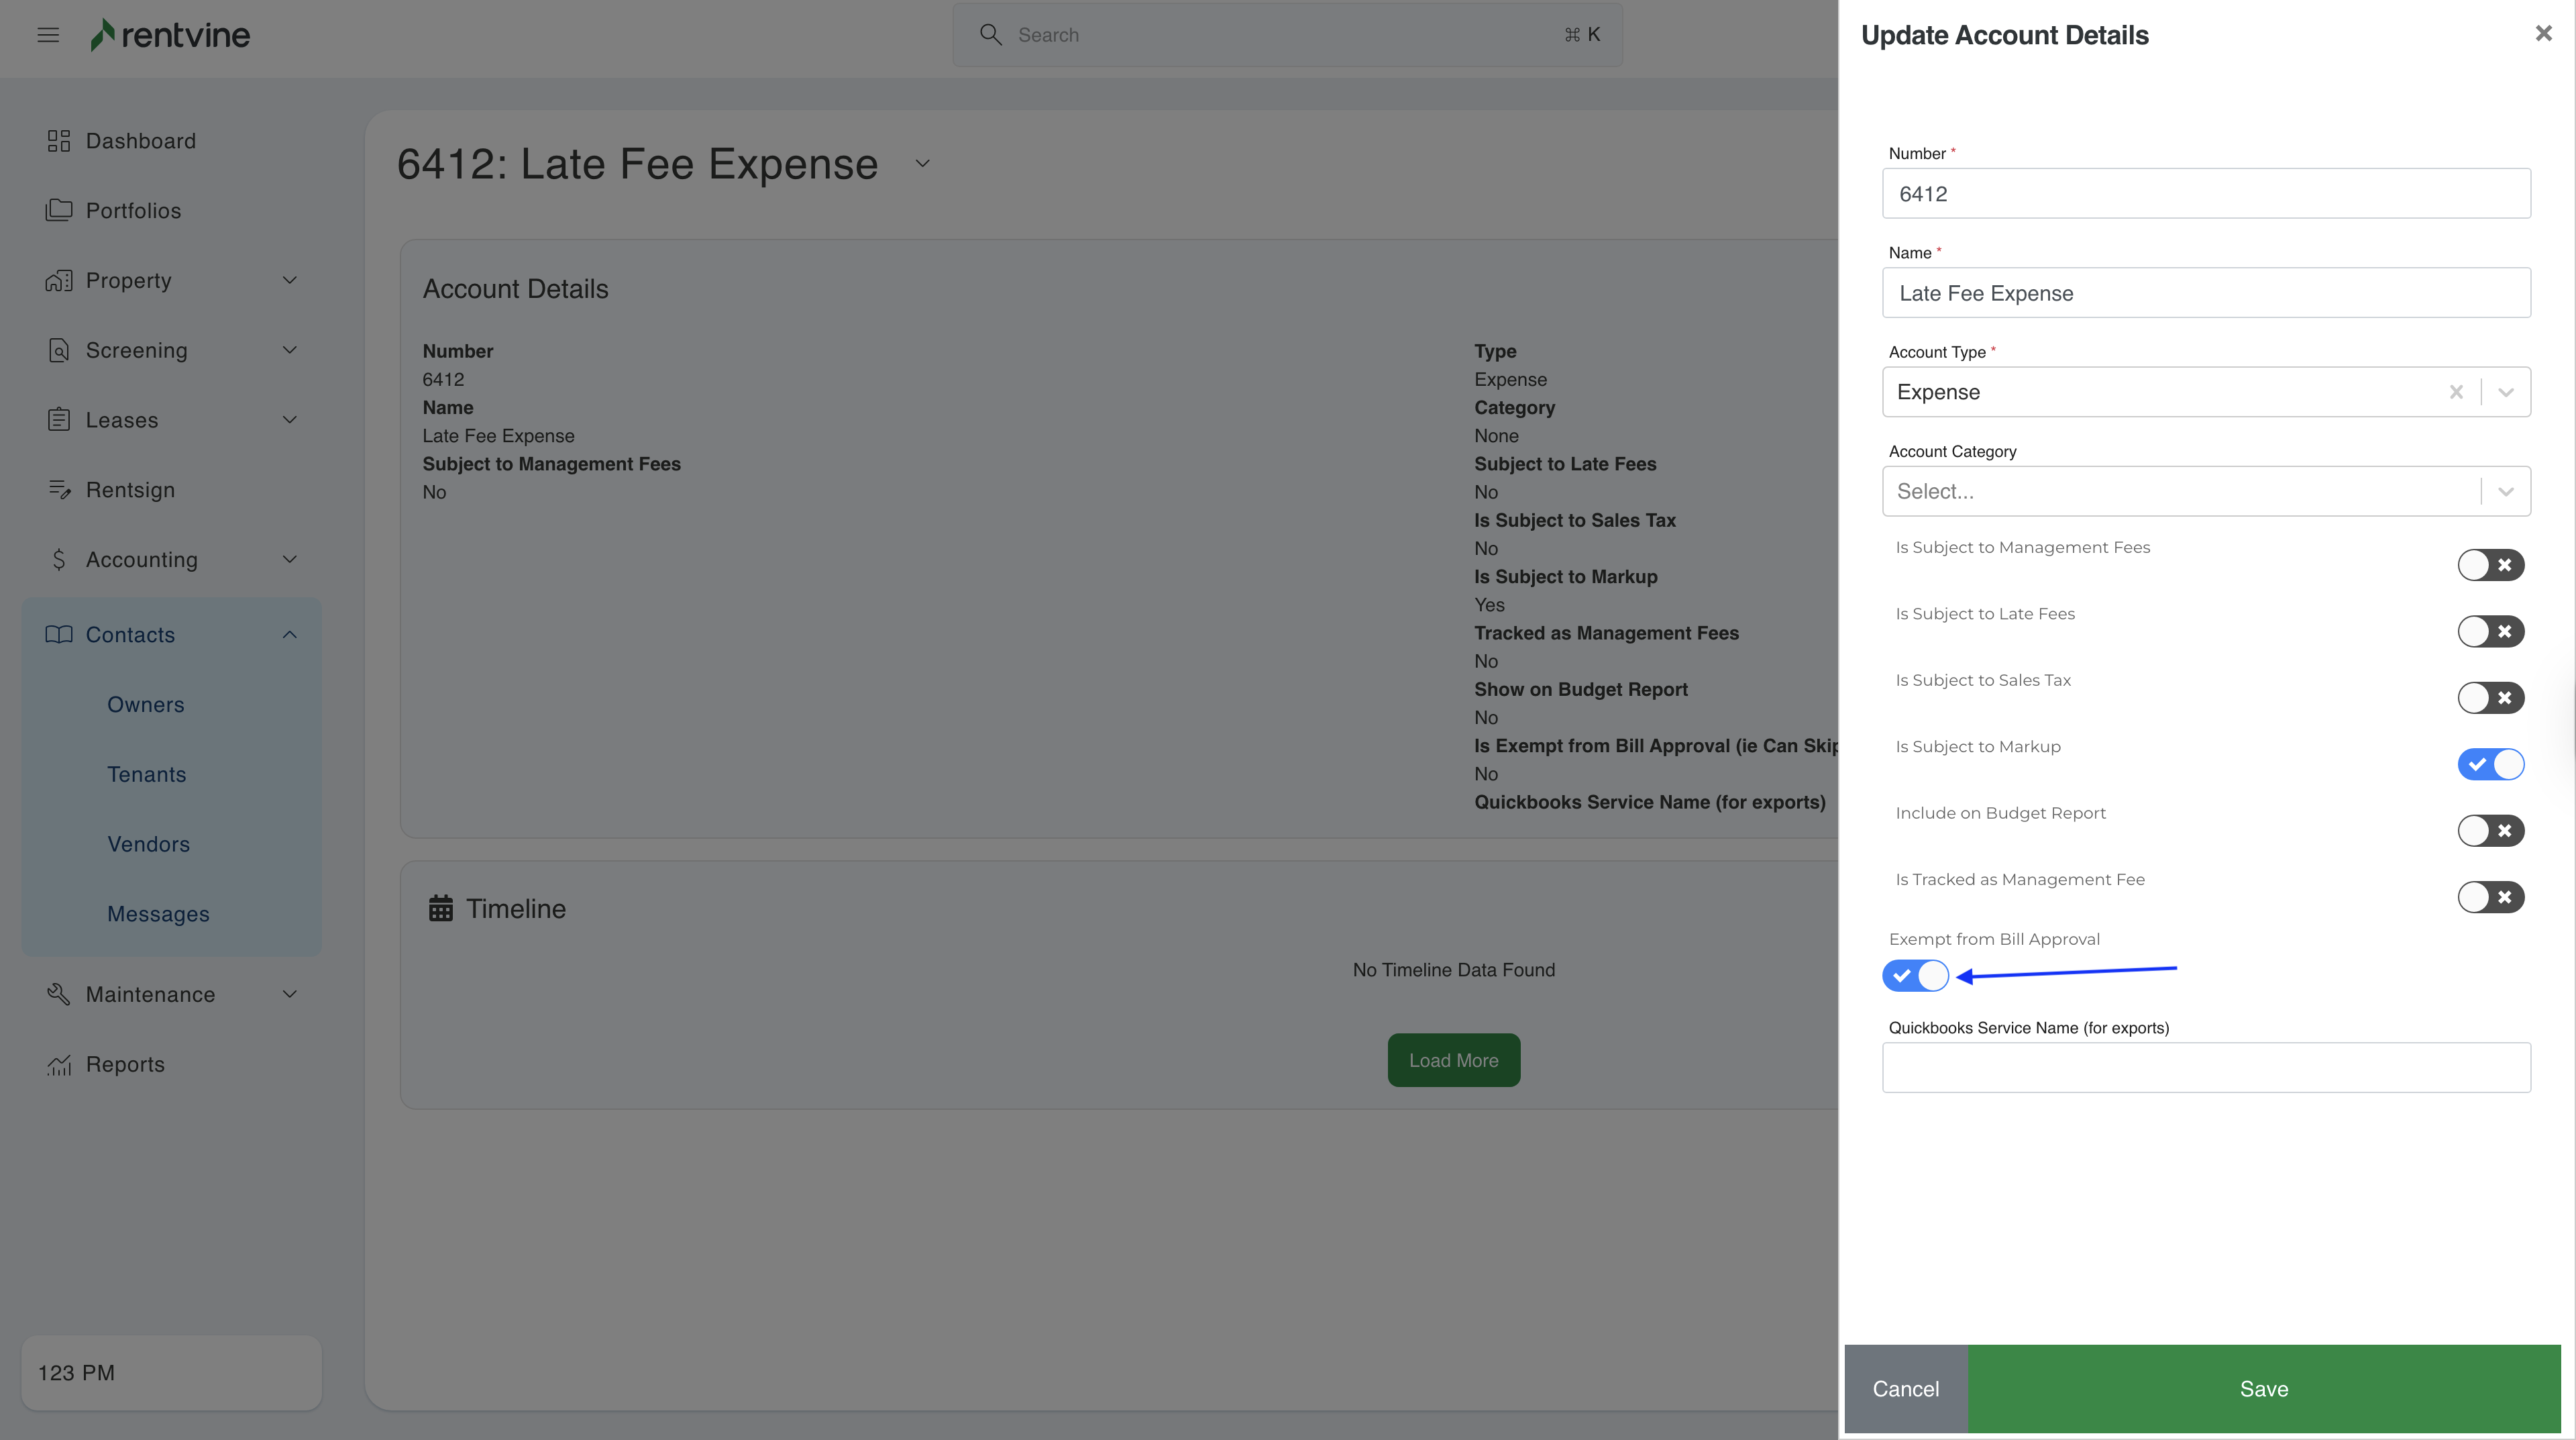
- Find the chart of account that you want to exclude and select it. Then click Edit. Next, toggle on Exempt from Bill Approval. Click Save.
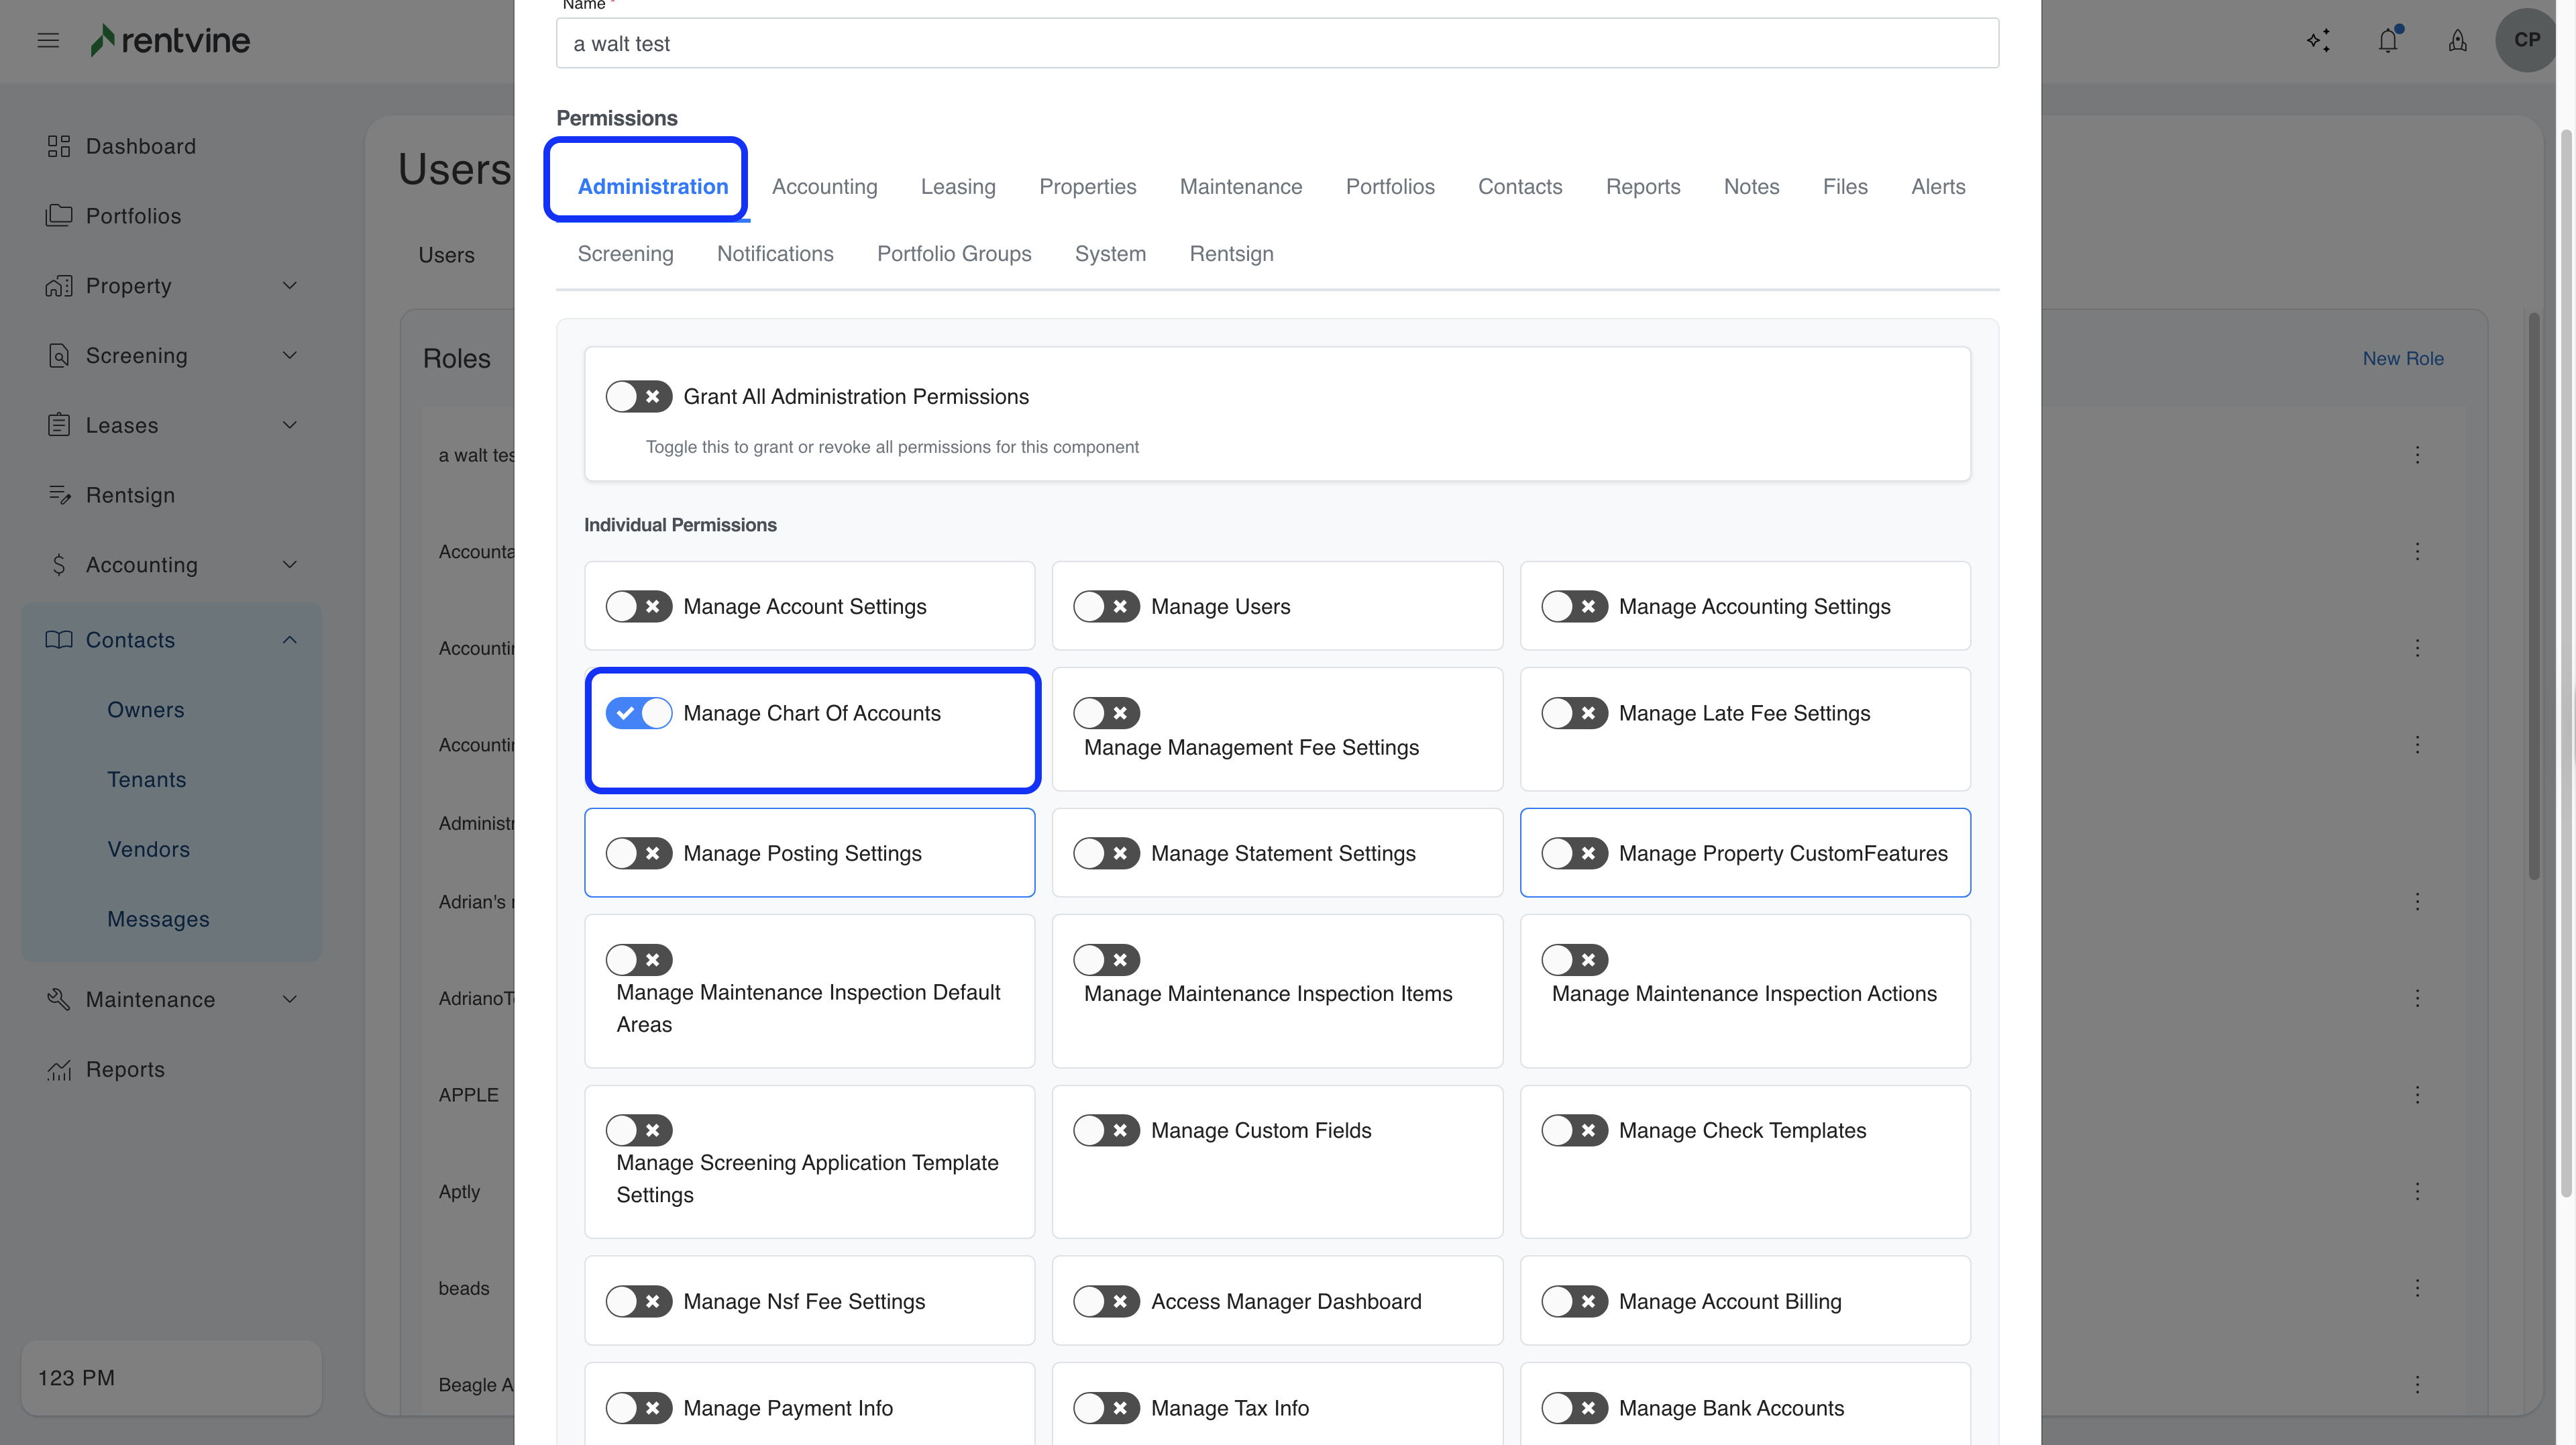
The user will require the Manage Chart of Accounts permission in order to exclude a chart of account. This permission can be found under the Administration tab of a role.