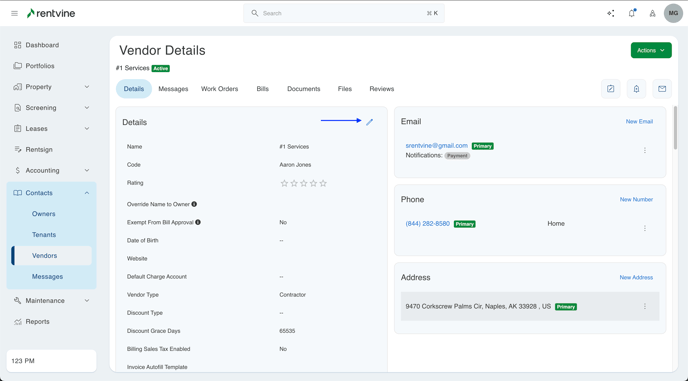
Has a vendor contact already been created in the system, but there is information that needs to be changed or added? Following this article will help you get that information changed or added.
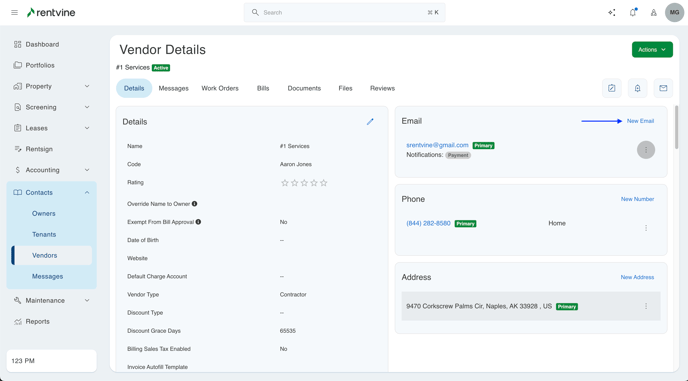


- How To Edit Name, Website URL, Default Charge Account, Vendor Type, Discount Percent
- From the dashboard view of Rentvine, click on Contacts on the left-hand side
- From the dropdown, click on Vendors
- On the next screen, enter the Vendor in the search field
- From the results, click the Vendor that you would like to change.
- In the Details section, Click the Edit Icon.
-
- Modify the necessary fields
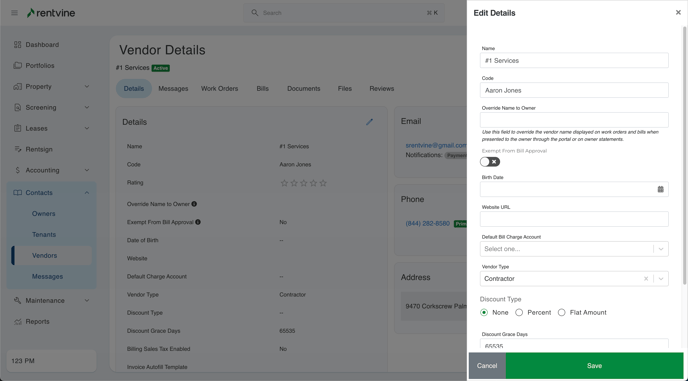
-
- Click the Save button

- How To Edit/Add New Email
-
- From the dashboard view of Rentvine, click on Contacts on the left-hand side
- From the dropdown, click on Vendors
- On the next screen, enter the Vendor in the search field
- From the results, click the Vendor that you would like to change.
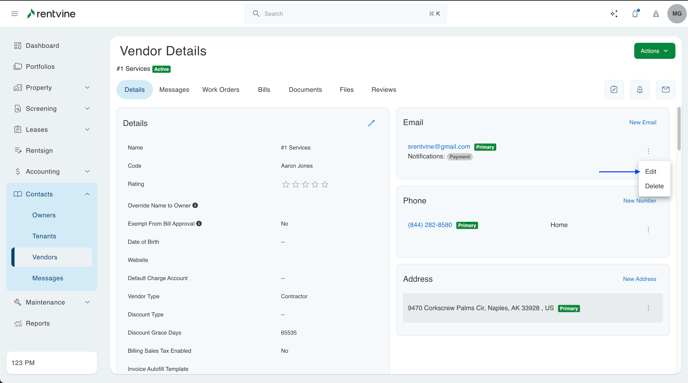
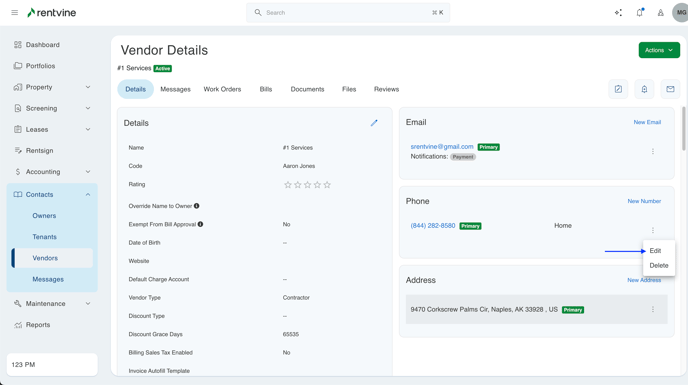
To Edit an Email:
-
- In the EMAIL section, click the ellipsis button on the right and select Edit
-
- Enter the email address

-
- Click toggle options if you would like to get notifications
- Click the Save Button
To Add a New Email:
-
- In the EMAIL section, Click the New Email Button
-
- Enter the New Email address
- Click toggle options if you would like to get notifications
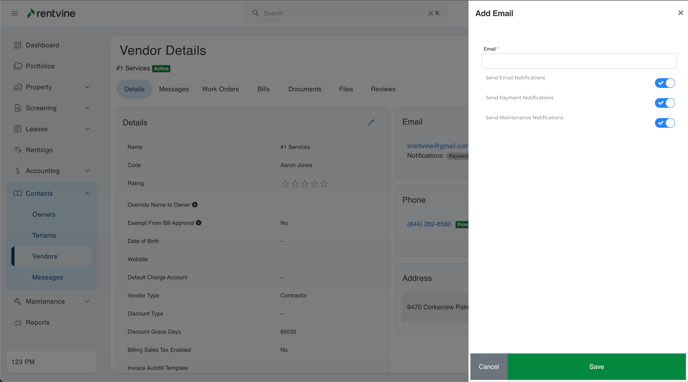
-
- Click the Save Button
- Click the Save Button
How To Edit/Add Phone Number
-
- From the dashboard view of Rentvine, click on Contacts on the left-hand side
- From the dropdown, click on Vendors
- On the next screen, enter the Vendor in the search field
- From the results, click the Vendor that you would like to change
- To Edit a Phone Number:
- In the Phone section, click the ellipsis button on the right and select Edit.
-
- Enter the Phone Number
- Choose the Phone Type(Optional)
- Enter the Description(Optional)

-
- Click the Save Button
- Click the Save Button
To Add A New Number:
-
- In the Phone section, click the New Number button
- Choose the Phone Type (Optional)
- Enter the Description (Optional)
- Click the Save Button


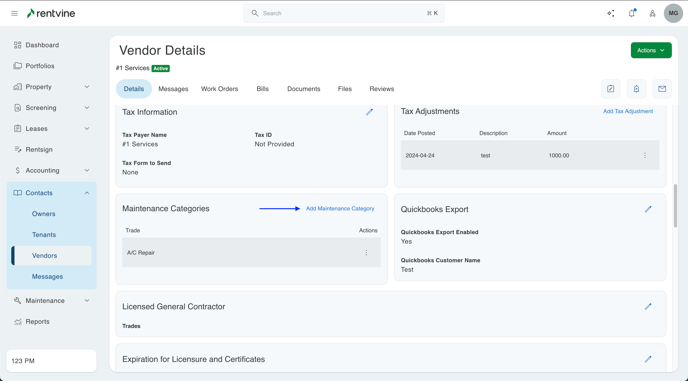
How To Edit 1099 Tax Information
-
- From the dashboard view of Rentvine, click on Contacts on the left-hand side
- From the dropdown, click on Vendors
- On the next screen, enter the Vendor in the search field
- From the results, click the Vendor that you would like to change.
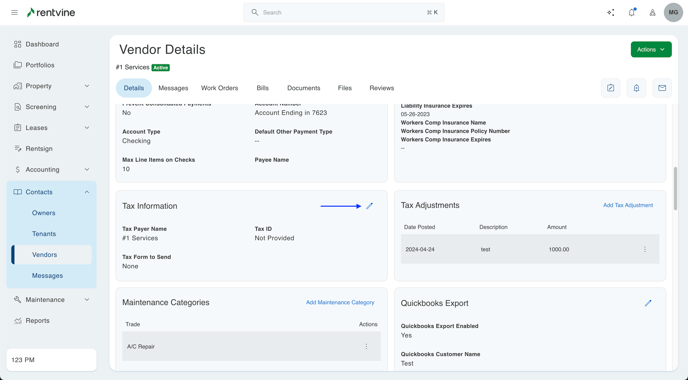
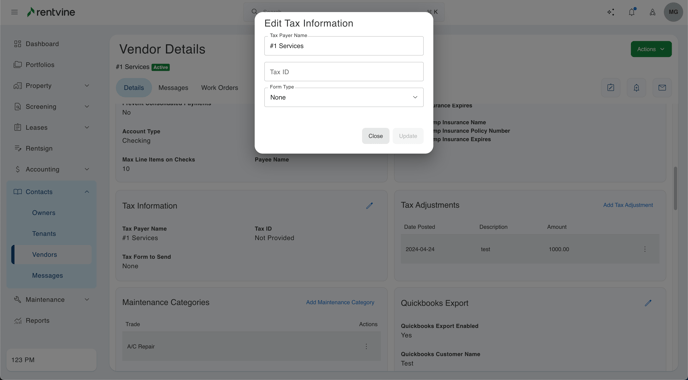
- In the Tax Information section, click the Edit Icon.
-
- Enter the Payee Name
- Enter the Tax ID
- Select the Form Type (1099 or None)
-
- Click the Save Button
- Click the Save Button
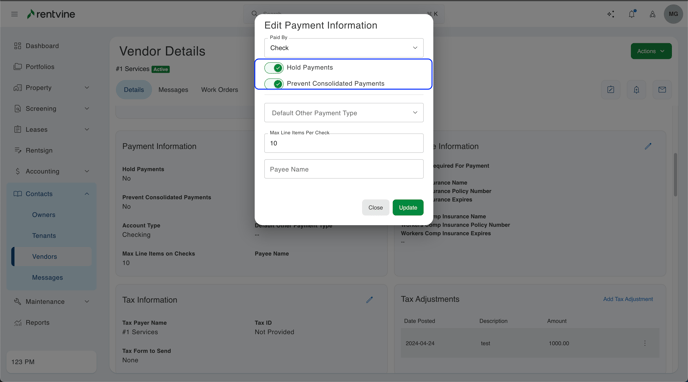
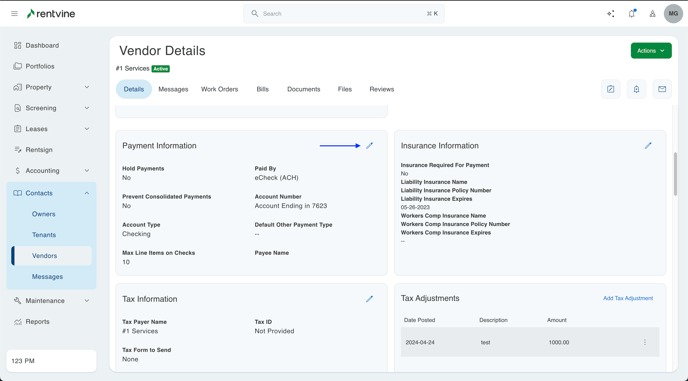
- How To Edit Payment Information
- From the dashboard view of Rentvine, click on Contacts on the left-hand side
- From the dropdown, click on Vendors
- On the next screen, enter the Vendor in the search field
- From the results, click the Vendor that you would like to change
- In the Payment Information section, click the Edit Button
-
- From the dropdown option, select the payment information
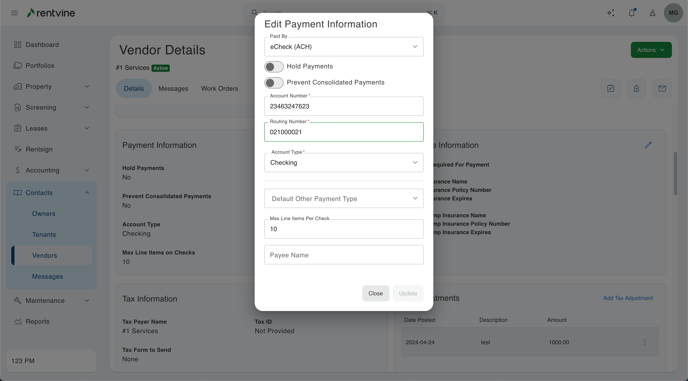
For Check
-
- Click the toggle button if you would like to Hold Payments
-
- Click the toggle button if you would like to Prevent Consolidated Payments
-
- Click the Save Button at the bottom
For ECheck
-
- Click the toggle button if you would like to Hold Payments
- Select ECheck
-
- Click the toggle button if you would like to Prevent Consolidated Payments
- Enter the Account Number
- Enter the Routing Number
- Select the Account Type
- Click the Save Button at the bottom
For NACHA (ACH)
-
- Click the toggle button if you would like to Hold Payments
- Select ACH
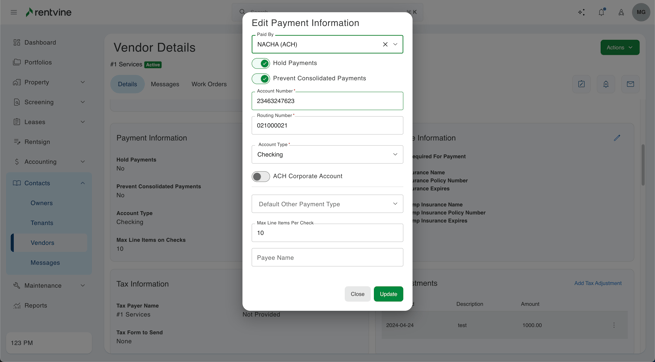
-
- Click the toggle button if you would like to Prevent Consolidated Payments
- Enter the Account Number
- Enter the Routing Number
- Select the Account Type
- Click the toggle button if you would like to use ACH Corporate Account
- Click the Save Button
- How To Edit Insurance Information
-
- From the dashboard view of Rentvine, click on Contacts on the left-hand side
- From the dropdown, click on Vendors
- On the next screen, enter the Vendor in the search field
- From the results, click the Vendor that you would like to change.
- In the Insurance Information section, click the Edit Button.

-
- Enter the information for the insurance

-
- Click the Save button
How To Add Vendor Maintenance Categories
-
- From the dashboard view of Rentvine, click on Contacts on the left-hand side
- From the dropdown, click on Vendors
- On the next screen, enter the Vendor in the search field
- From the results, click the Vendor that you would like to change.
- In the Maintenance Categories section, click the Edit icon.
-
- Select the Vendor Trade from the dropdown list
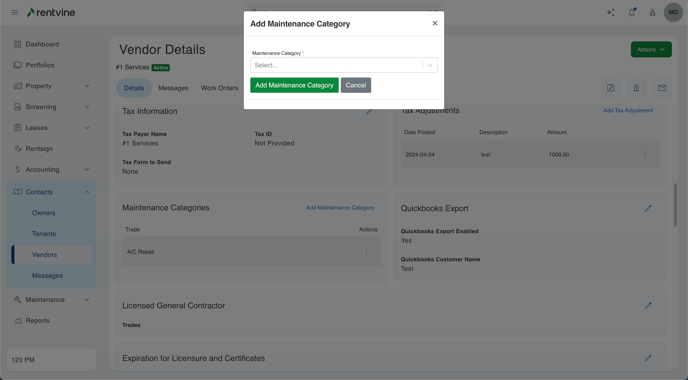
-
- Click the Add Vendor Trade button
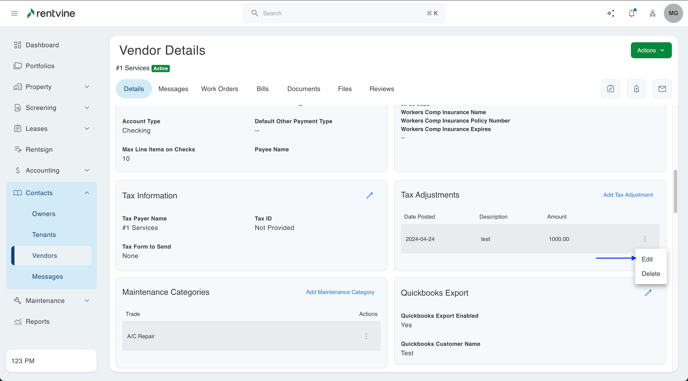
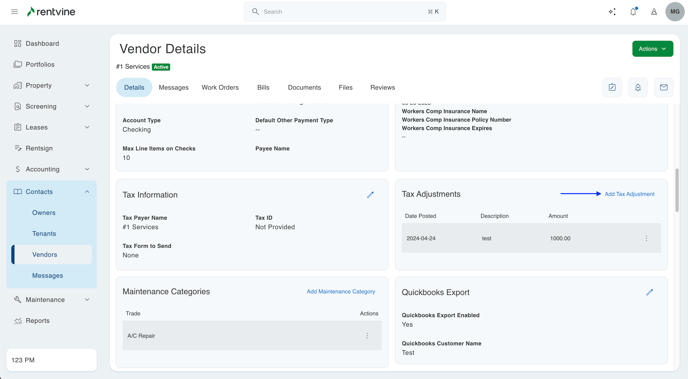
How to Edit Tax Adjustments
-
- From the dashboard view of Rentvine, click on Contacts on the left-hand side
- From the dropdown, click on Vendors
- On the next screen, enter the Vendor in the search field
- From the results, click the Vendor that you would like to change
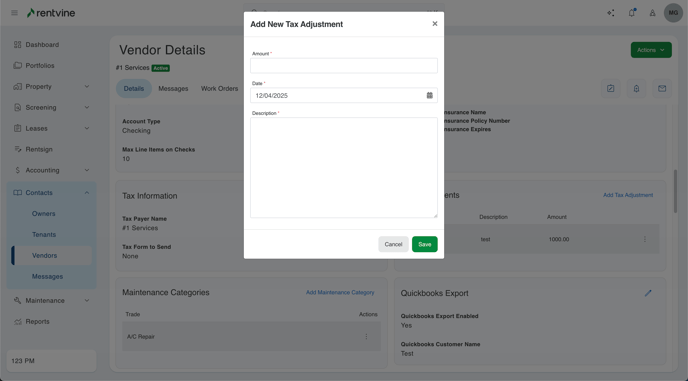
- In the Tax Adjustments section, click the ellipsis button on the right and select Edit.
-
- Enter the Amount
- Enter/Select the Date
- Enter the Description
-
- Click the Save button
- Click the "Add Tax Adjustment" button in the top right of this box in order to add a new adjustment.
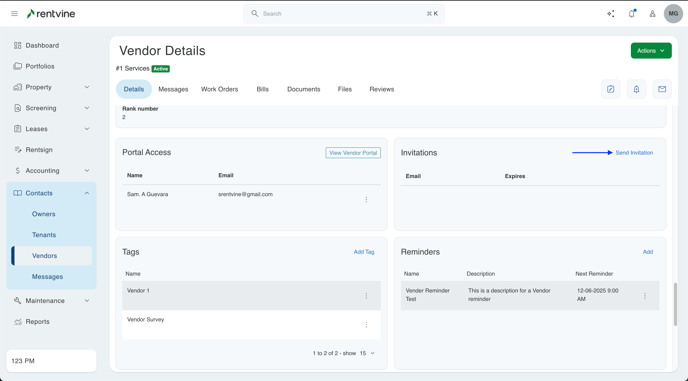
Invitations
-
- From the dashboard view of Rentvine, click on Contacts on the left-hand side
- From the dropdown, click on Vendors
- On the next screen, enter the Vendor in the search field
- From the results, click the Vendor that you would like to change
- In the Invitations section, click the Send Invitation button
-
- Enter the email address

-
- Click the Invite button