How to Add a Bill
- Go to the "Add Bill" page.
-
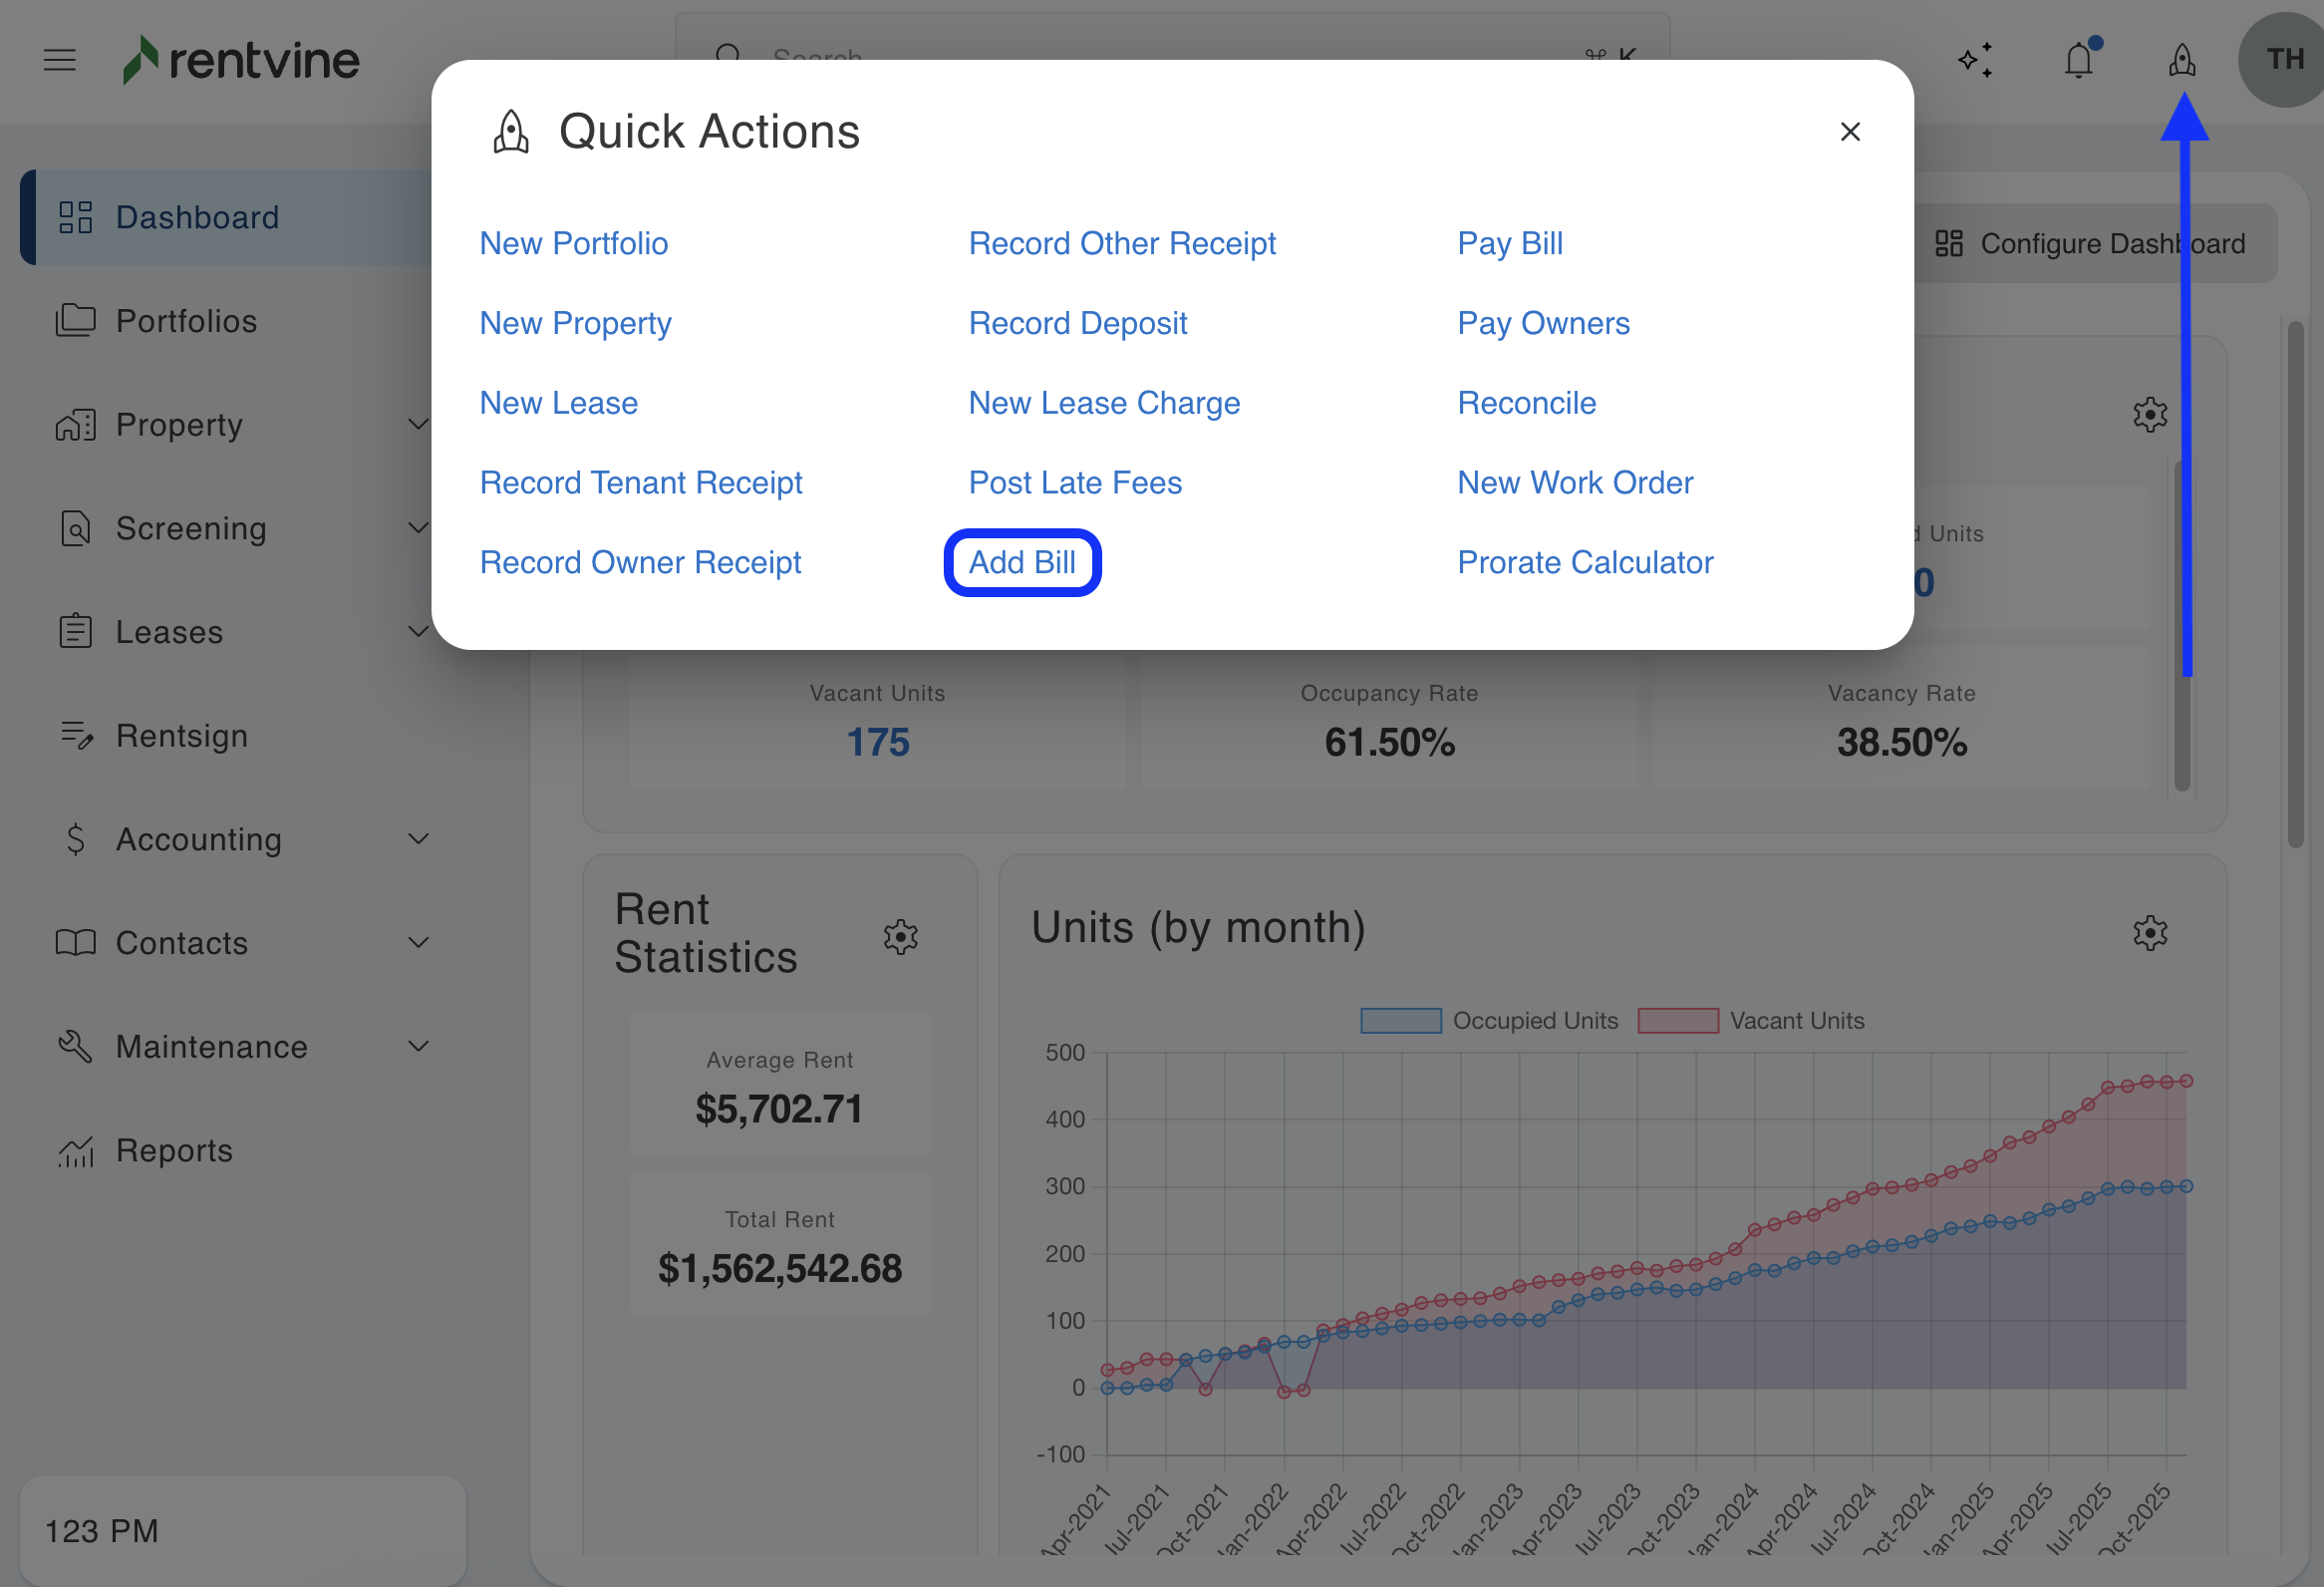
- On the top of the page, click on the Quick Actions menu button and then click on Add Bill.
OR
-
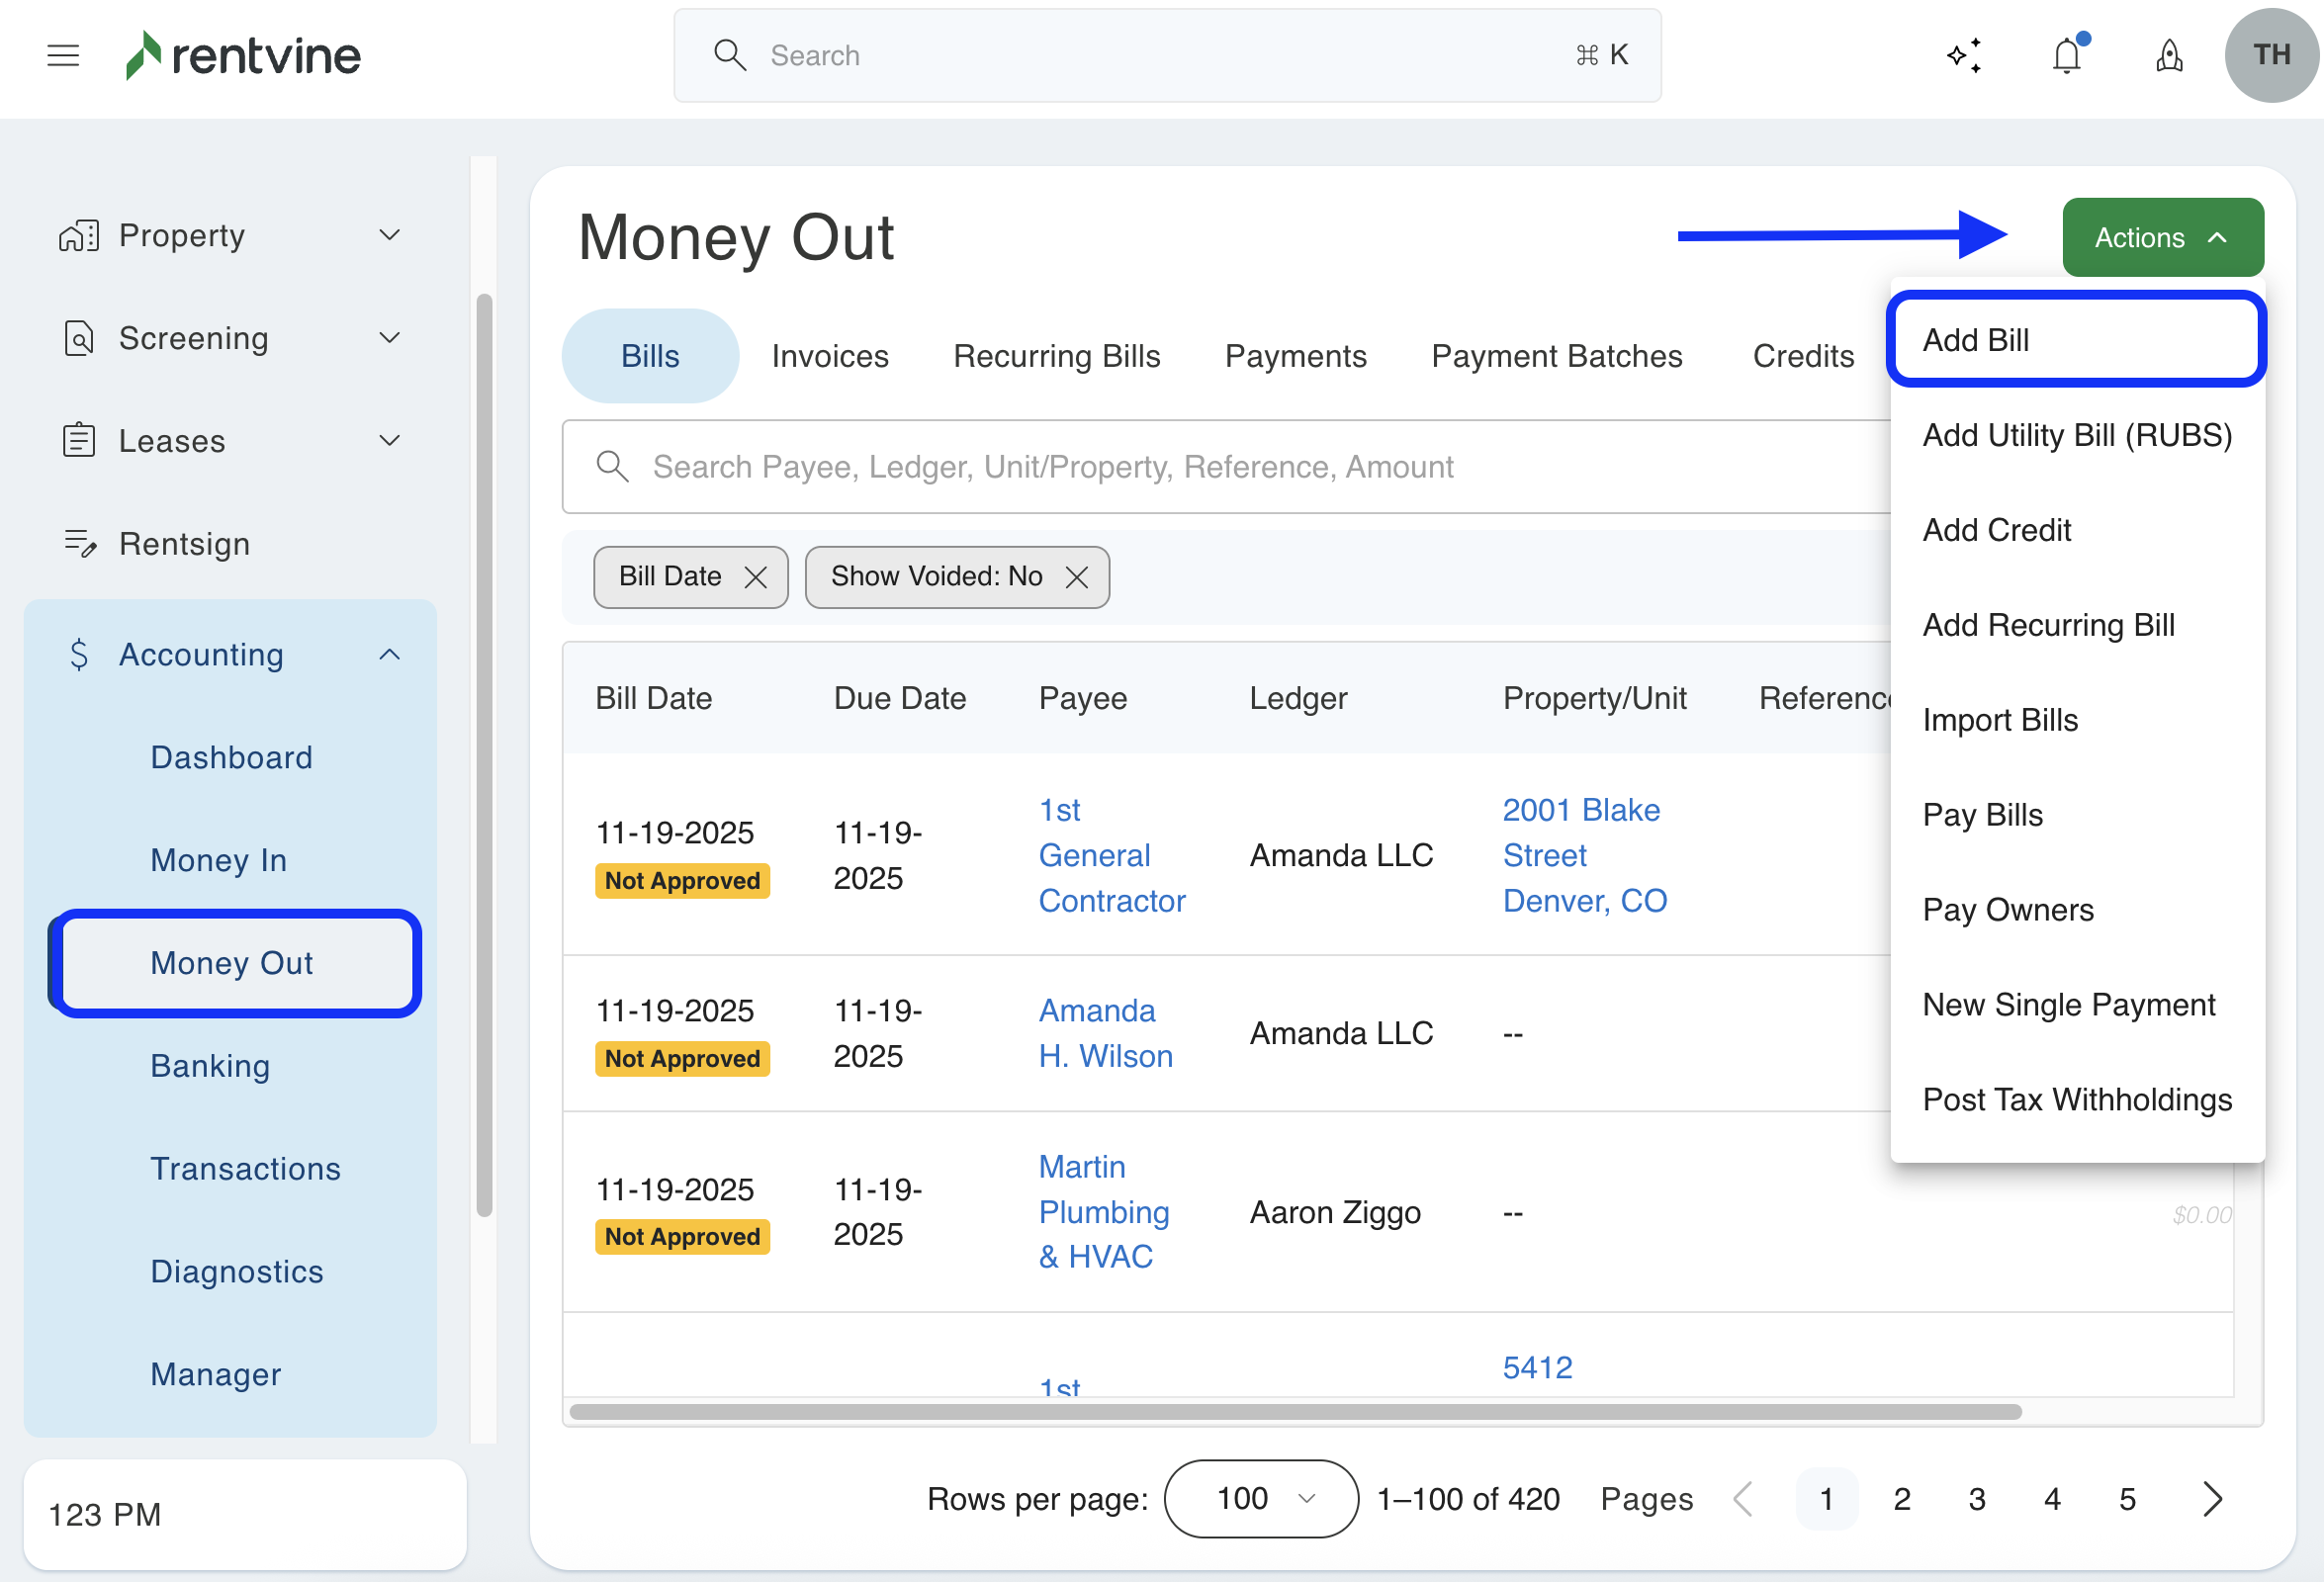
- From the dashboard view of Rentvine, click on the Accounting dropdown on the left-hand side
- Click on Money Out from the dropdown
- On the right-hand side, click on the green Actions button and select Add Bill
-
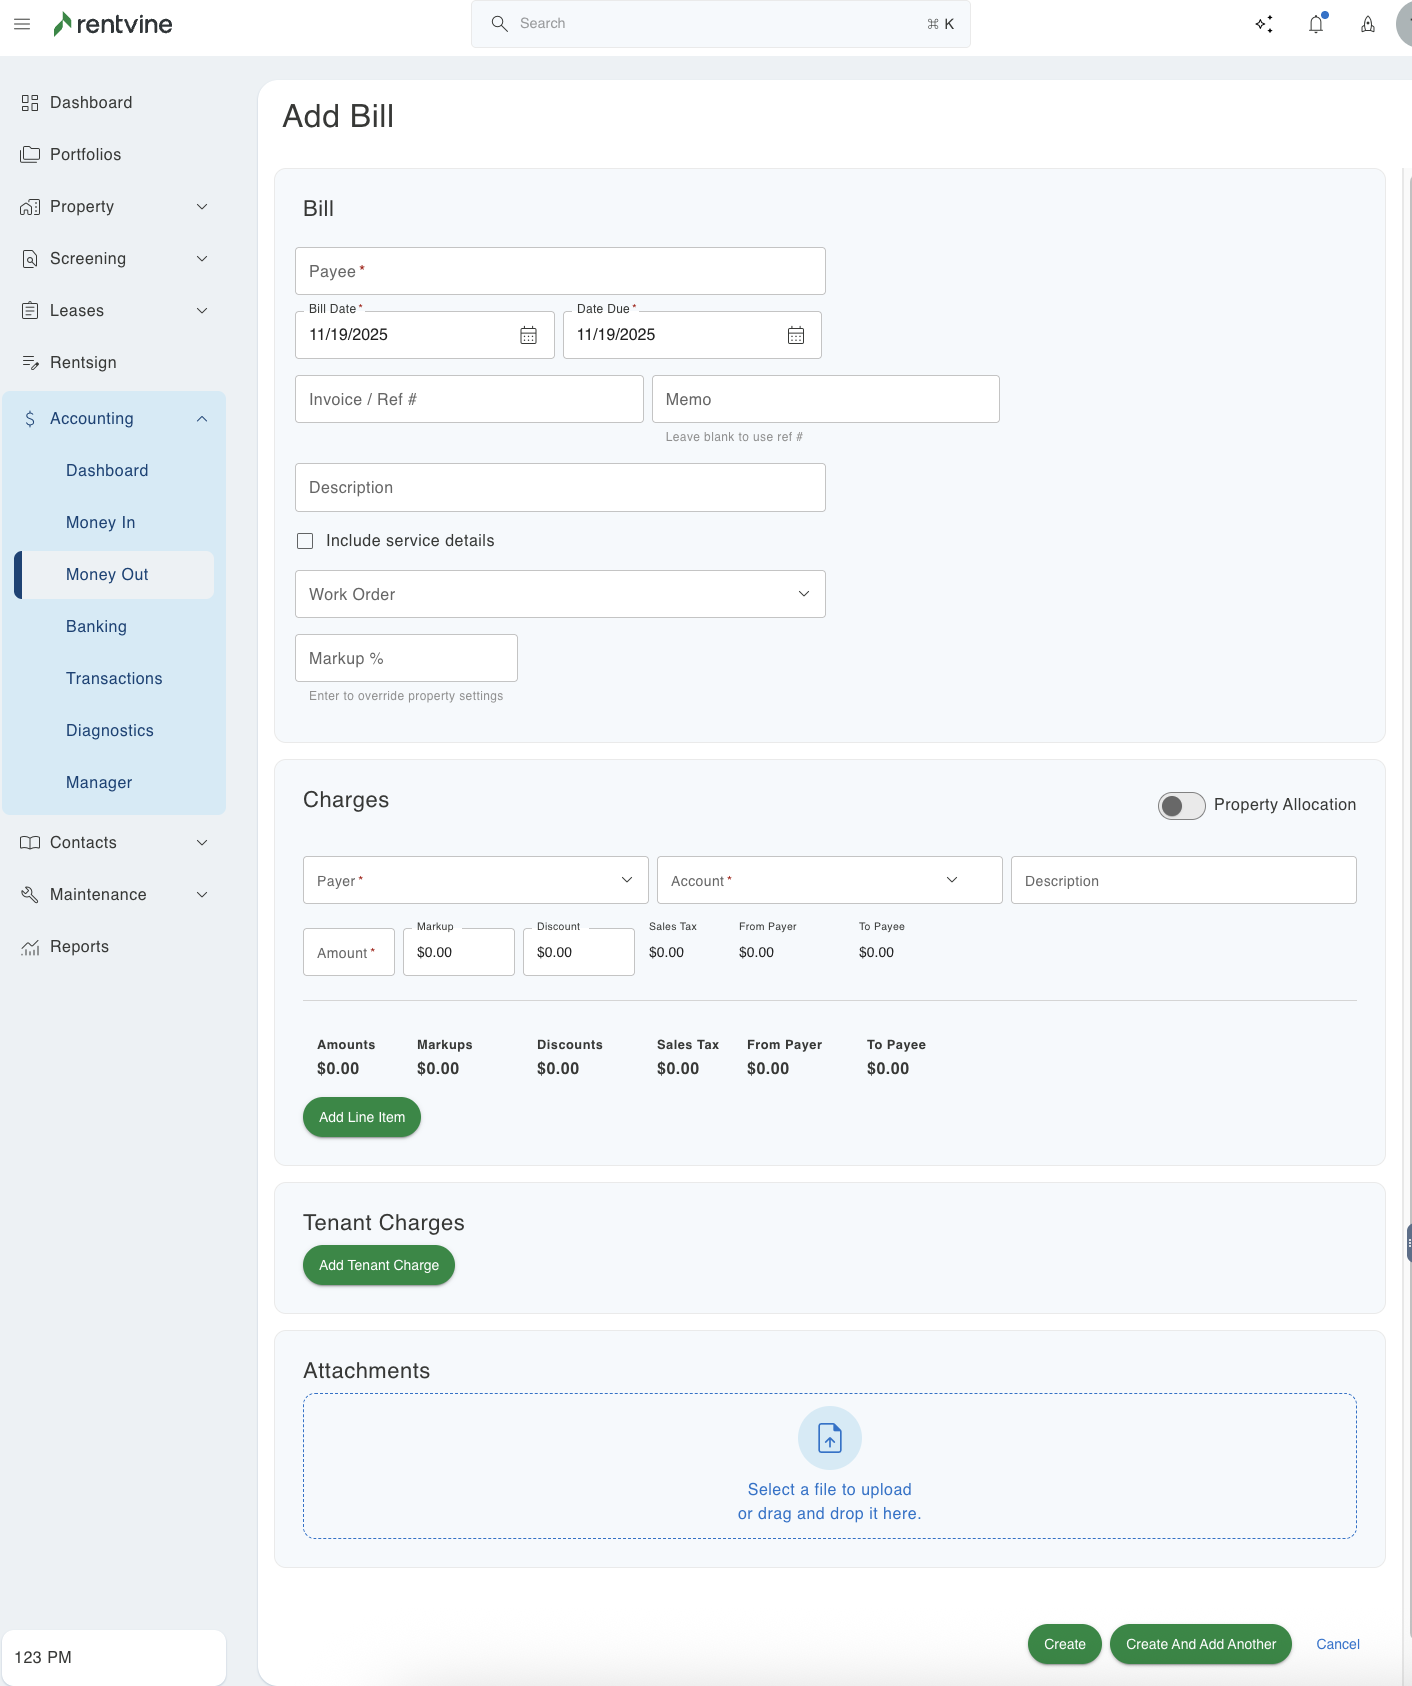
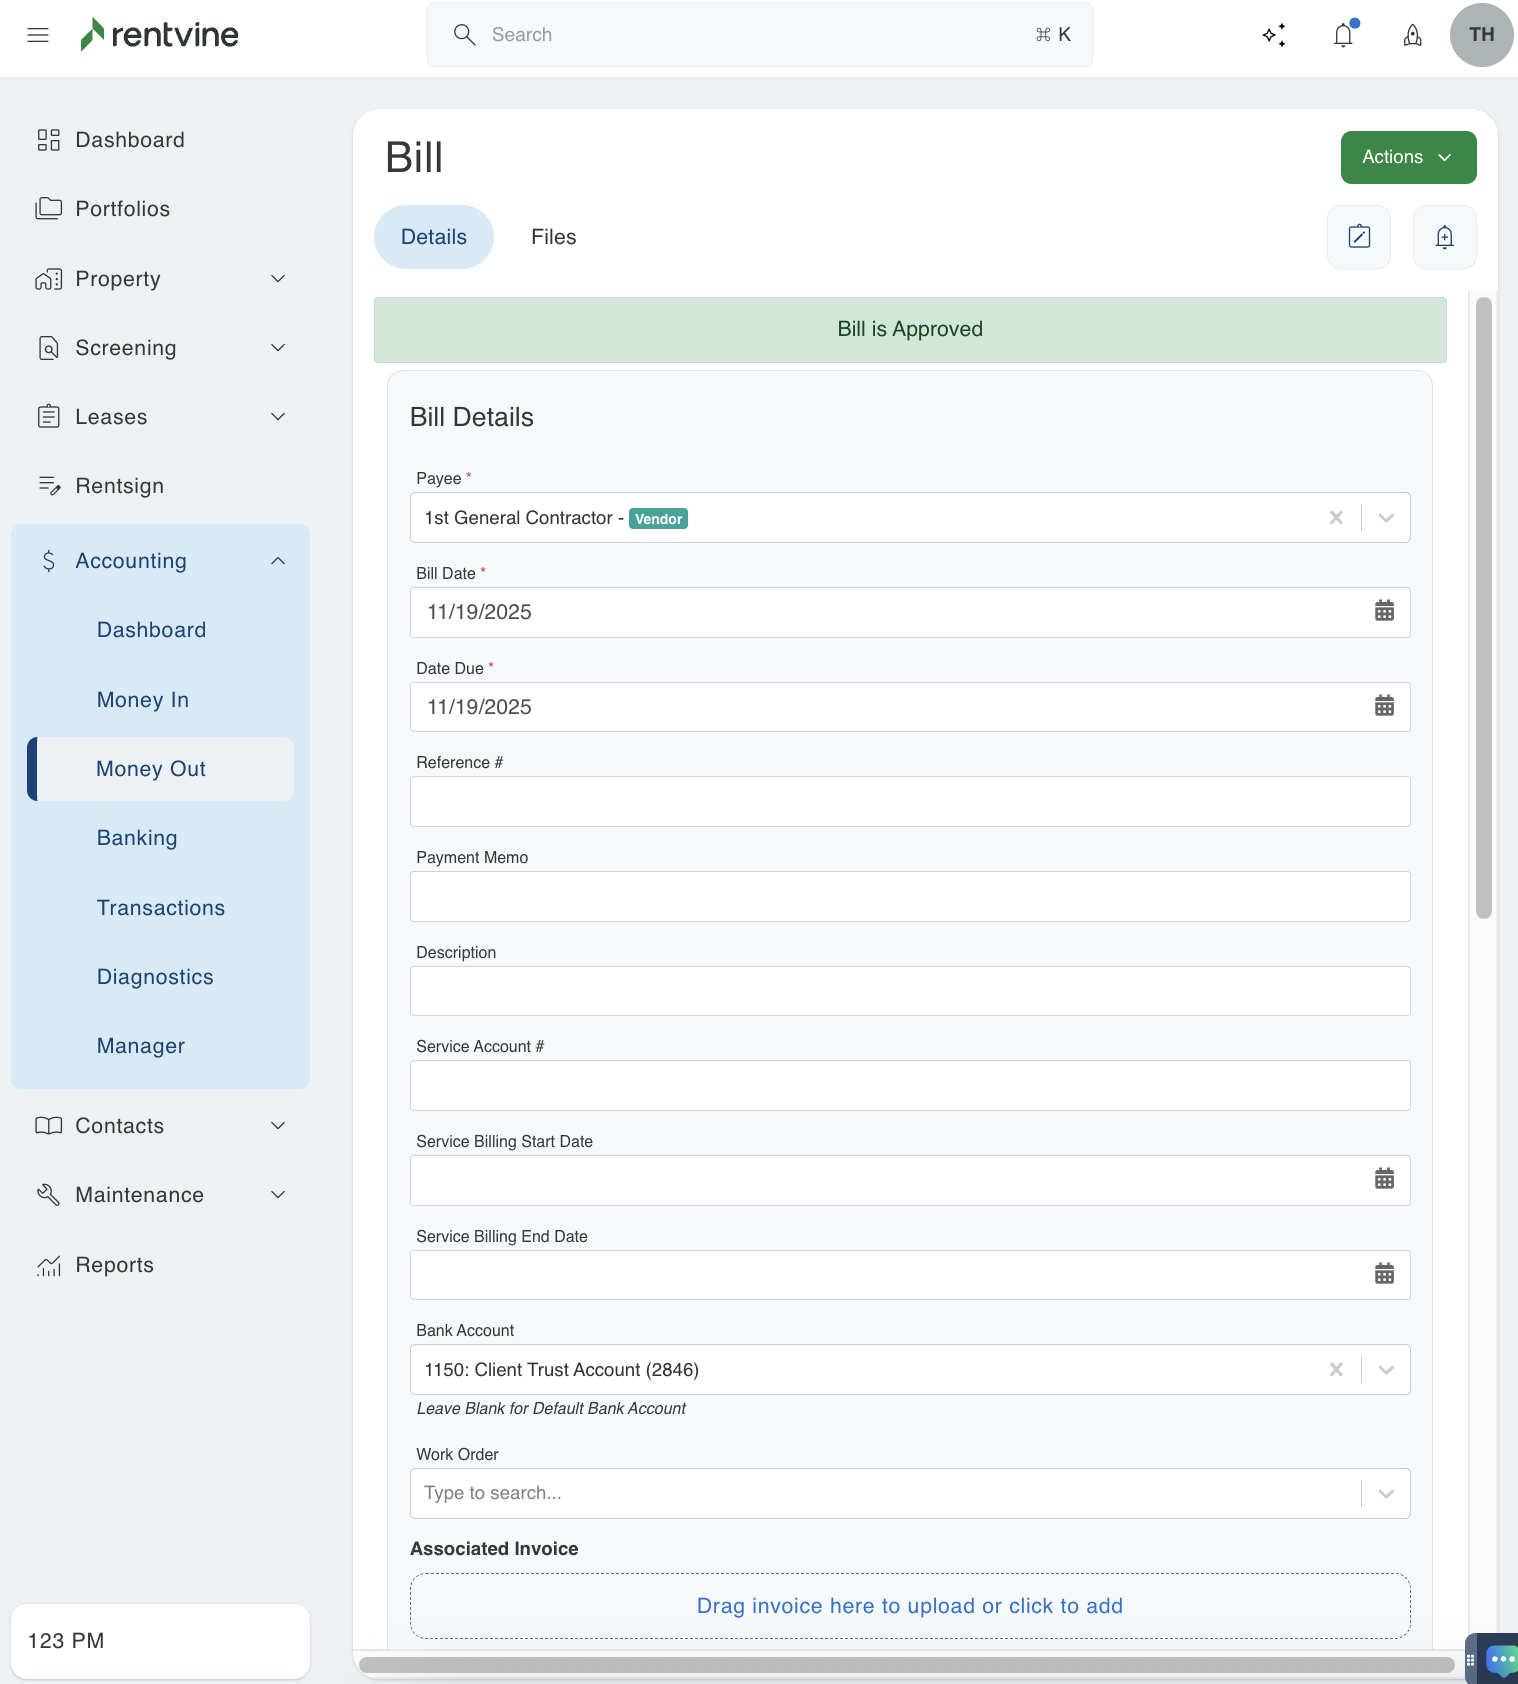
- On the next screen, enter the Bill Details
- Enter/ Select Payee ( This field is required). This is who the bill is paying
- Enter the Bill Date and Date Due
- Enter the Invoice #/ Reference #
- Enter the Payment Memo or leave blank to use the Reference #
- If you want to associate this bill with a Work Order, fill in the work order number.
- You can override the bank account on a bill. You can select the bank account the funds are coming to pay for the bill.
- On the next screen, enter the Bill Details
-
-
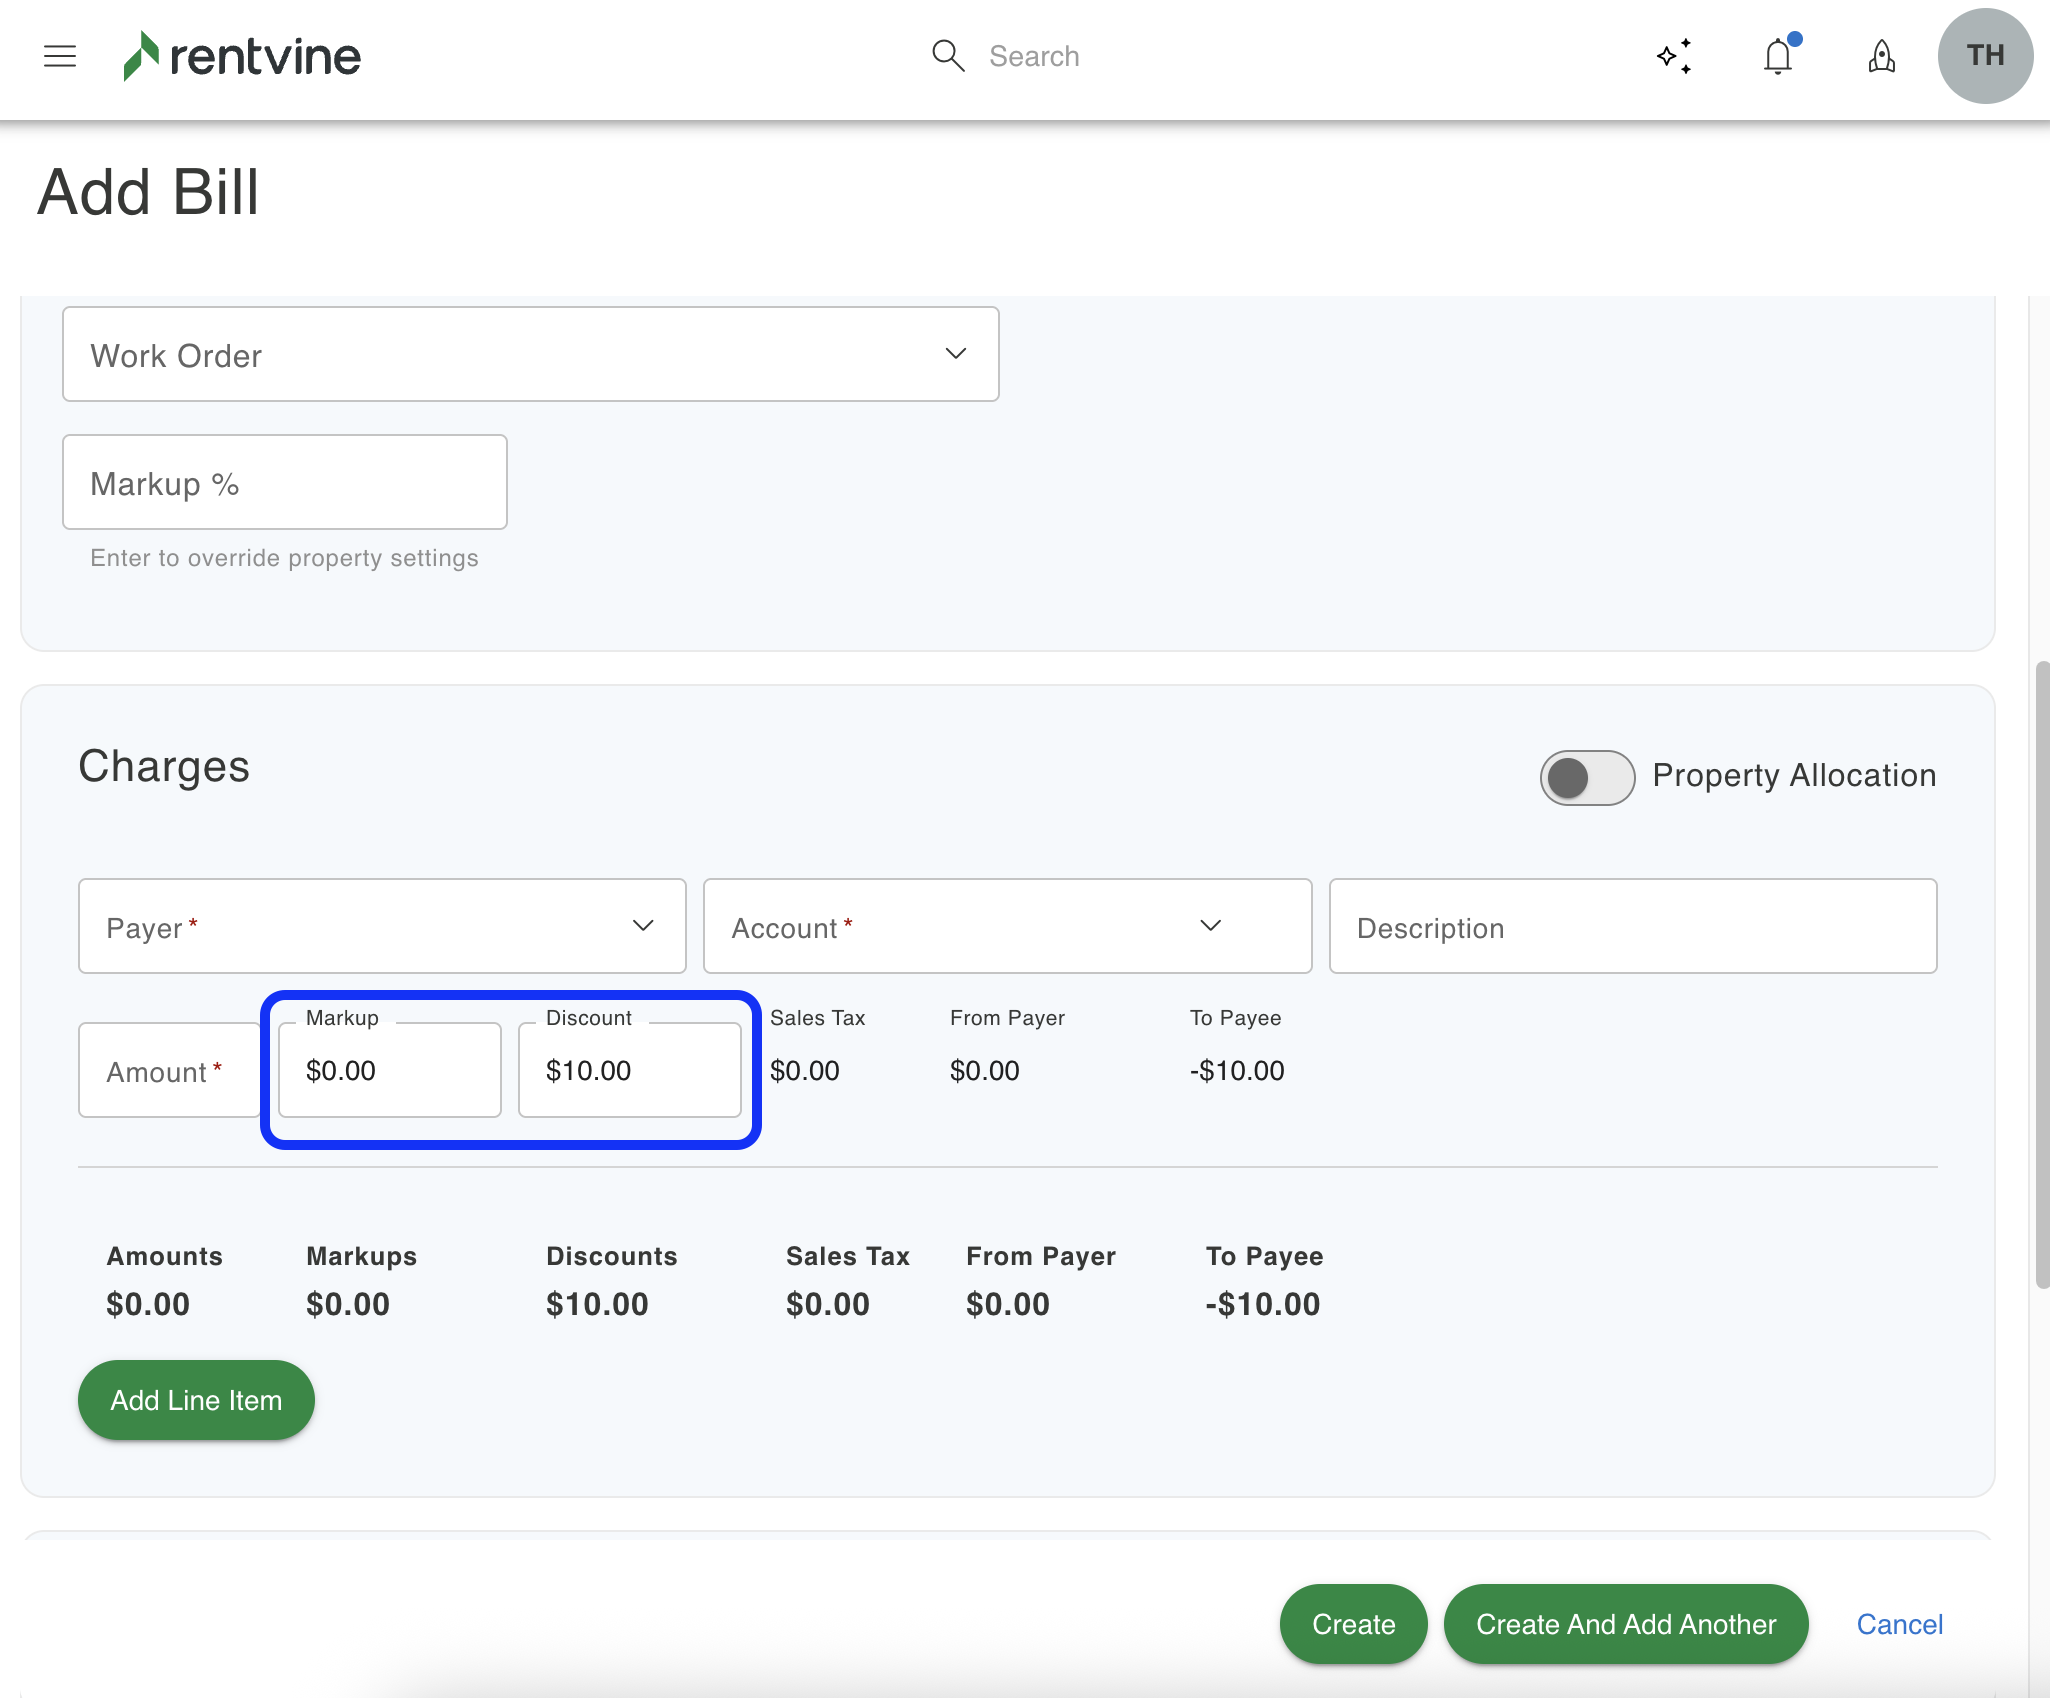
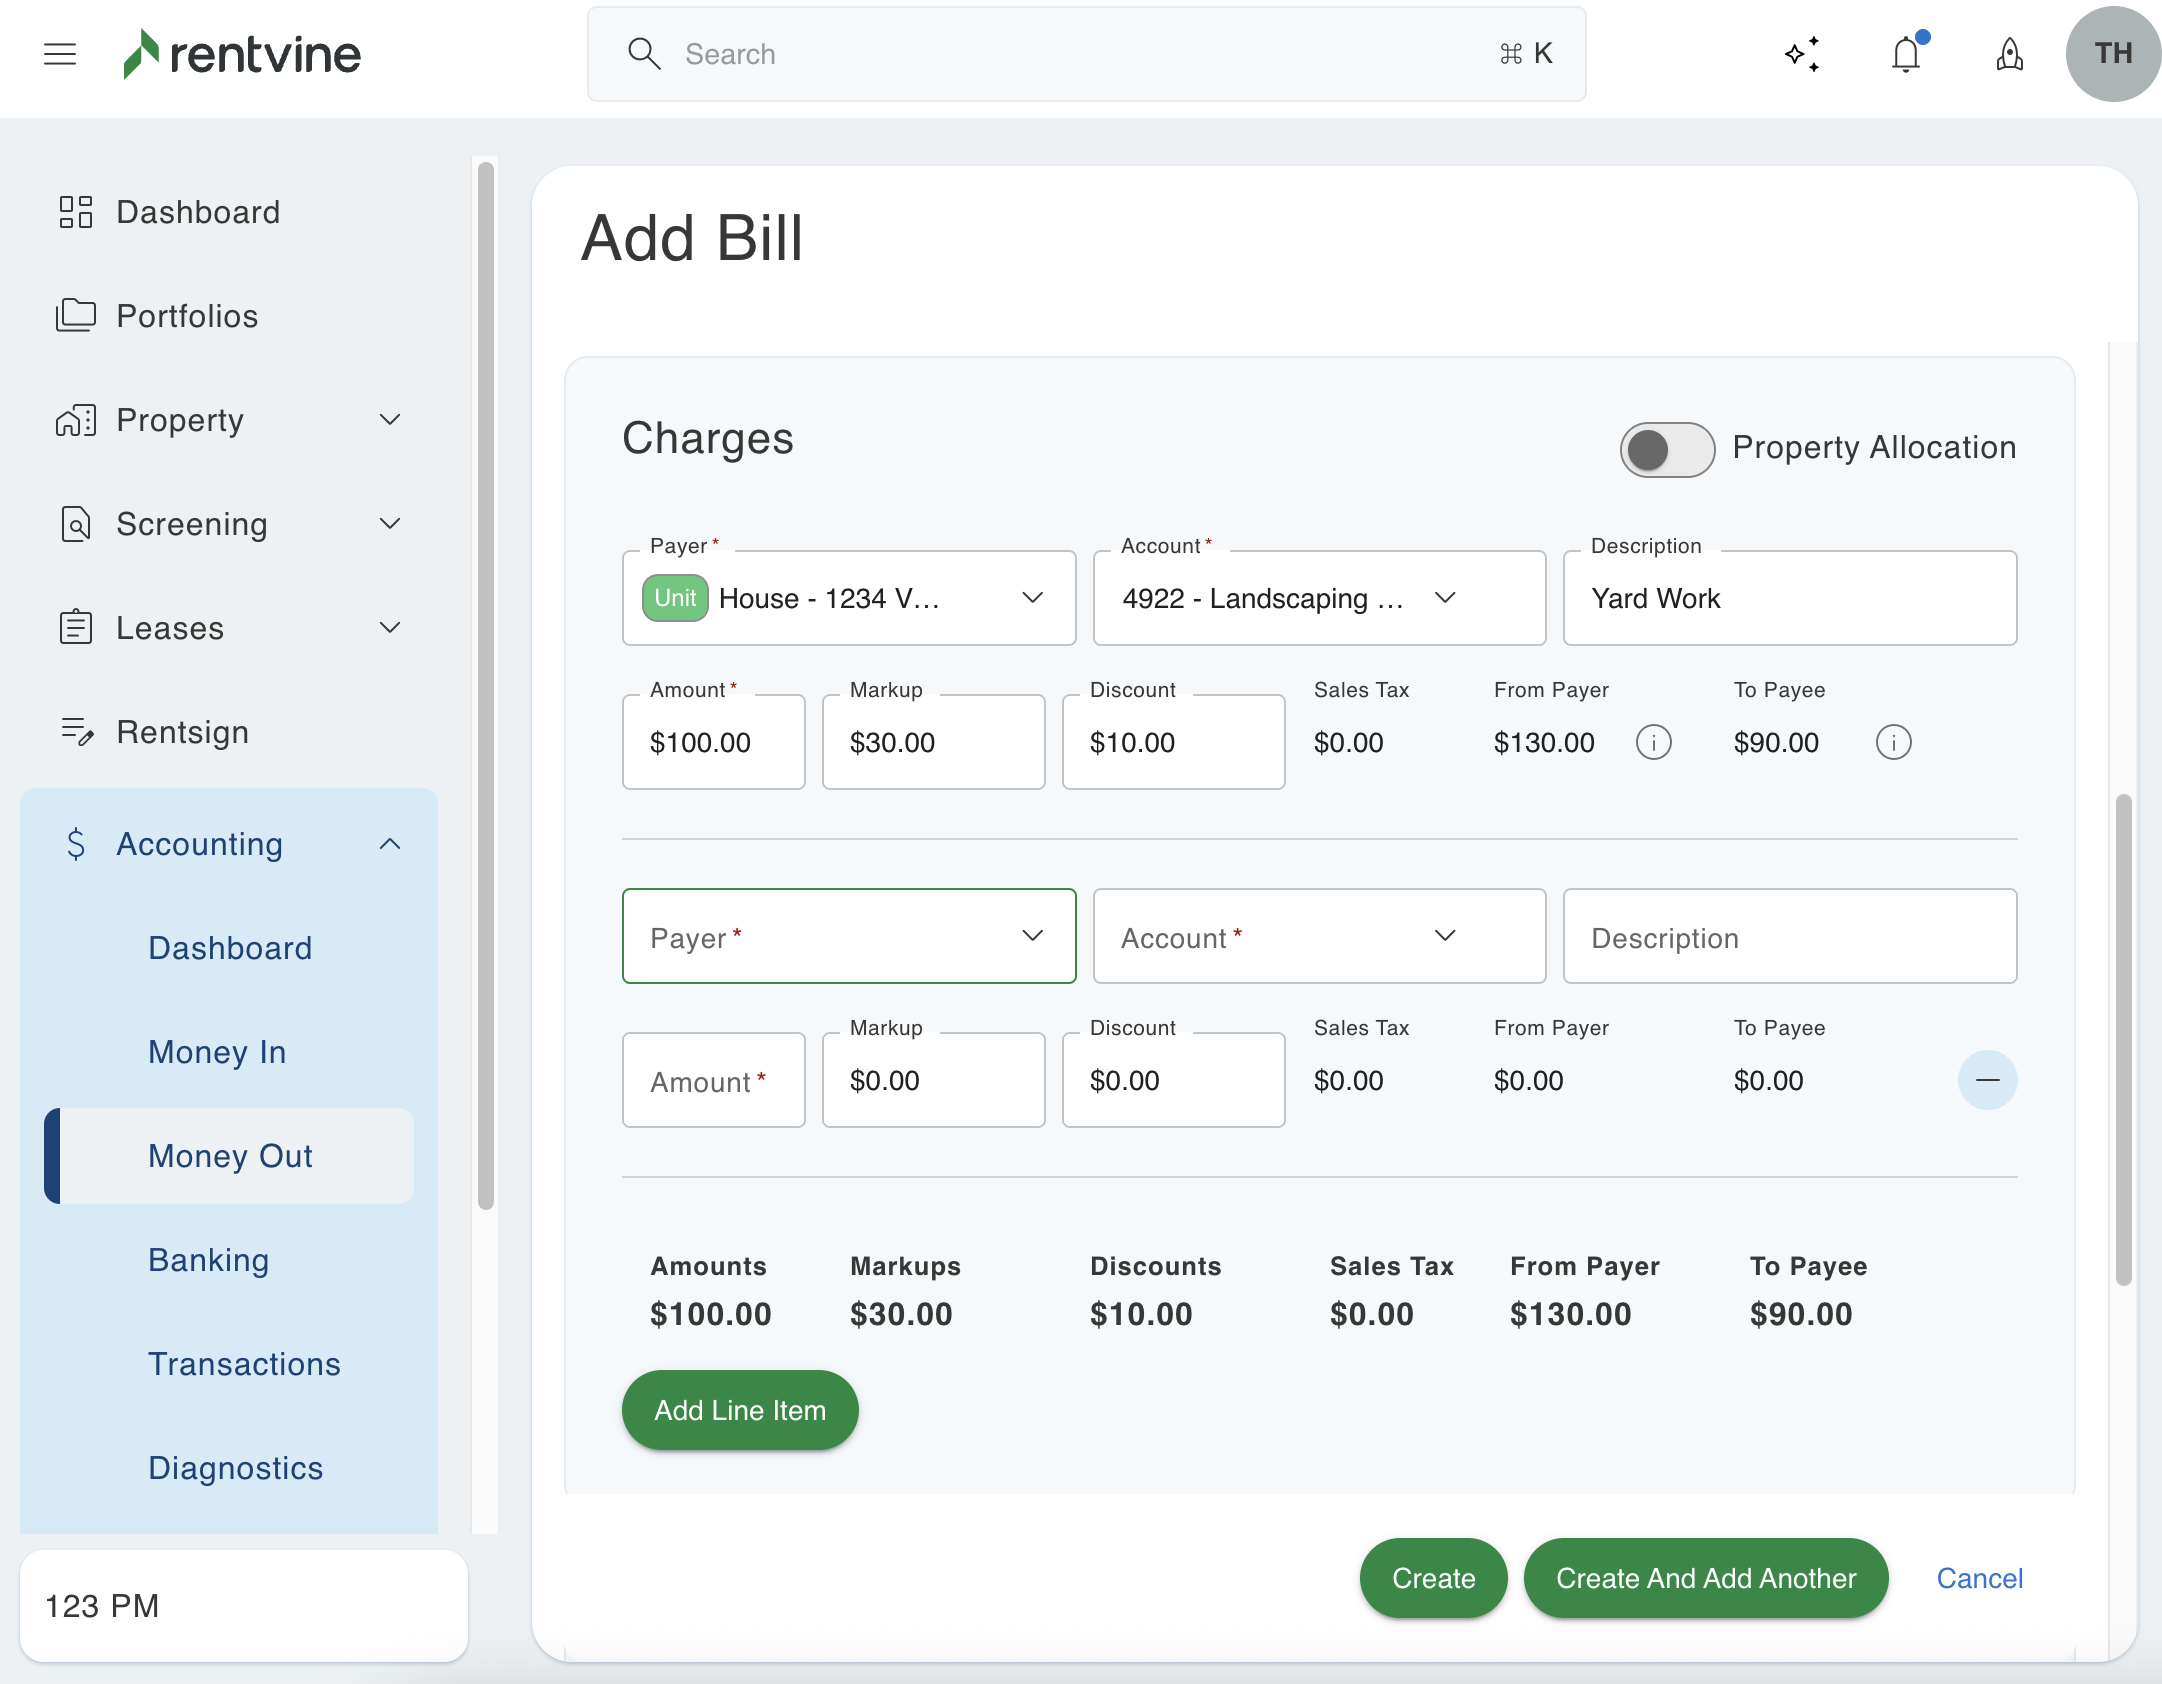
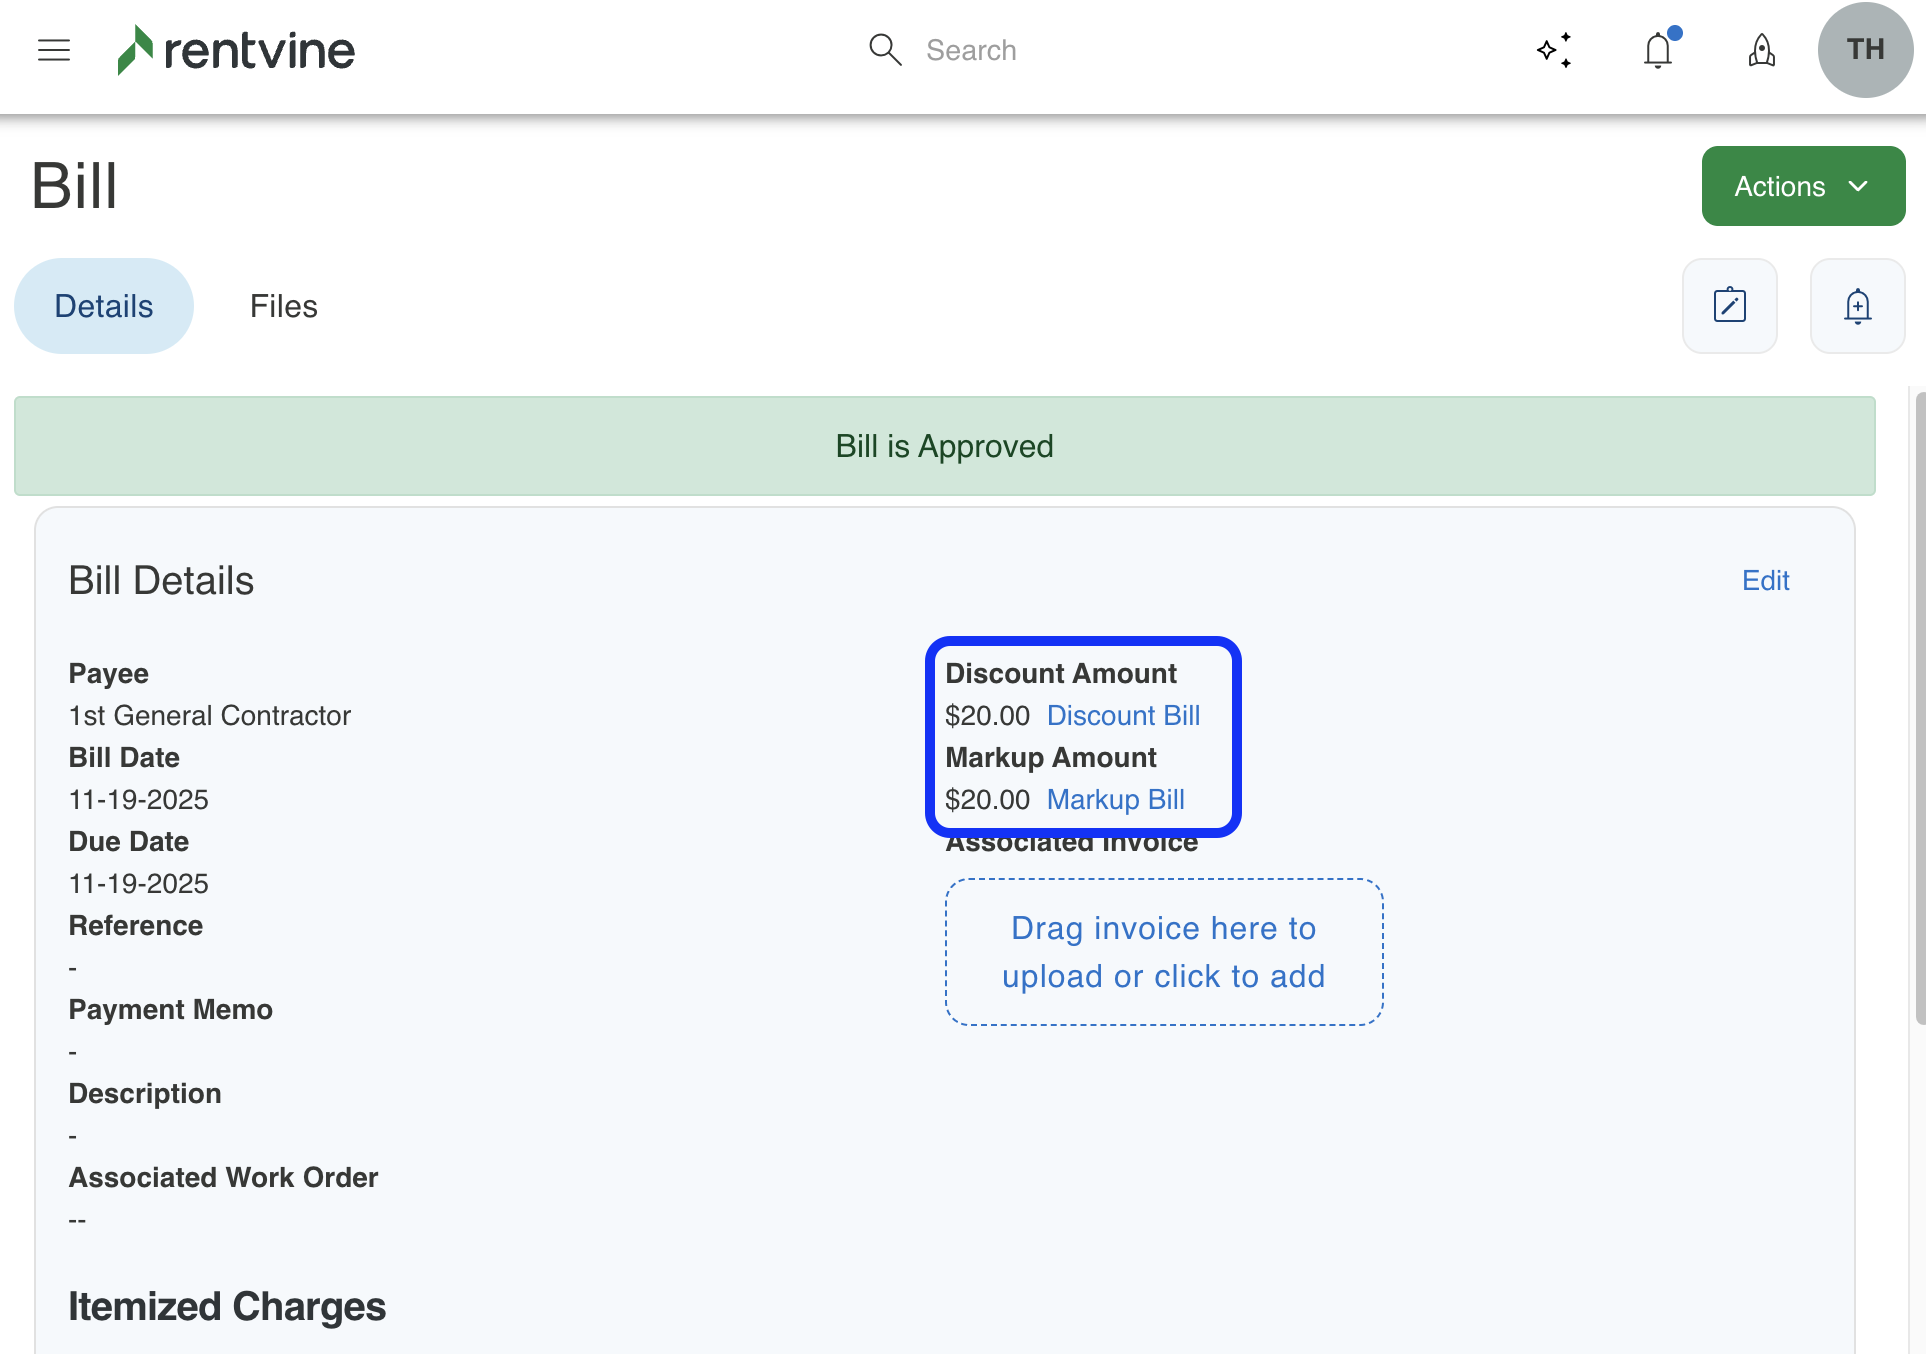
- If a vendor is selected and you have markups enabled, you will see the Markup. In the Markup field, enter an amount if you plan on marking up this bill for the owner. You can also enter a Discount. If you've added a default discount amount to the vendor contact, it will autofill
-
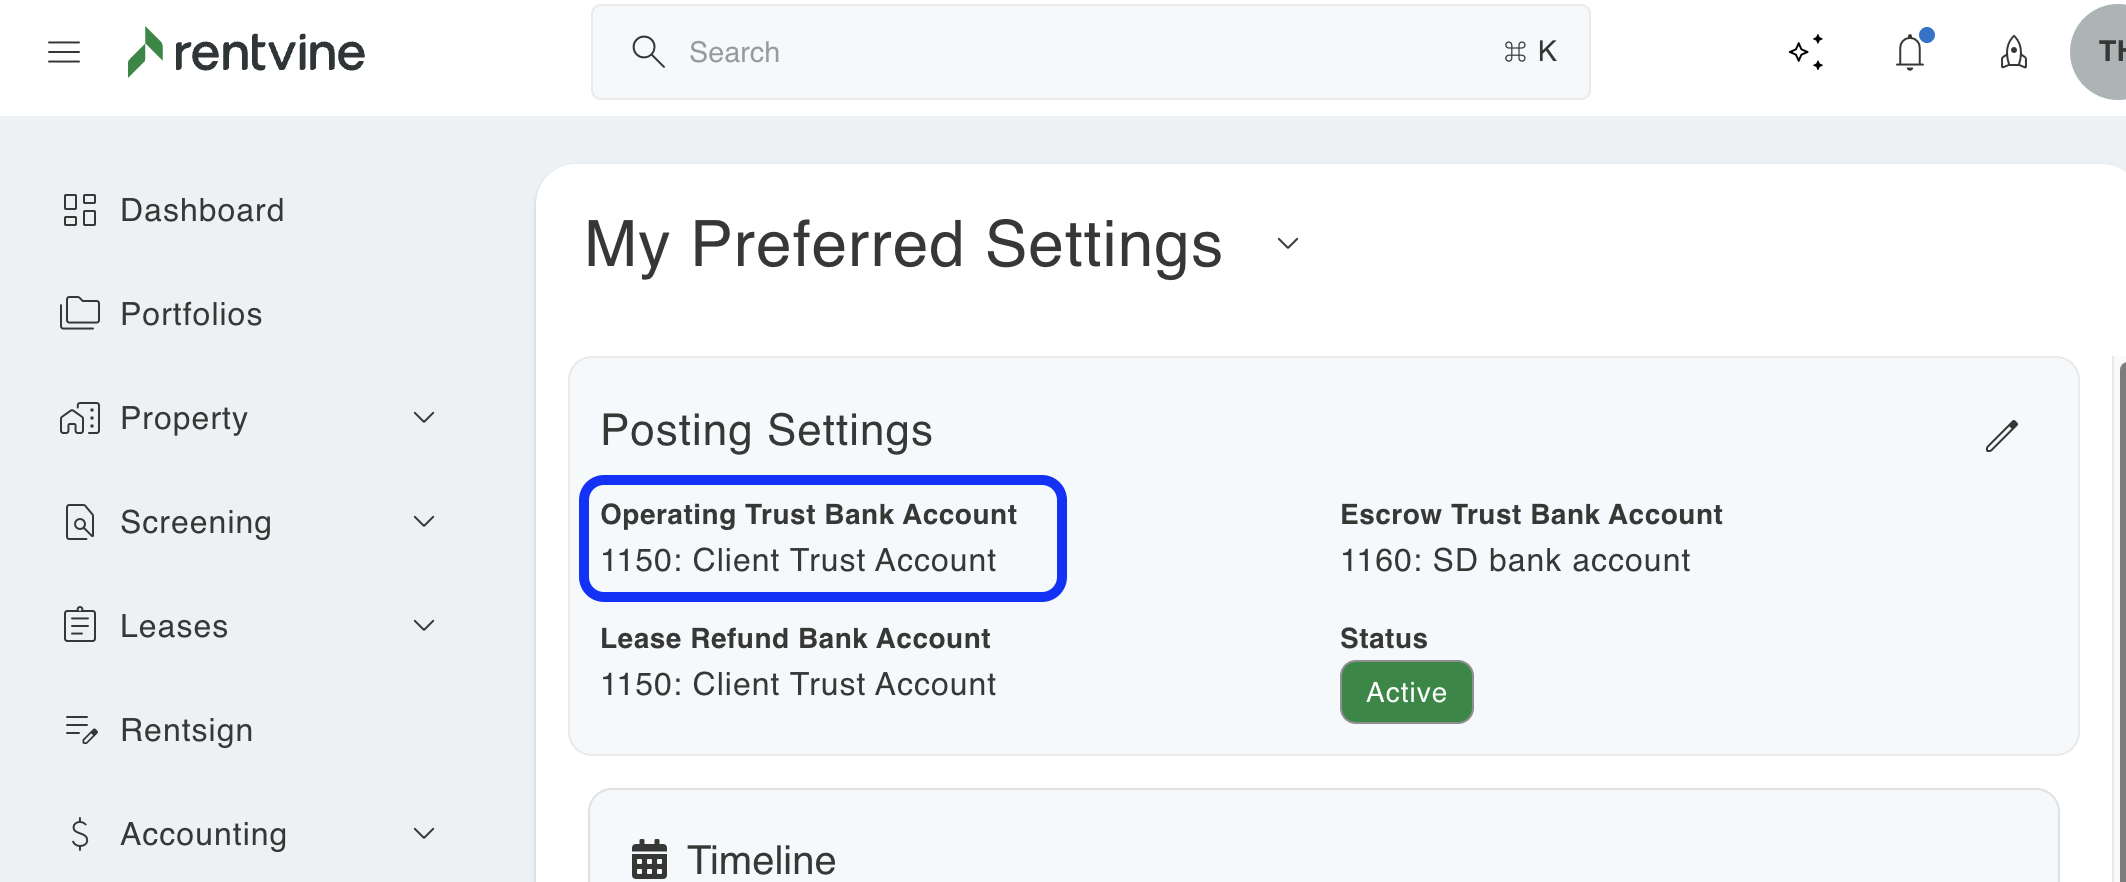
If the bank account on the bill is left blank, the system will use the default bank account. The default bank account on a bill is pulled from the "Operating Trust Bank Account" field on a posting setting.
-
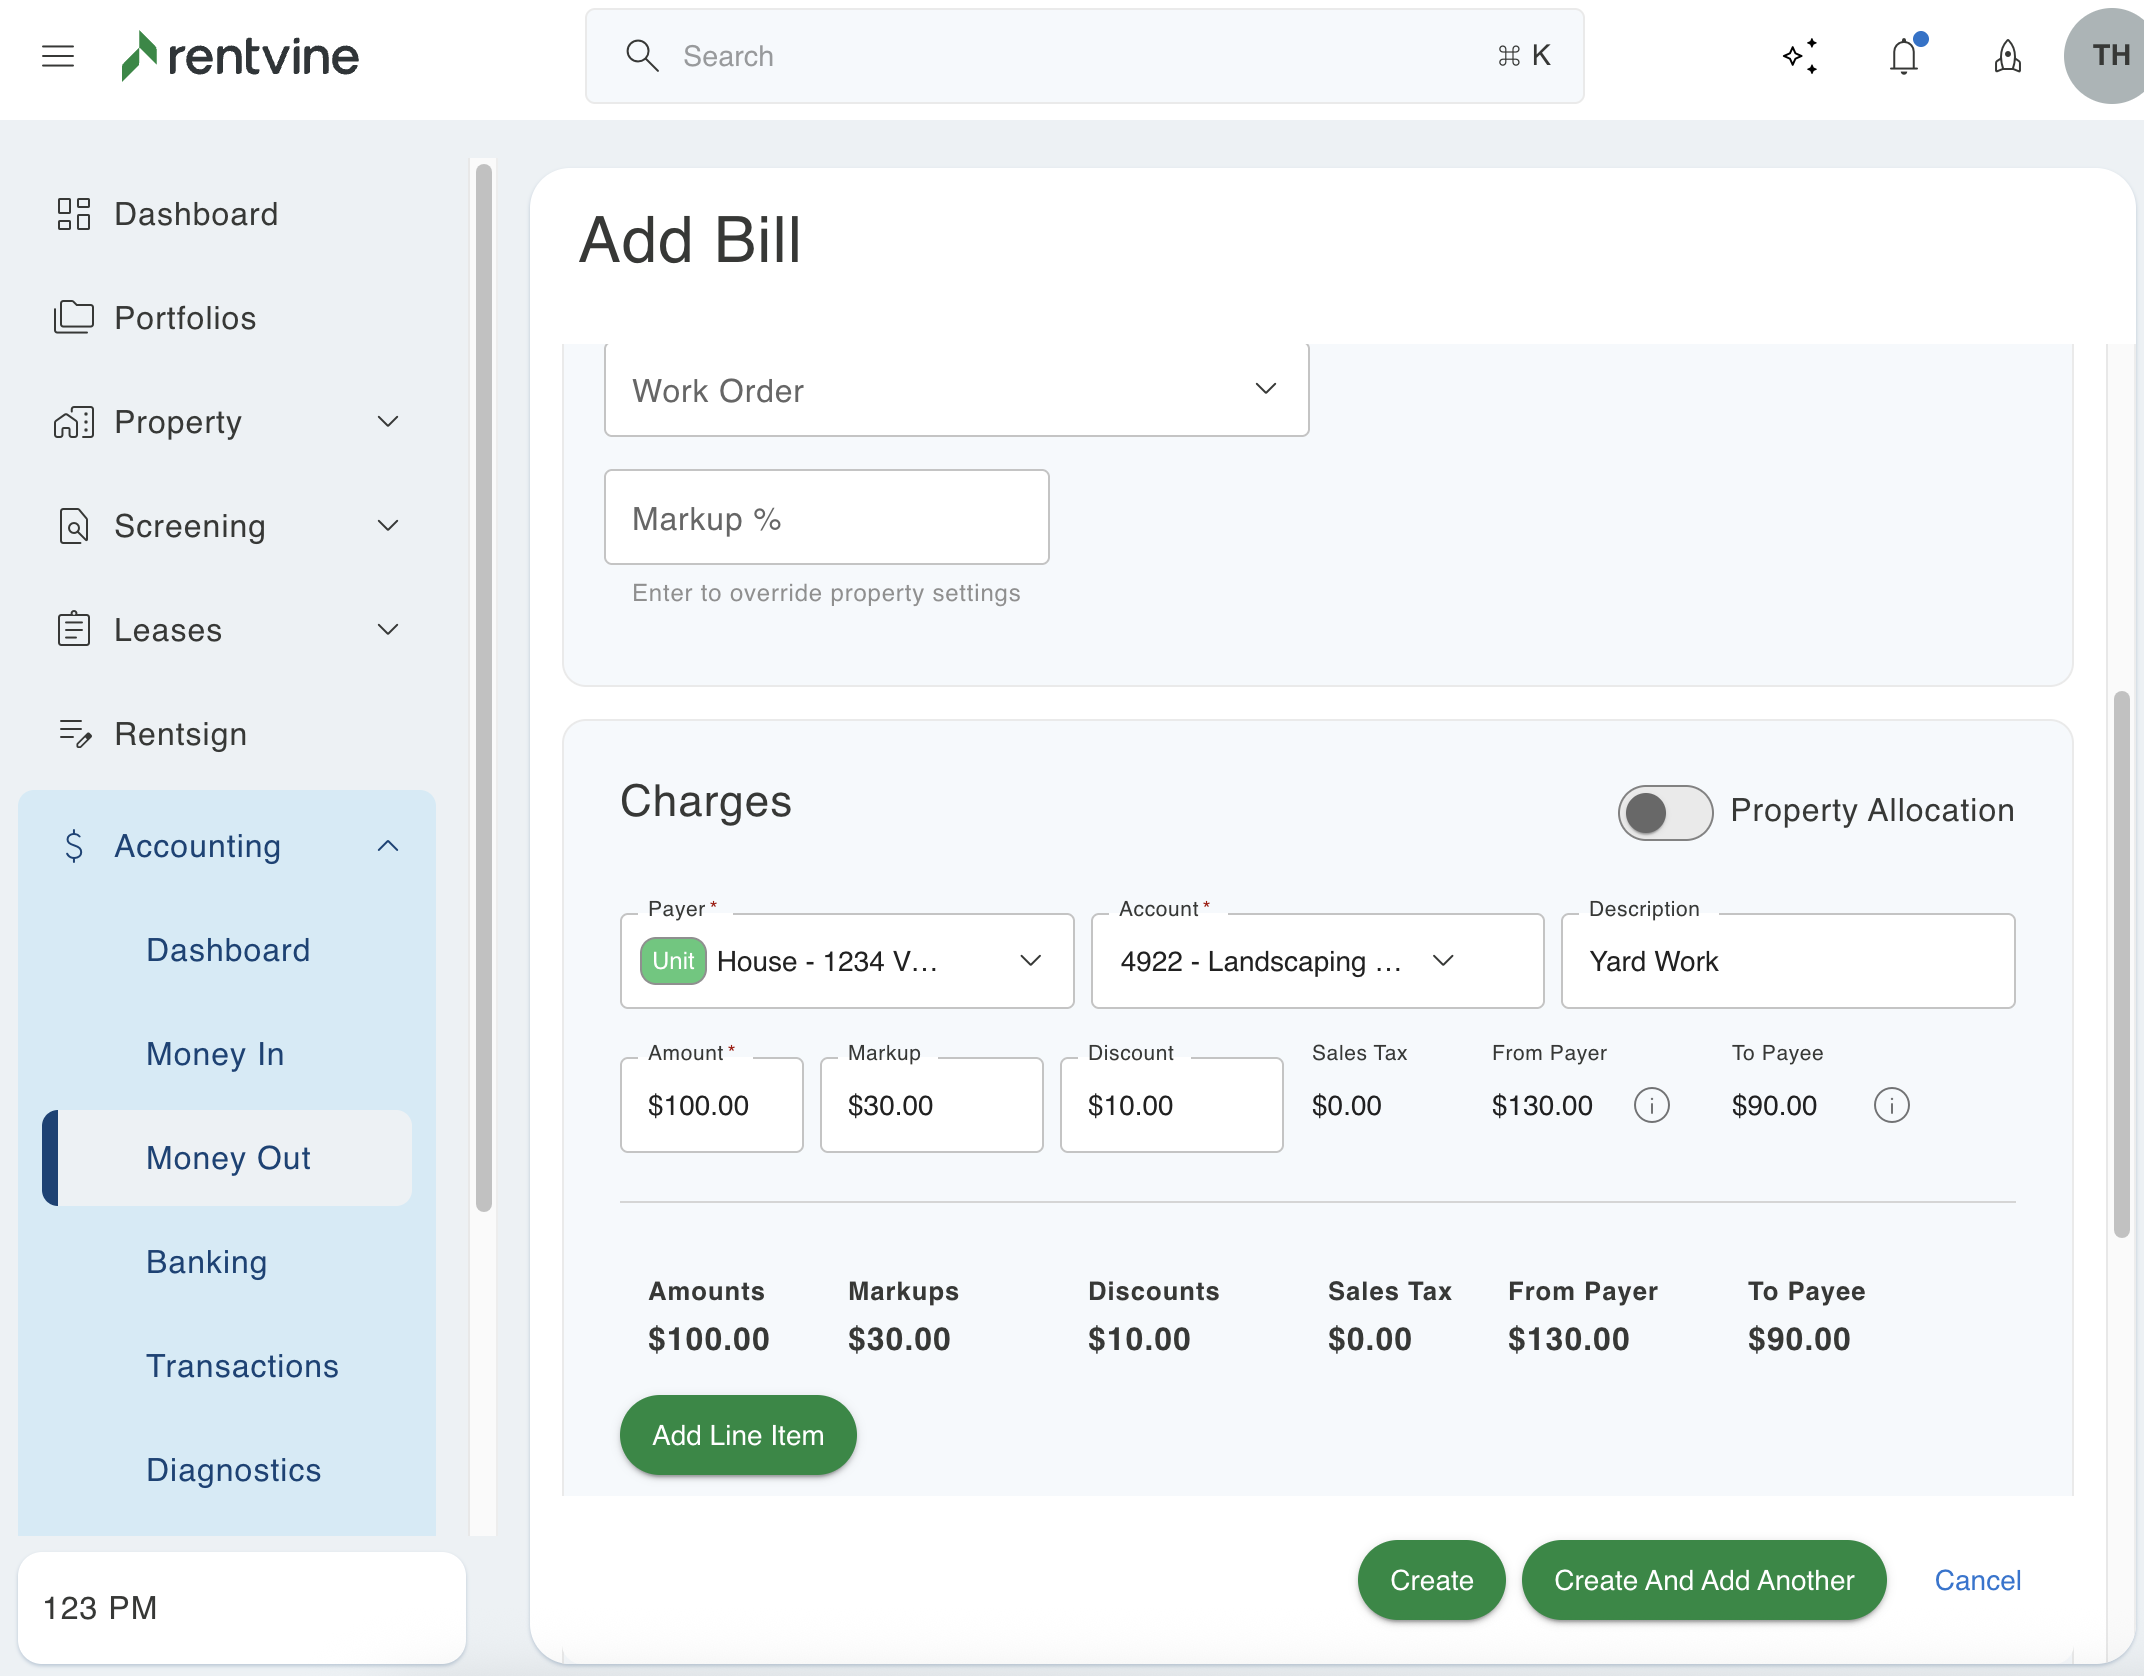
- Complete the New Itemized Bill Charges section
- Enter/ Select Payer. This is who will be paying the bill, i.e, Property, Unit, or Portfolio (owner)
- Enter the Account. This will typically be an expense account
- Enter the Amount of the bill charge
- Enter the Description for what this charge is for
- Complete the New Itemized Bill Charges section
-
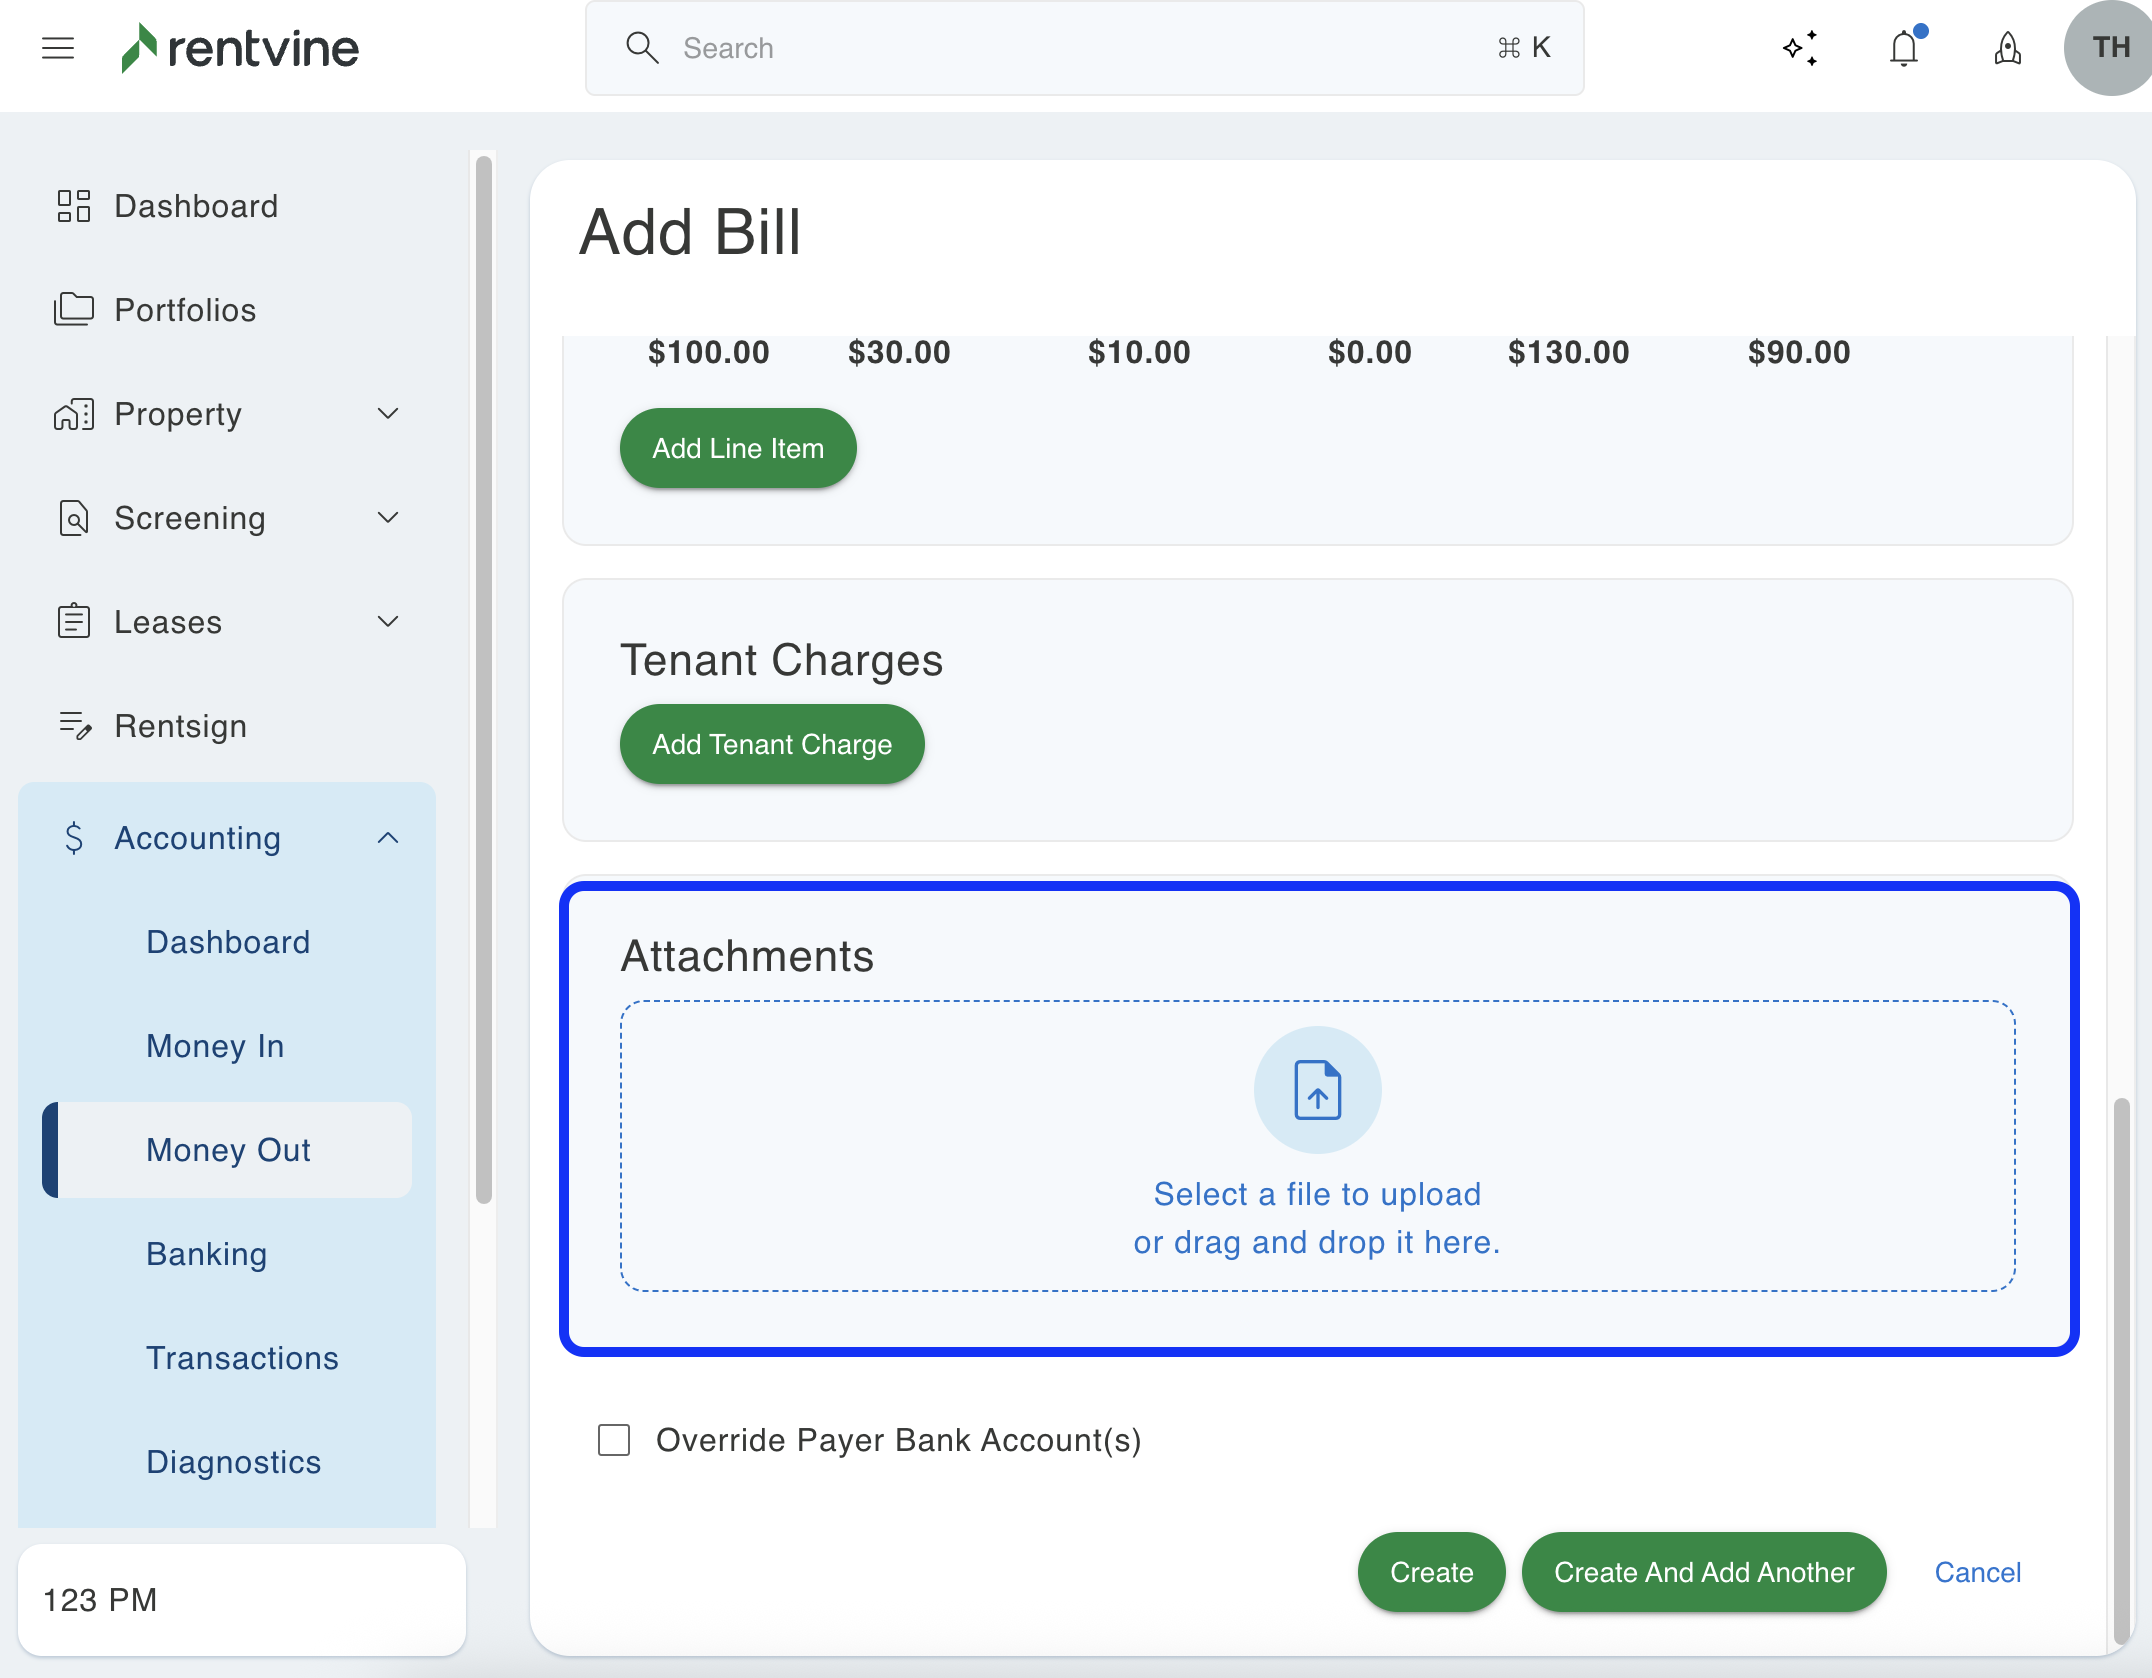
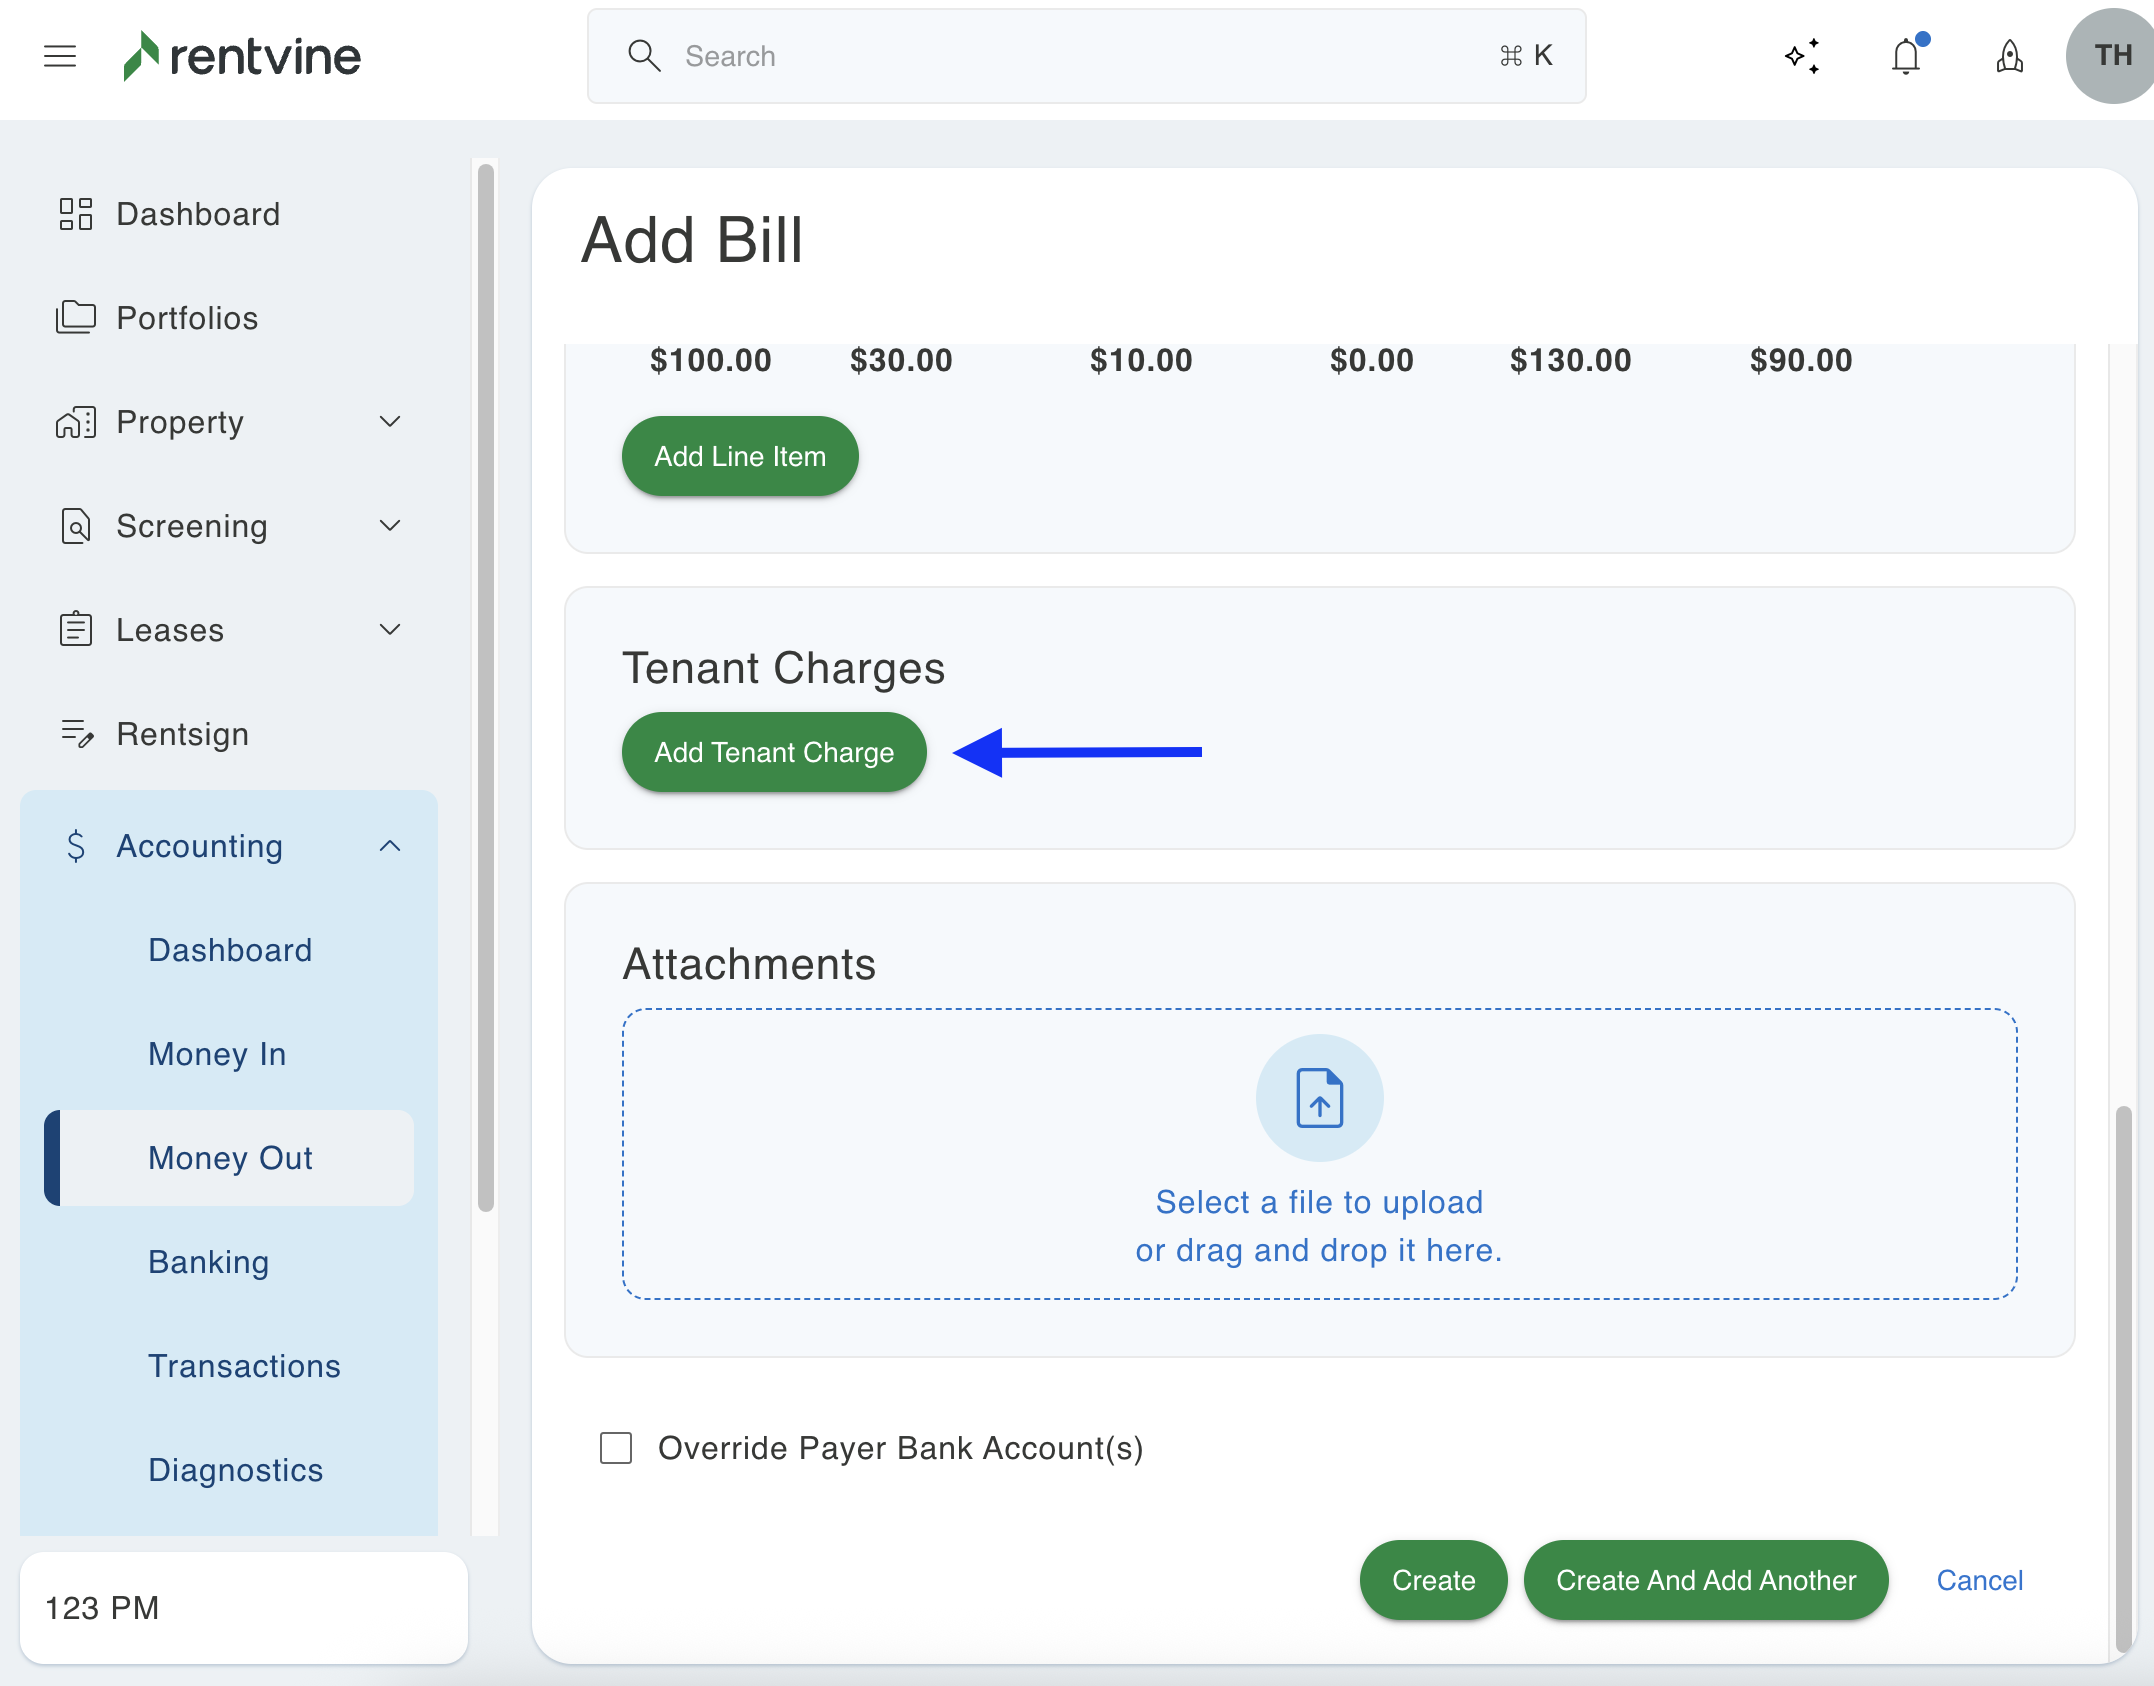
- In the Attach Files section, you can attach a file/invoice
- Drag and drop to the green Attach Files section to upload files
- Or, you can click on that section to search your computer for a file
- In the Attach Files section, you can attach a file/invoice
-
- In the Charge Tenants section, you have the option to add a charge to a tenant as well. This charge will be created on their lease. This feature is typically used to reimburse the owner for the bill.
- Click the Add tenant charges toggle option on to drop down the fields to charge a tenant
- In the Tenant/Lease field, type in the tenant's name or the address of the lease, and select the correct tenant
- Select an Account for the charge. This will typically be an income account, i.e., Reimbursement
- Type in the Amount you are charging the tenant
- Lastly, enter a Description of the charge
- If you need to add another tenant charge, click on the Add Another Tenant Charge button, and follow the same steps
- In the Charge Tenants section, you have the option to add a charge to a tenant as well. This charge will be created on their lease. This feature is typically used to reimburse the owner for the bill.
-
- Click the green Save button to create the bill or Save and Add Another to create the bill and add another bill.
Allocating Bills by Property
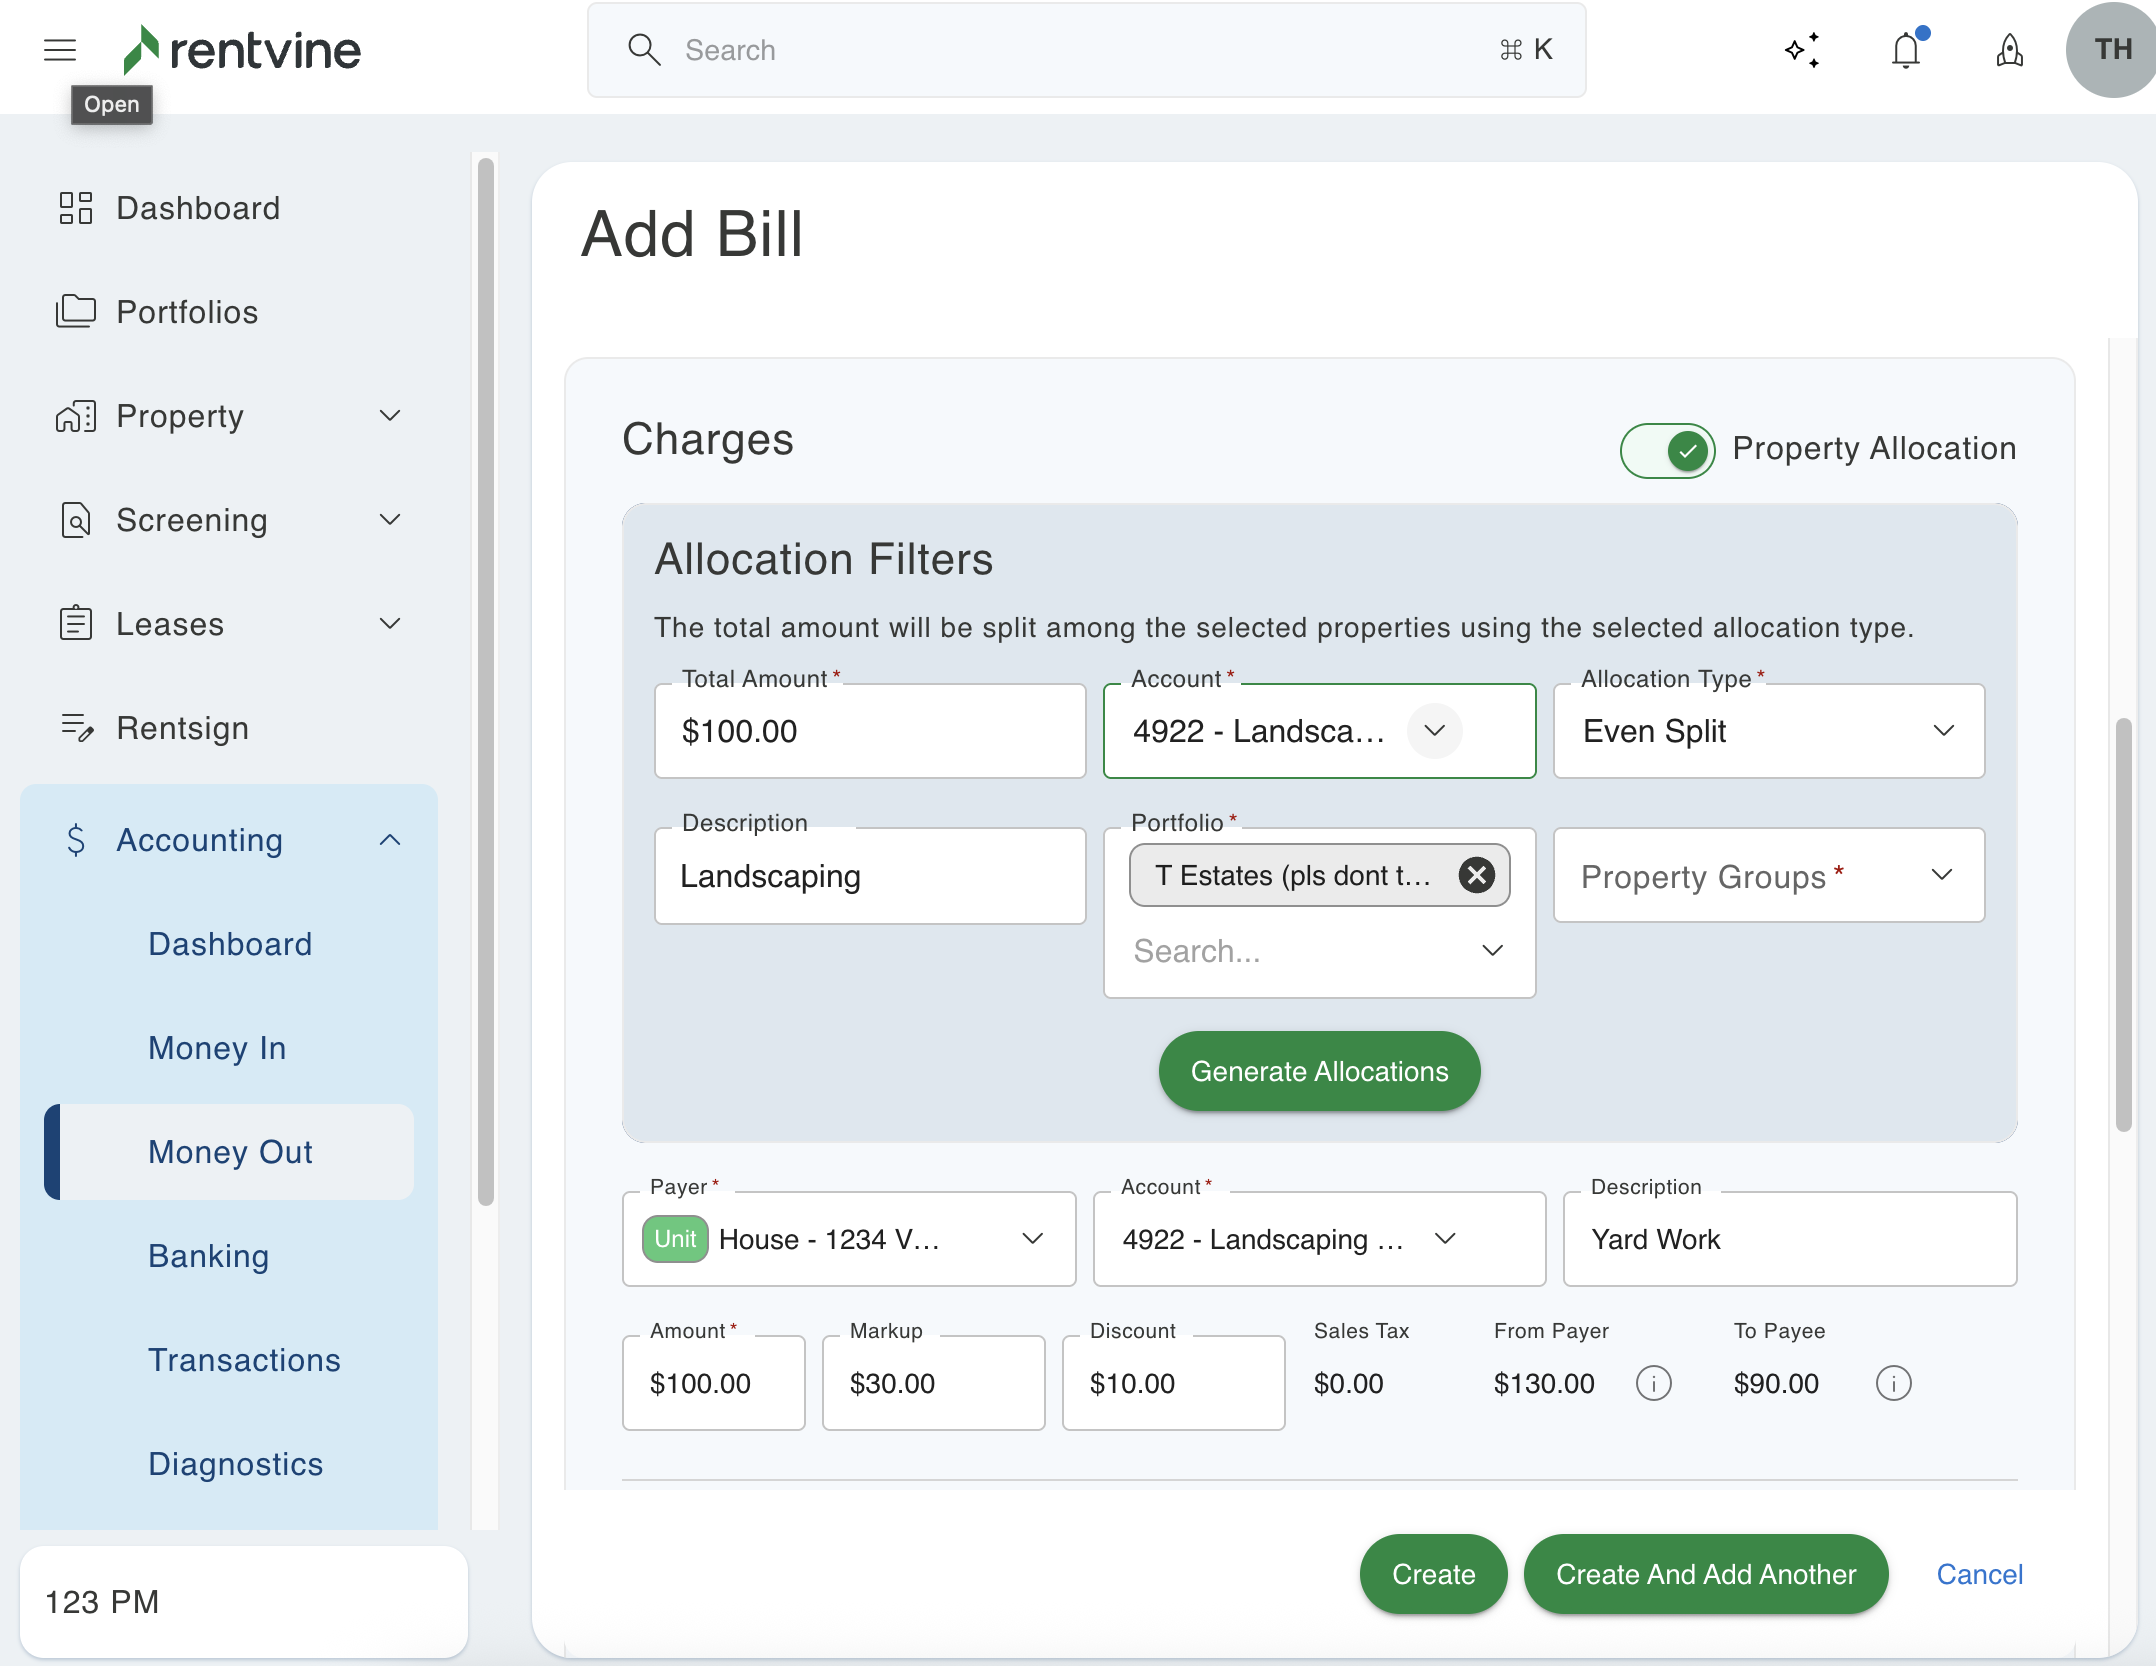
- This next feature can be found when creating a new bill. For this, we are going to create a new bill in the money out tab. In here, you will now see a new toggle labeled "Allocate by property". When turned on, you will first be able to specify some details. For example, you could put a total amount of 1000 dollars and choose an account for miscellaneous expenses. Then you can enter the description for each line item.
- Next, you will be able to use the portfolio and or property group filter to select which properties the amount will be allocated to. You can select one or more portfolios and one or more property groups if you would like.
- The last filter is the allocation type. You will be able to select how you want to allocate the amount. You can select even split, unit count, occupied unit count, and square footage. This will change the amounts on the bills that are created based on the allocation type that is selected. Next, we can click generate allocations, and it will show you all of the line items that can be created.

- It will show the full breakdown based on the selected filters, and you can just click save to create the bill. If you need to remove any line items from this section, you can click the red button next to the line item to remove it. Also, any zero-dollar amounts that are here based on the filters will be skipped, and no bill will be created for them.
How To Edit a Bill
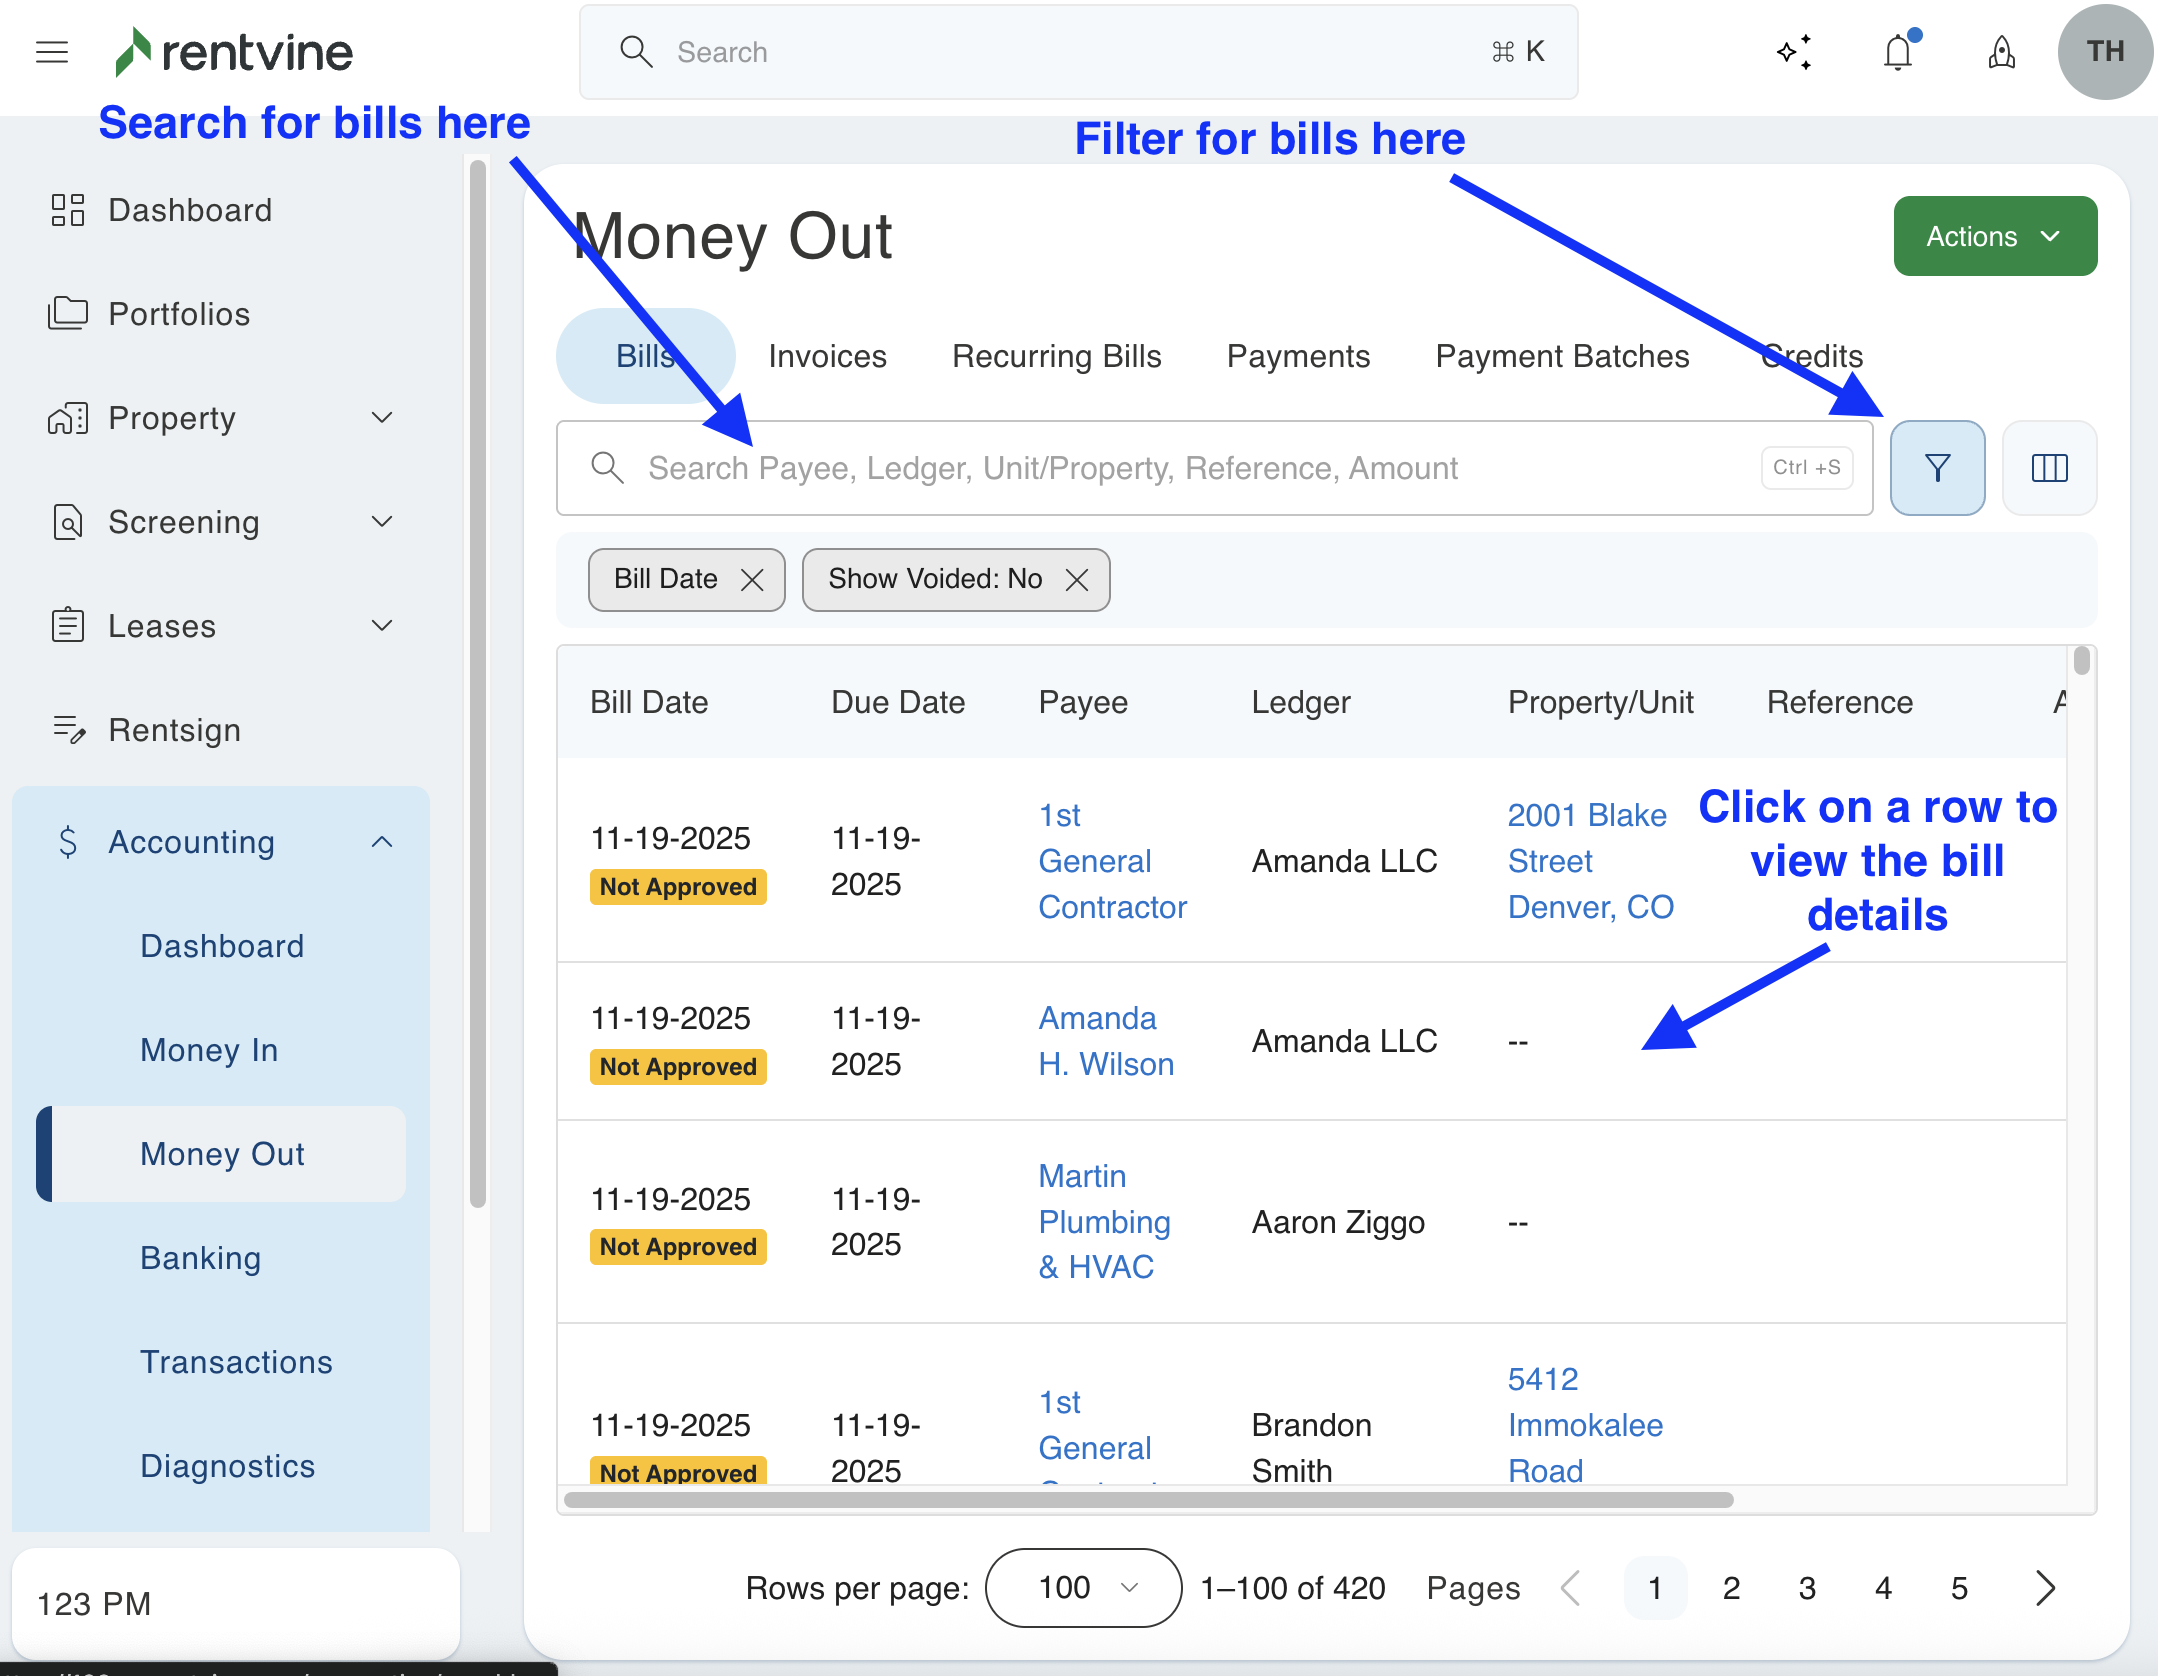
- From the dashboard view of Rentvine, click on the Accounting dropdown on the left-hand side
- Click on Money Out from the dropdown
- The next page shows you a listing of all the bills under the Bills tab. On the next screen, search for the bill you would like to edit in the search field
- From the search results, click on a bill to view it.
- On the bill view page, click on the Edit button to make your changes
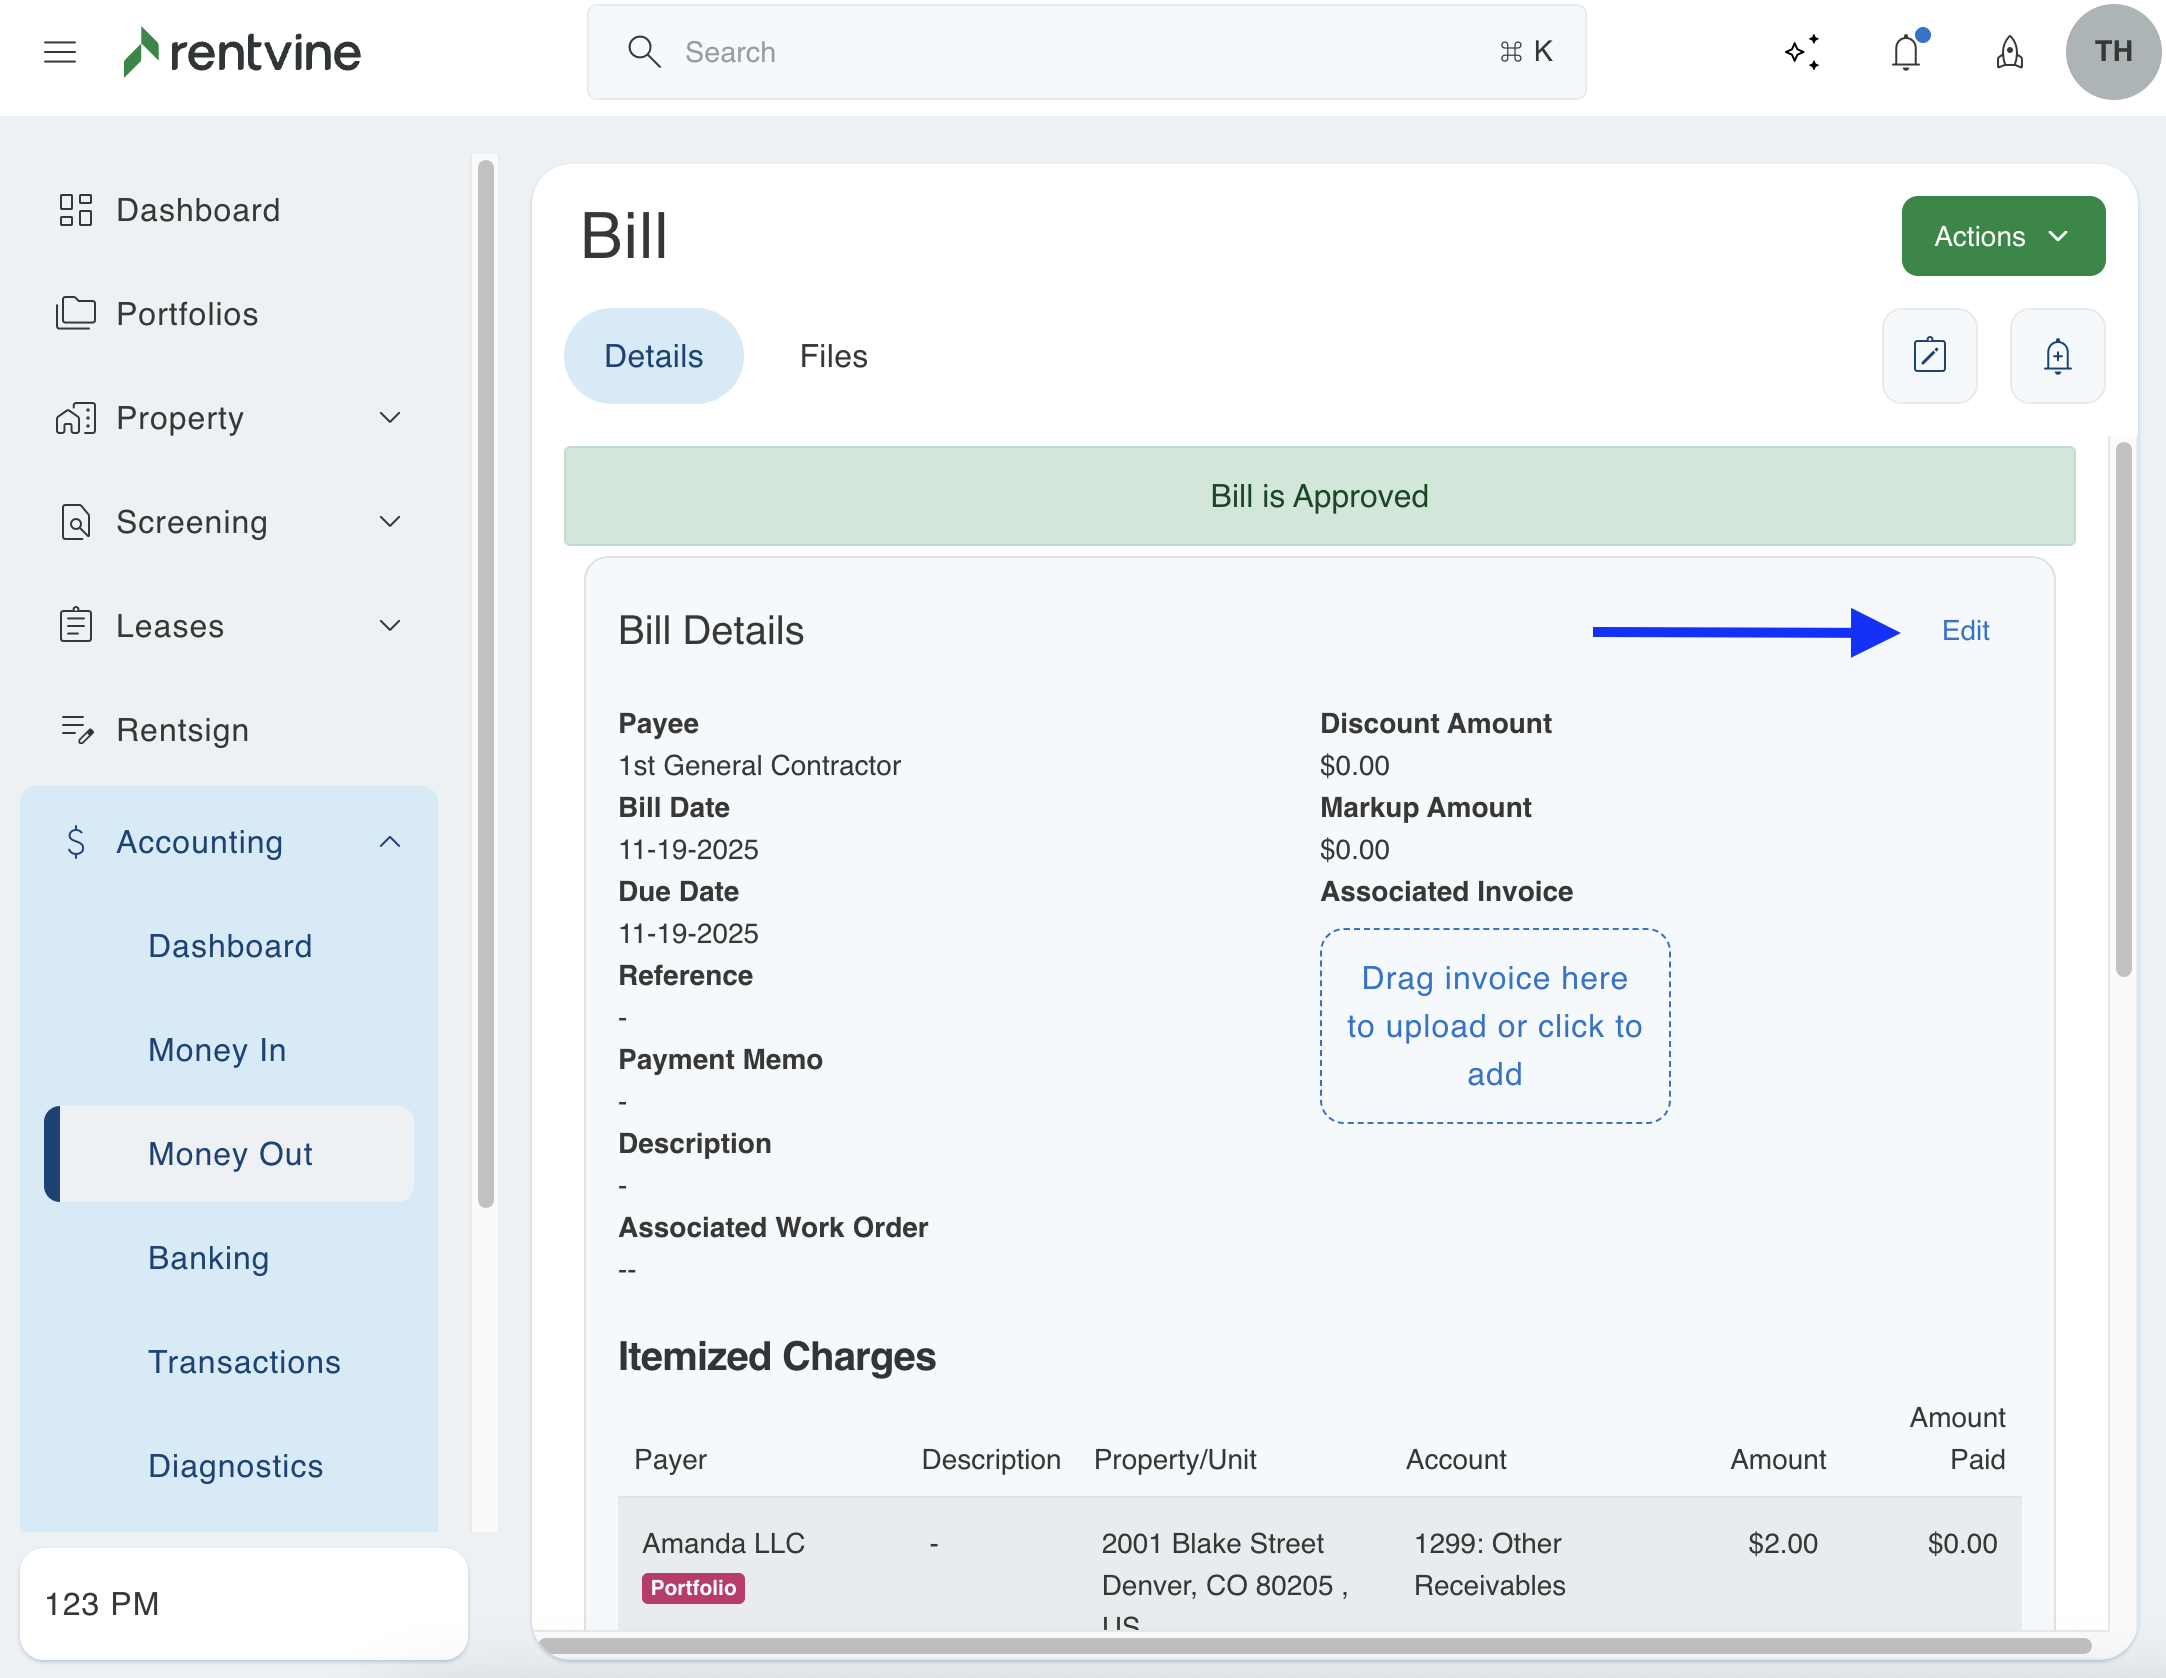
- Edit Bill Details
- Edit the Payee if necessary
- Edit the Bill Date if necessary
- Edit the Due Date if necessary
- Edit the Reference # if necessary
- Edit the Payment Memo if necessary
- Edit the Bank Account if necessary
- Edit the Work Order this is attached to if necessary
- Edit Bill Details
-
- If you would like to edit the markup bill or the discount bill, you can click on the hyperlink under the markup/discount percentage.
- You will then follow the same steps to edit the bill from above.
Please note that you can only edit most of these fields if the bill is completely unpaid. If the bill is paid, you will need to void the payment applied to it before you can make these edits.
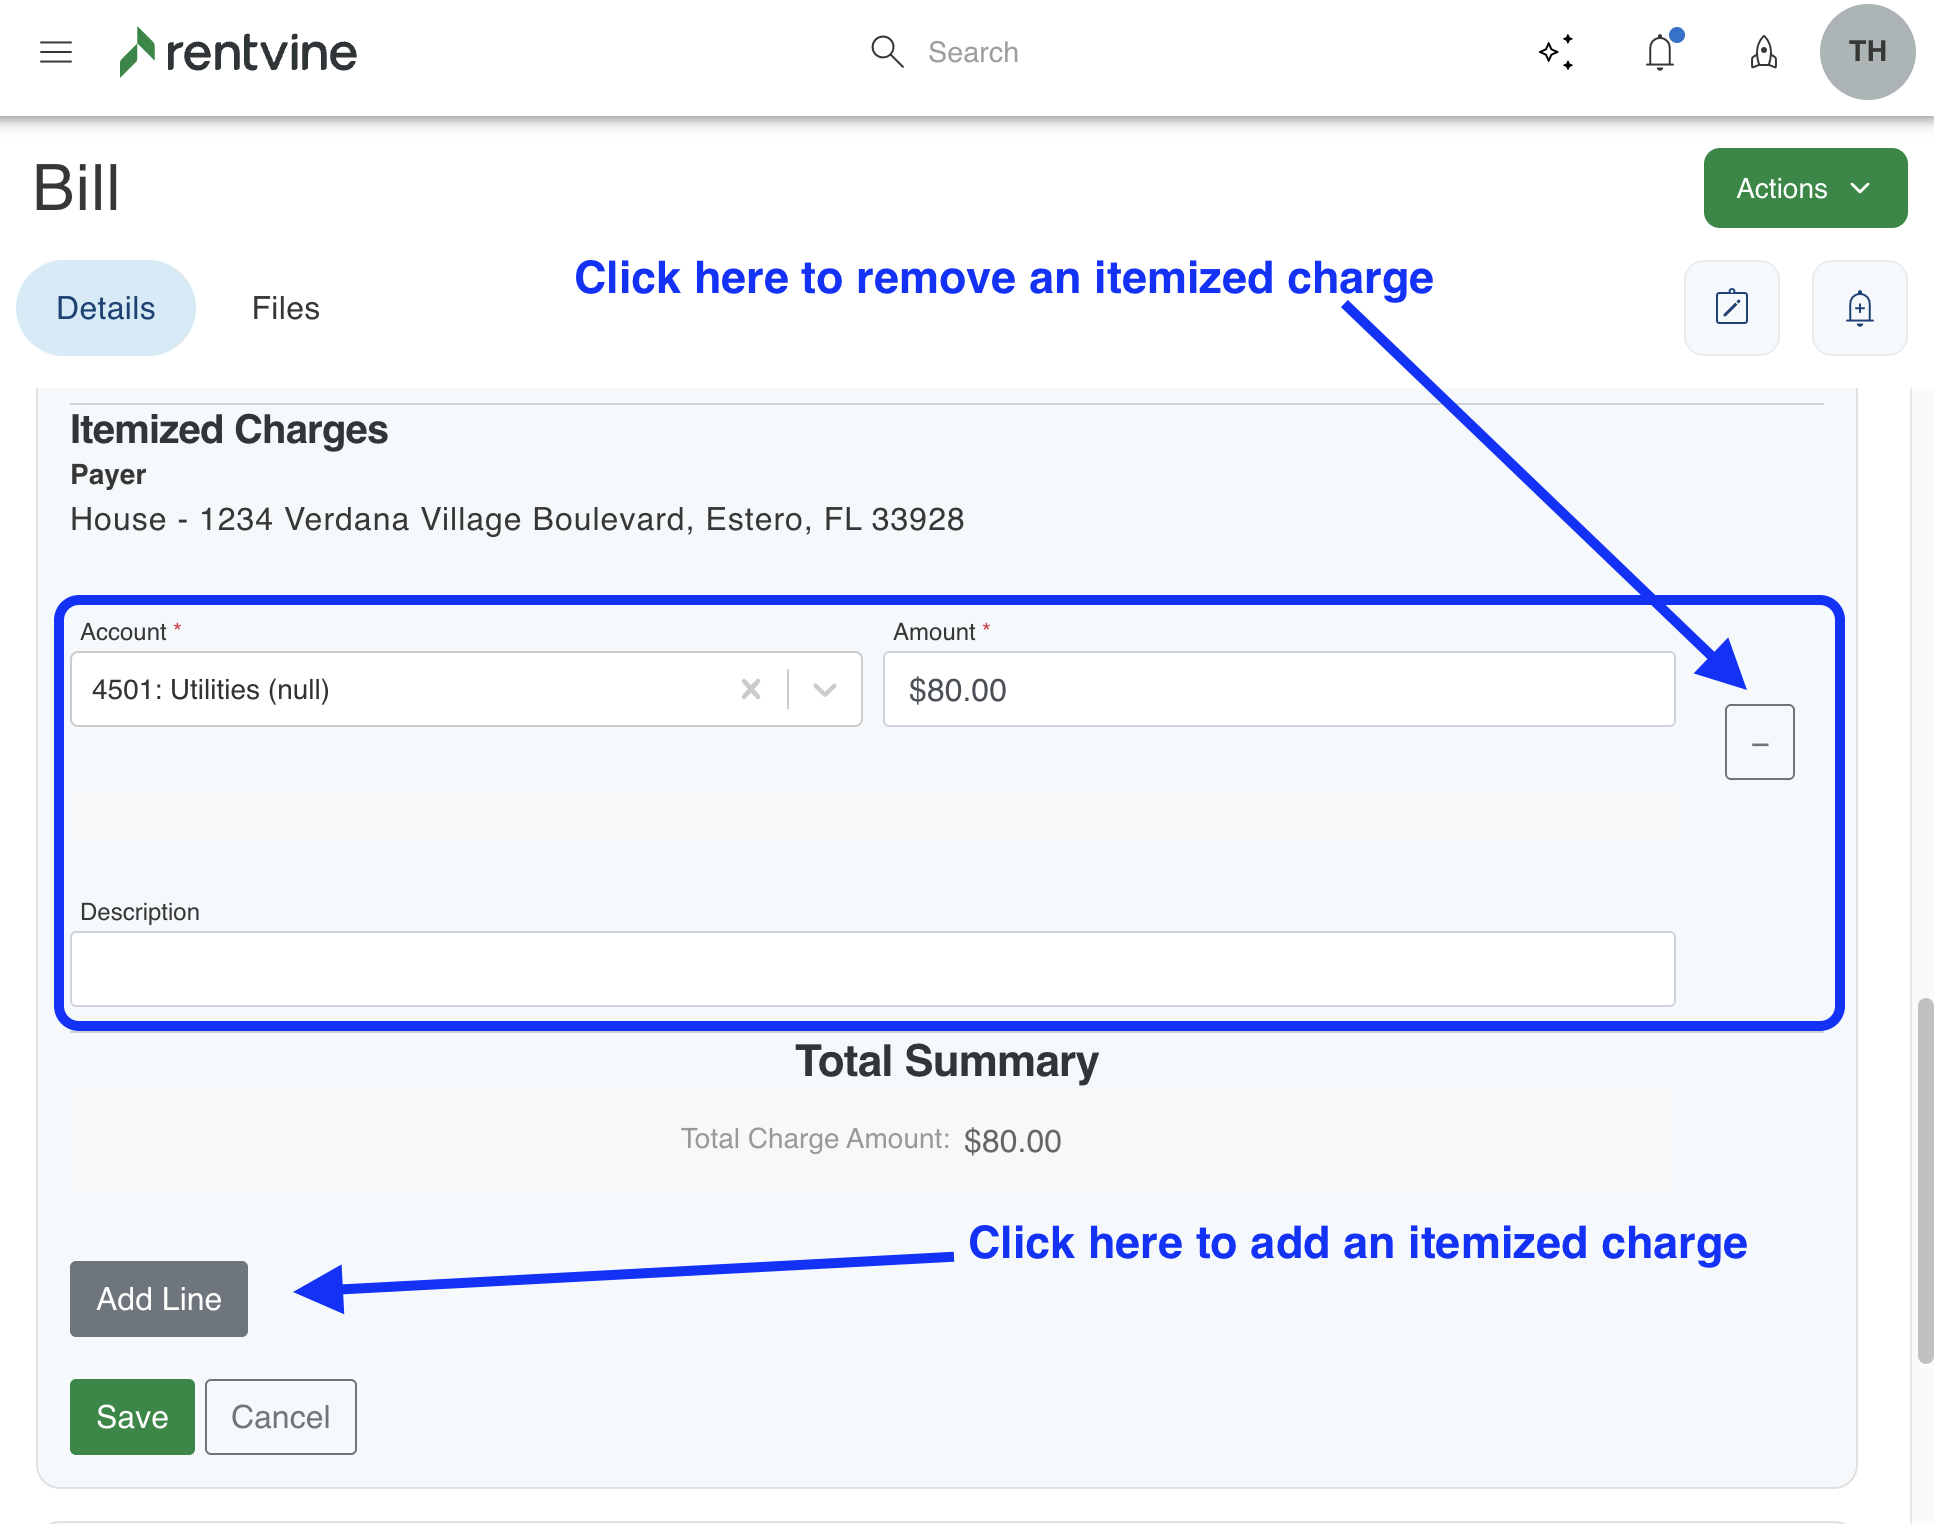
- Edit Itemized Charges
-
Edit the Account if necessary (this field can only be modified if the bill is unpaid)
-
Edits the Amount if necessary (this field can only be modified if the bill is unpaid)
-
Edit the Description if necessary
-
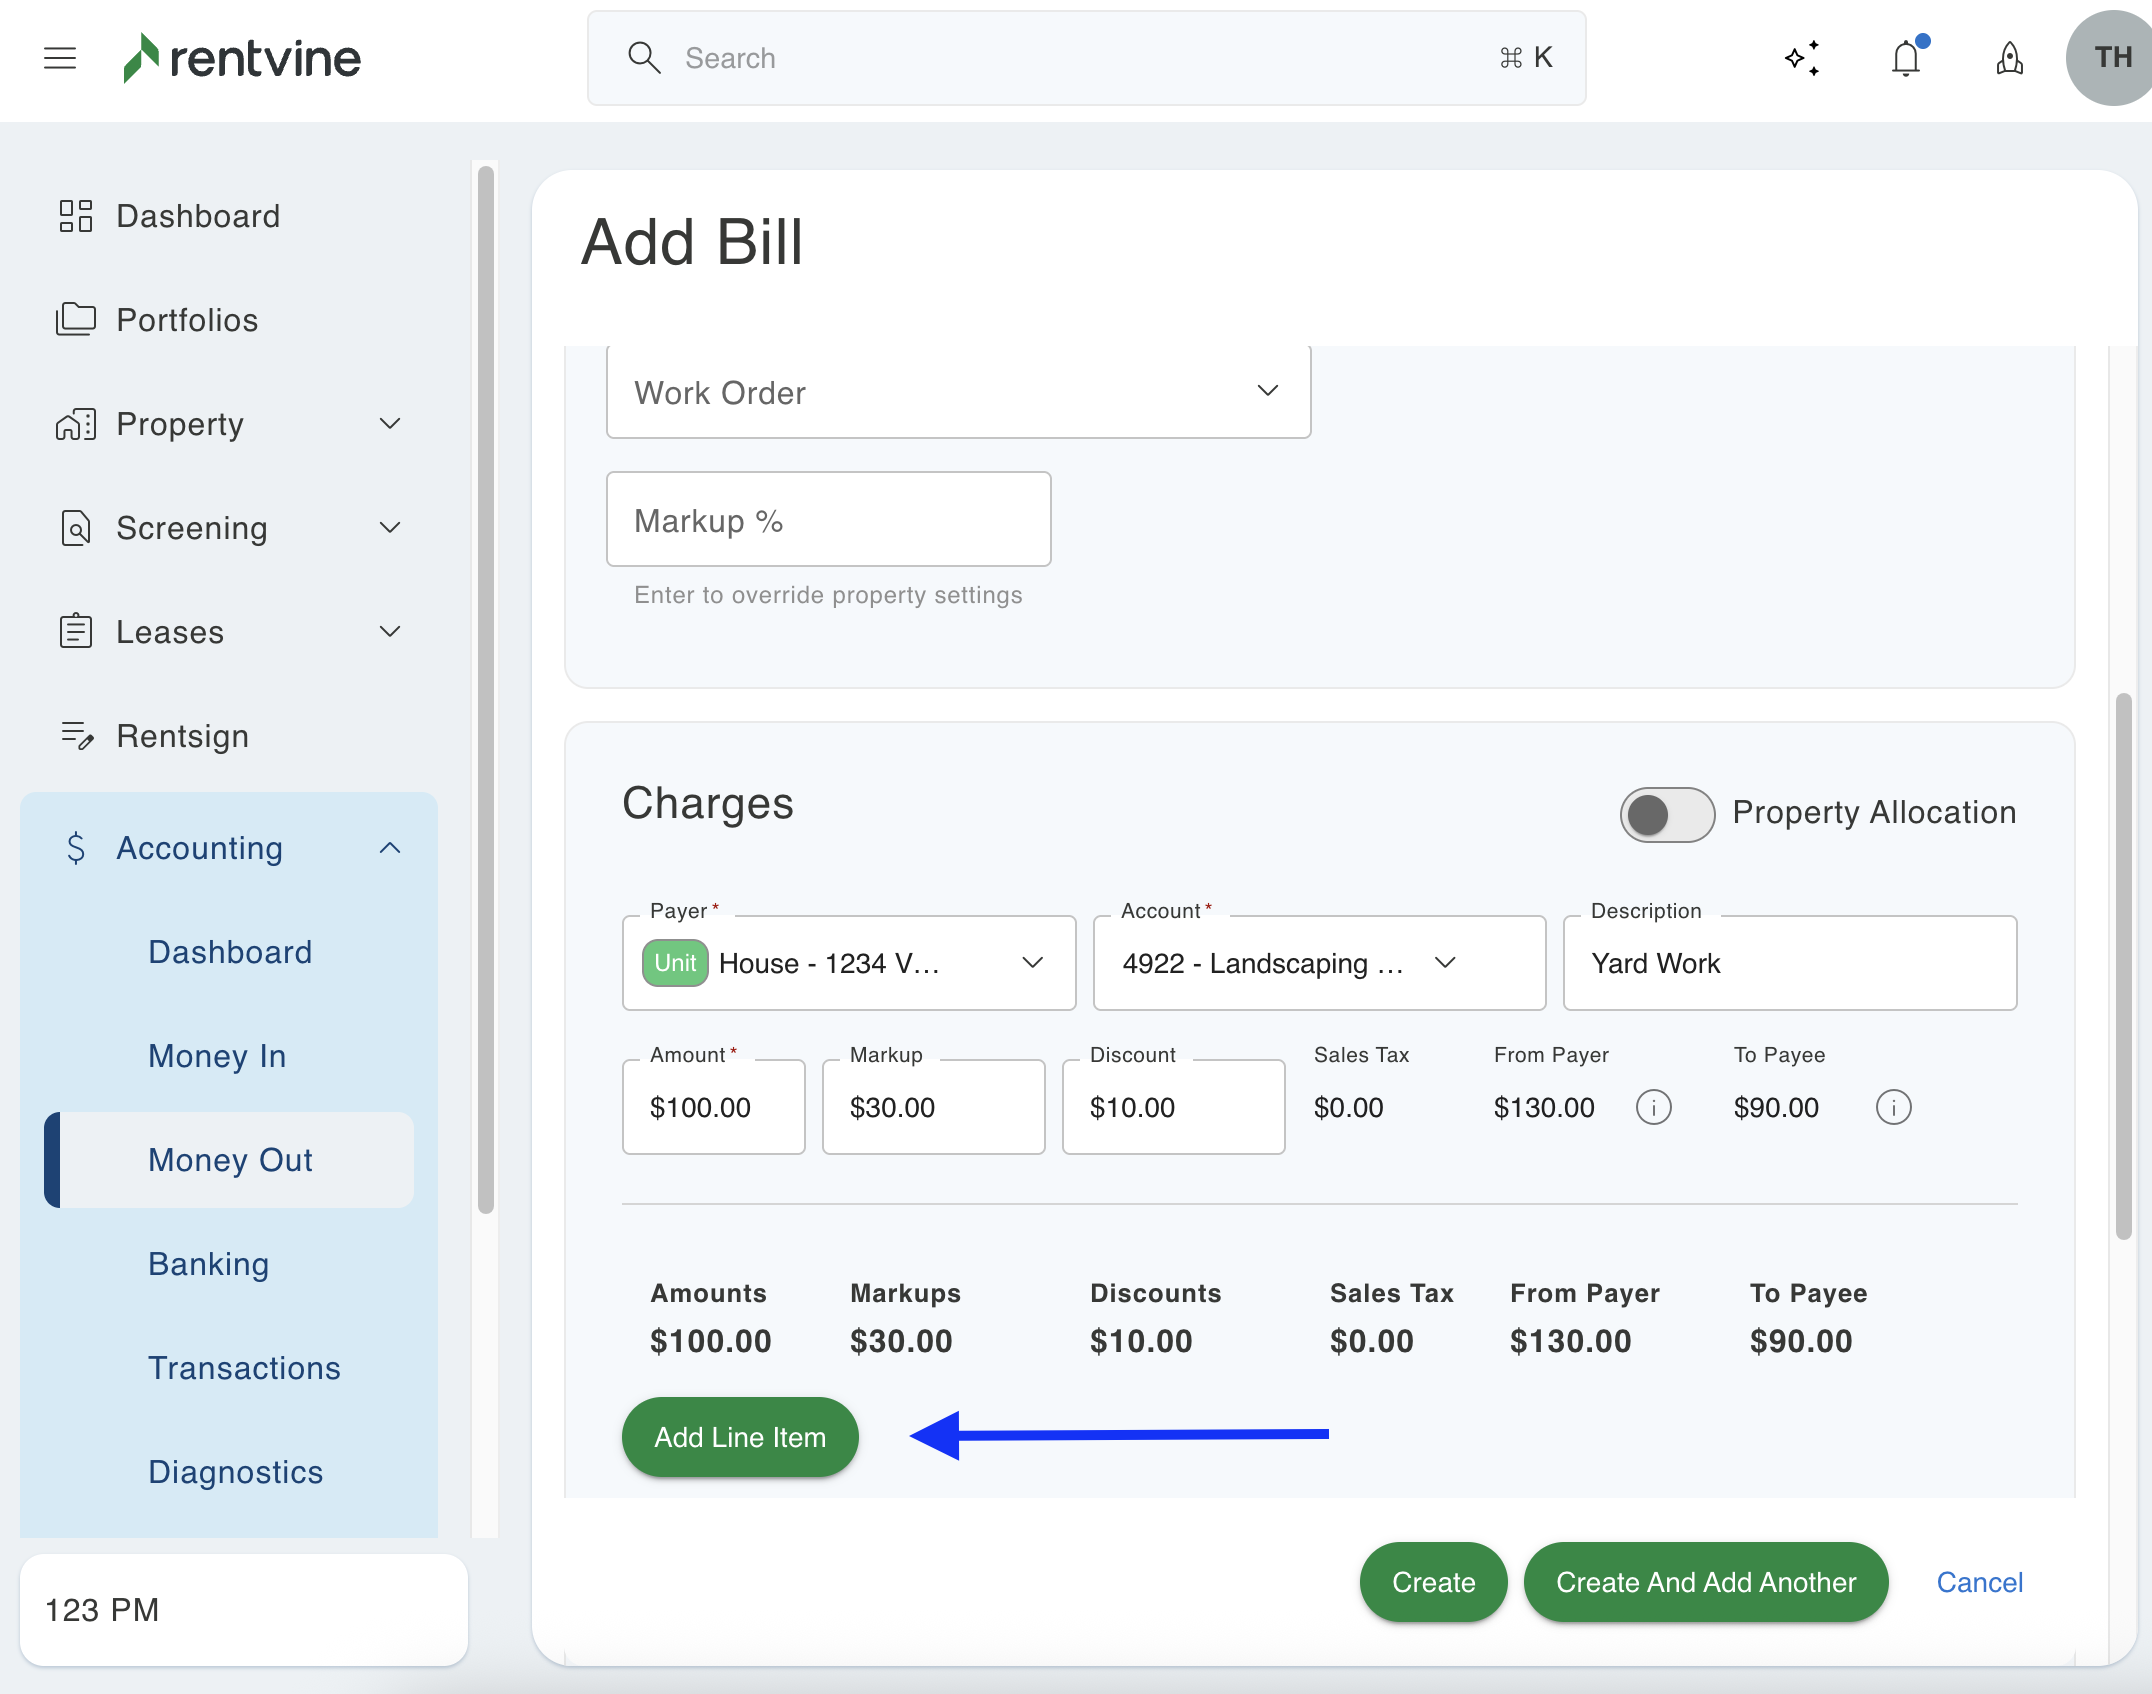
If you need to add another charge, you can do so by clicking the grey Add Line button
-
You can also remove an itemized charge by clicking the minus sign next to the amount.
-
6. Click the green Save button
How to Delete a Bill
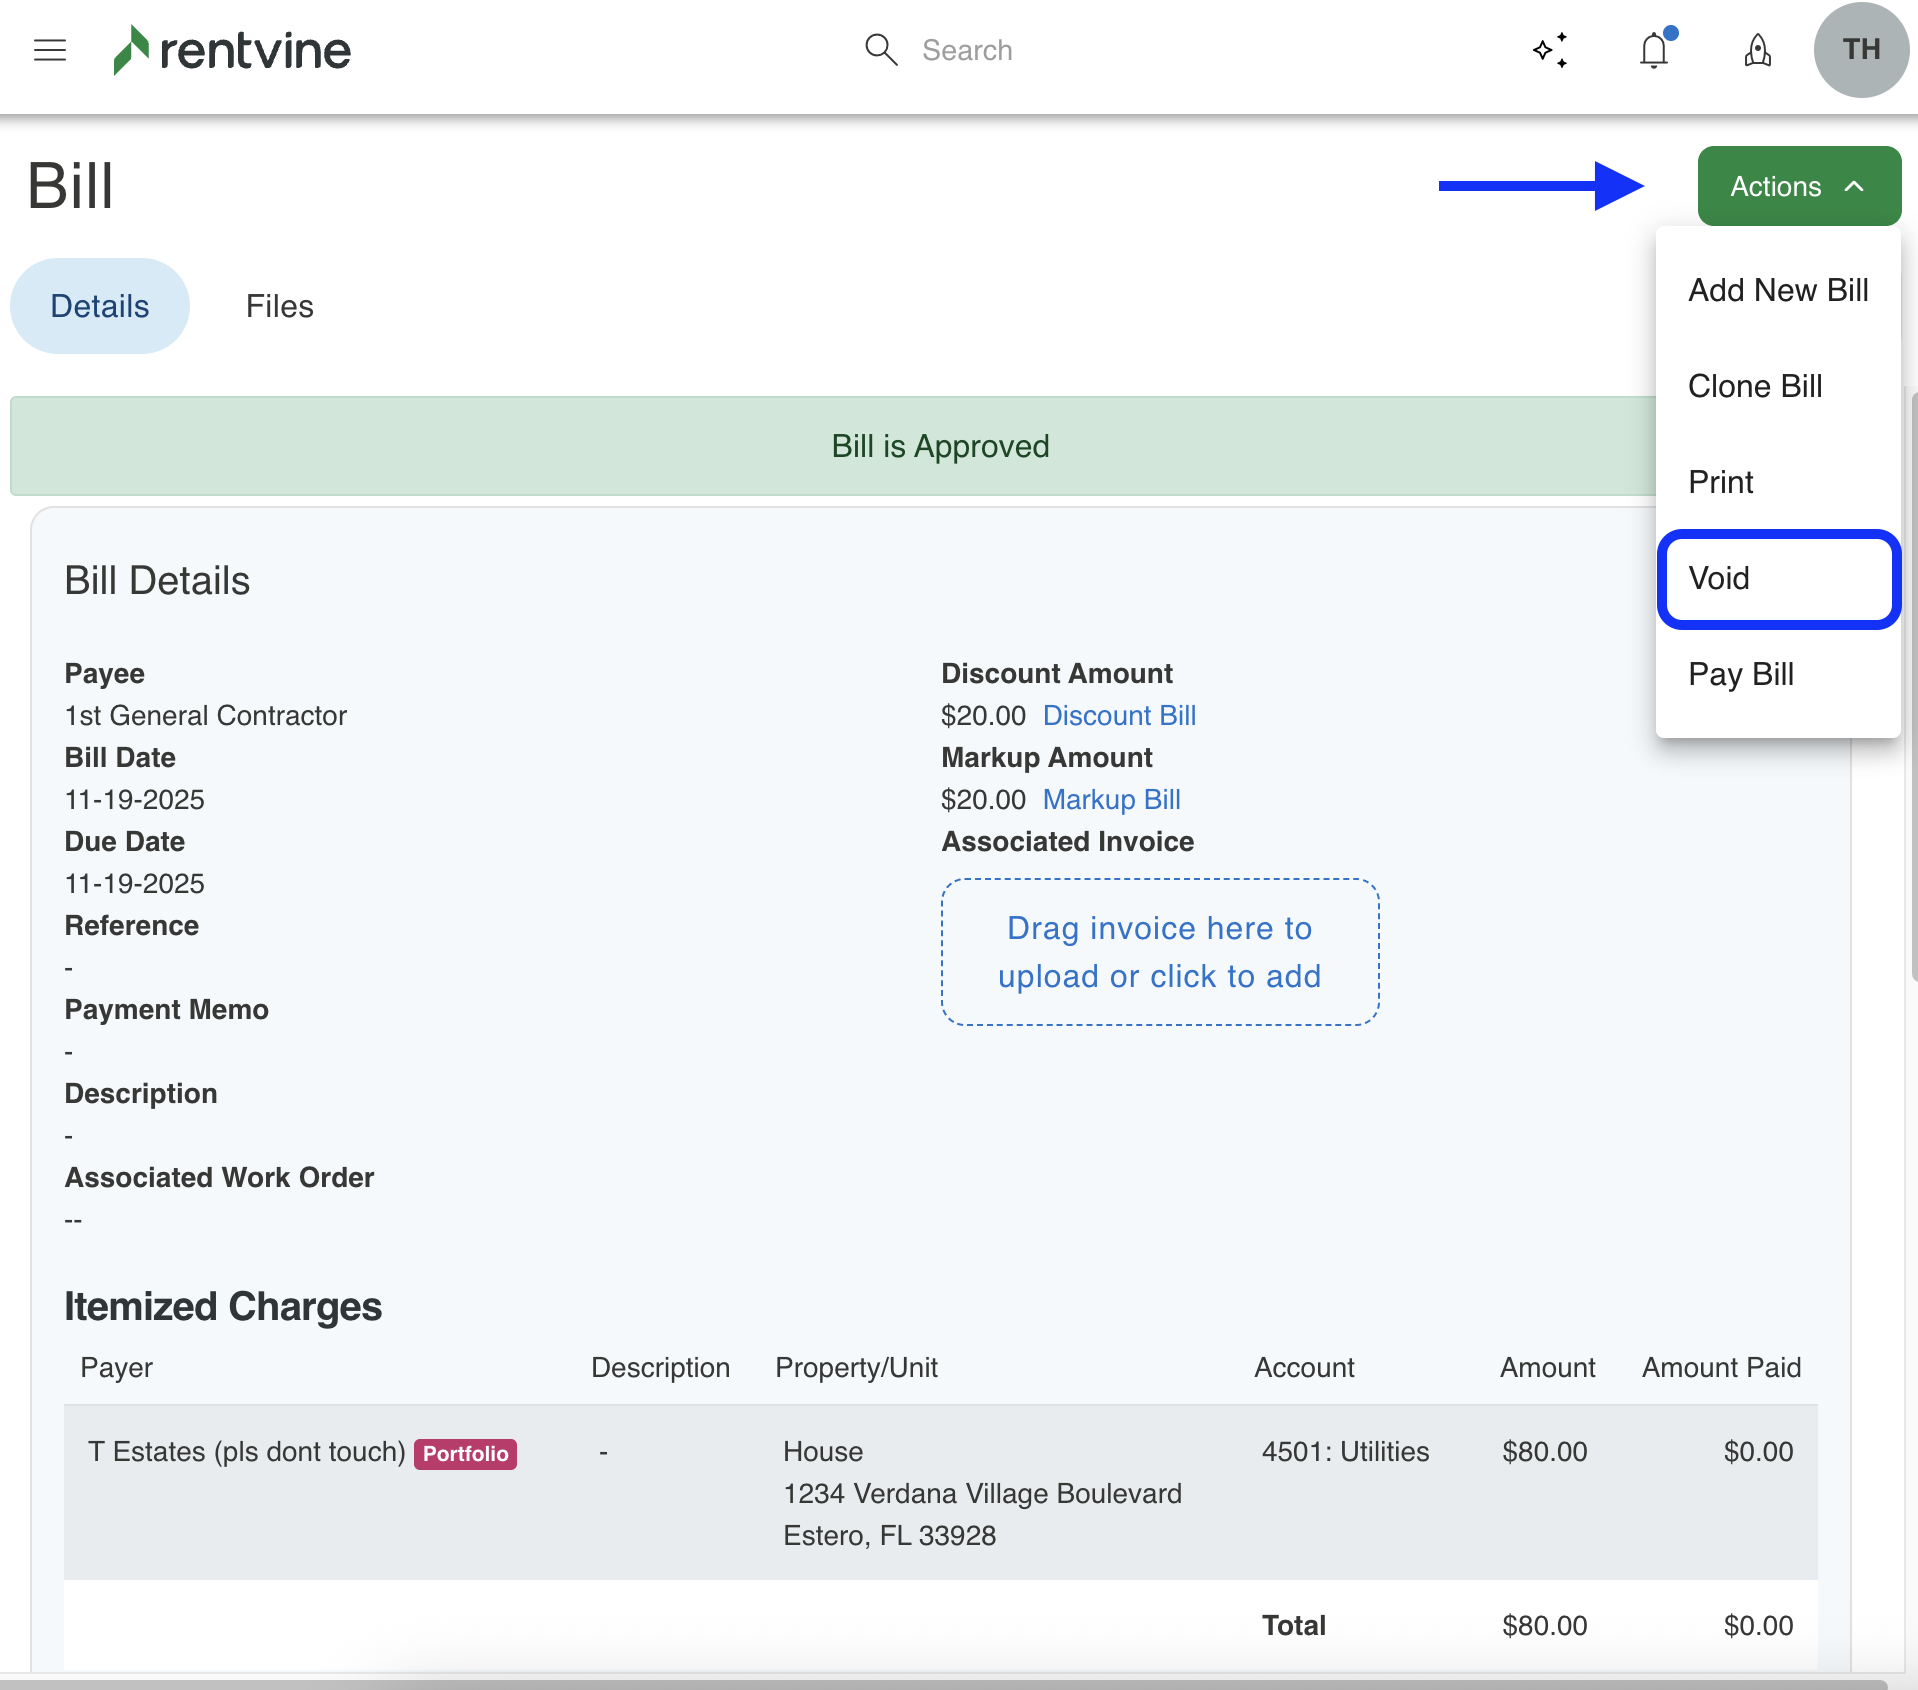
- While you are in the bill view page, click on the green Actions button on the top right of the page and select Void from the dropdown menu.
- A confirmation window will appear asking if you are sure that you want to void the bill. Click Void Bill to confirm.
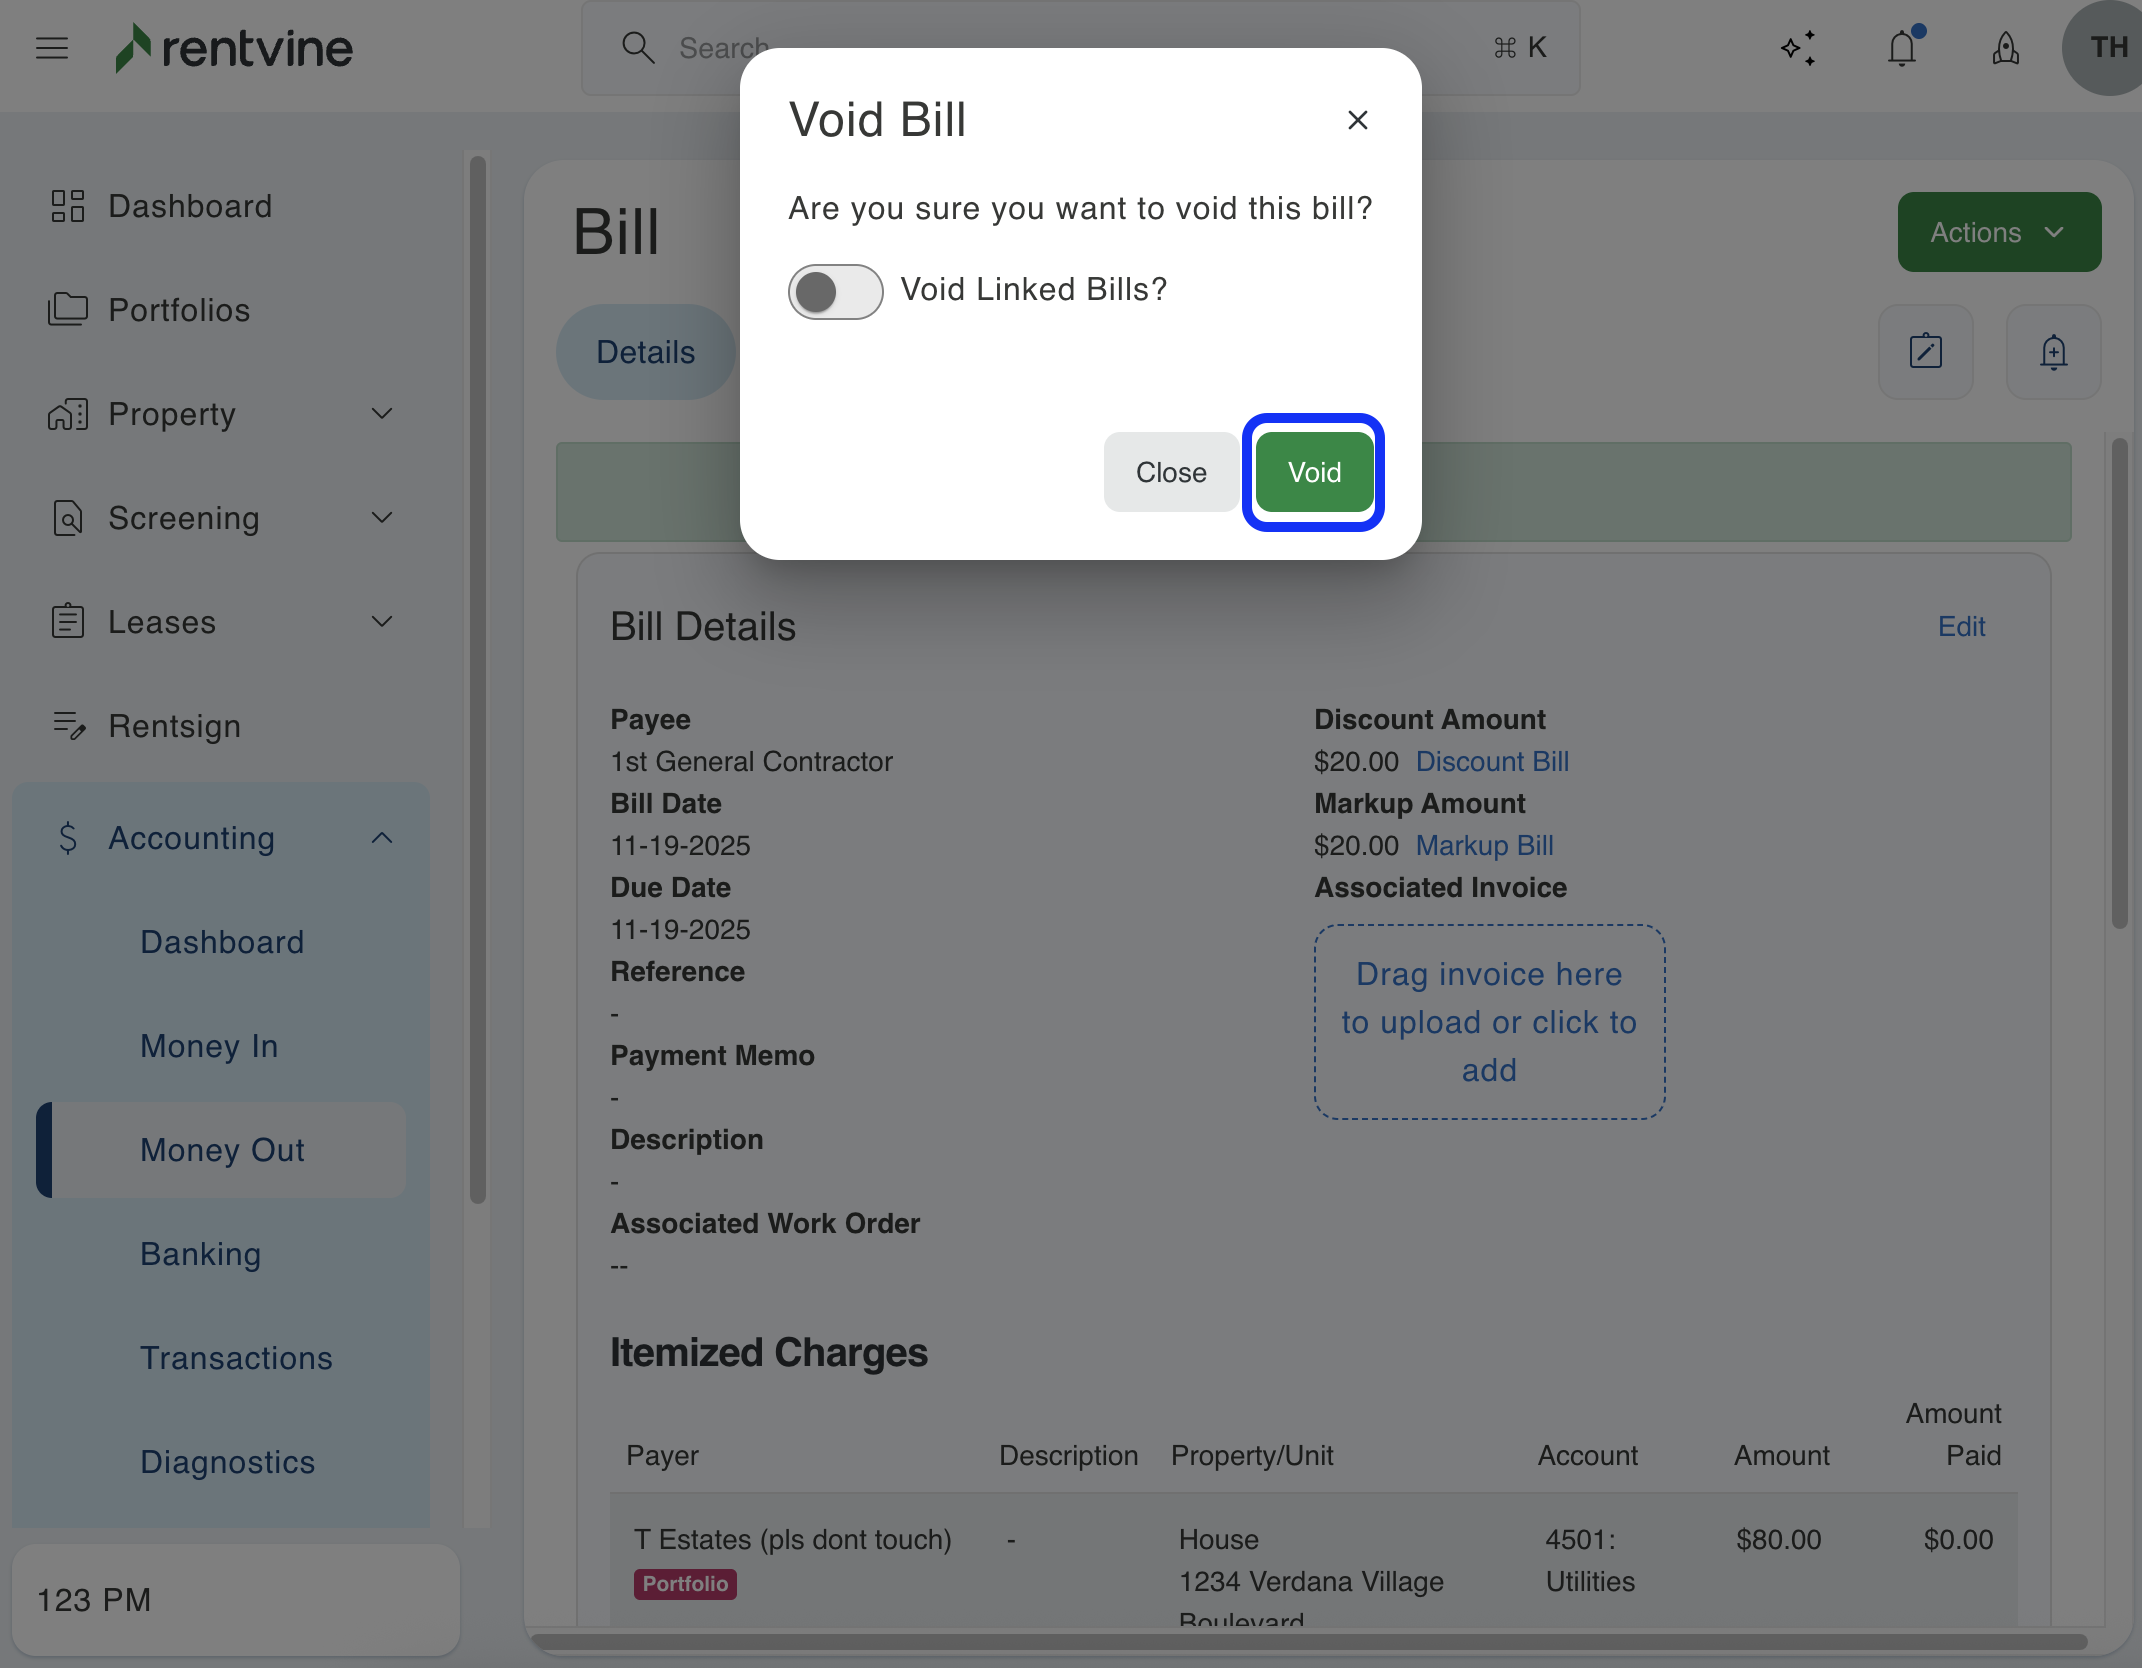
Please note that only unpaid bills can be voided. If you need to void a paid bill, you will first need to void the payment that paid for this bill.
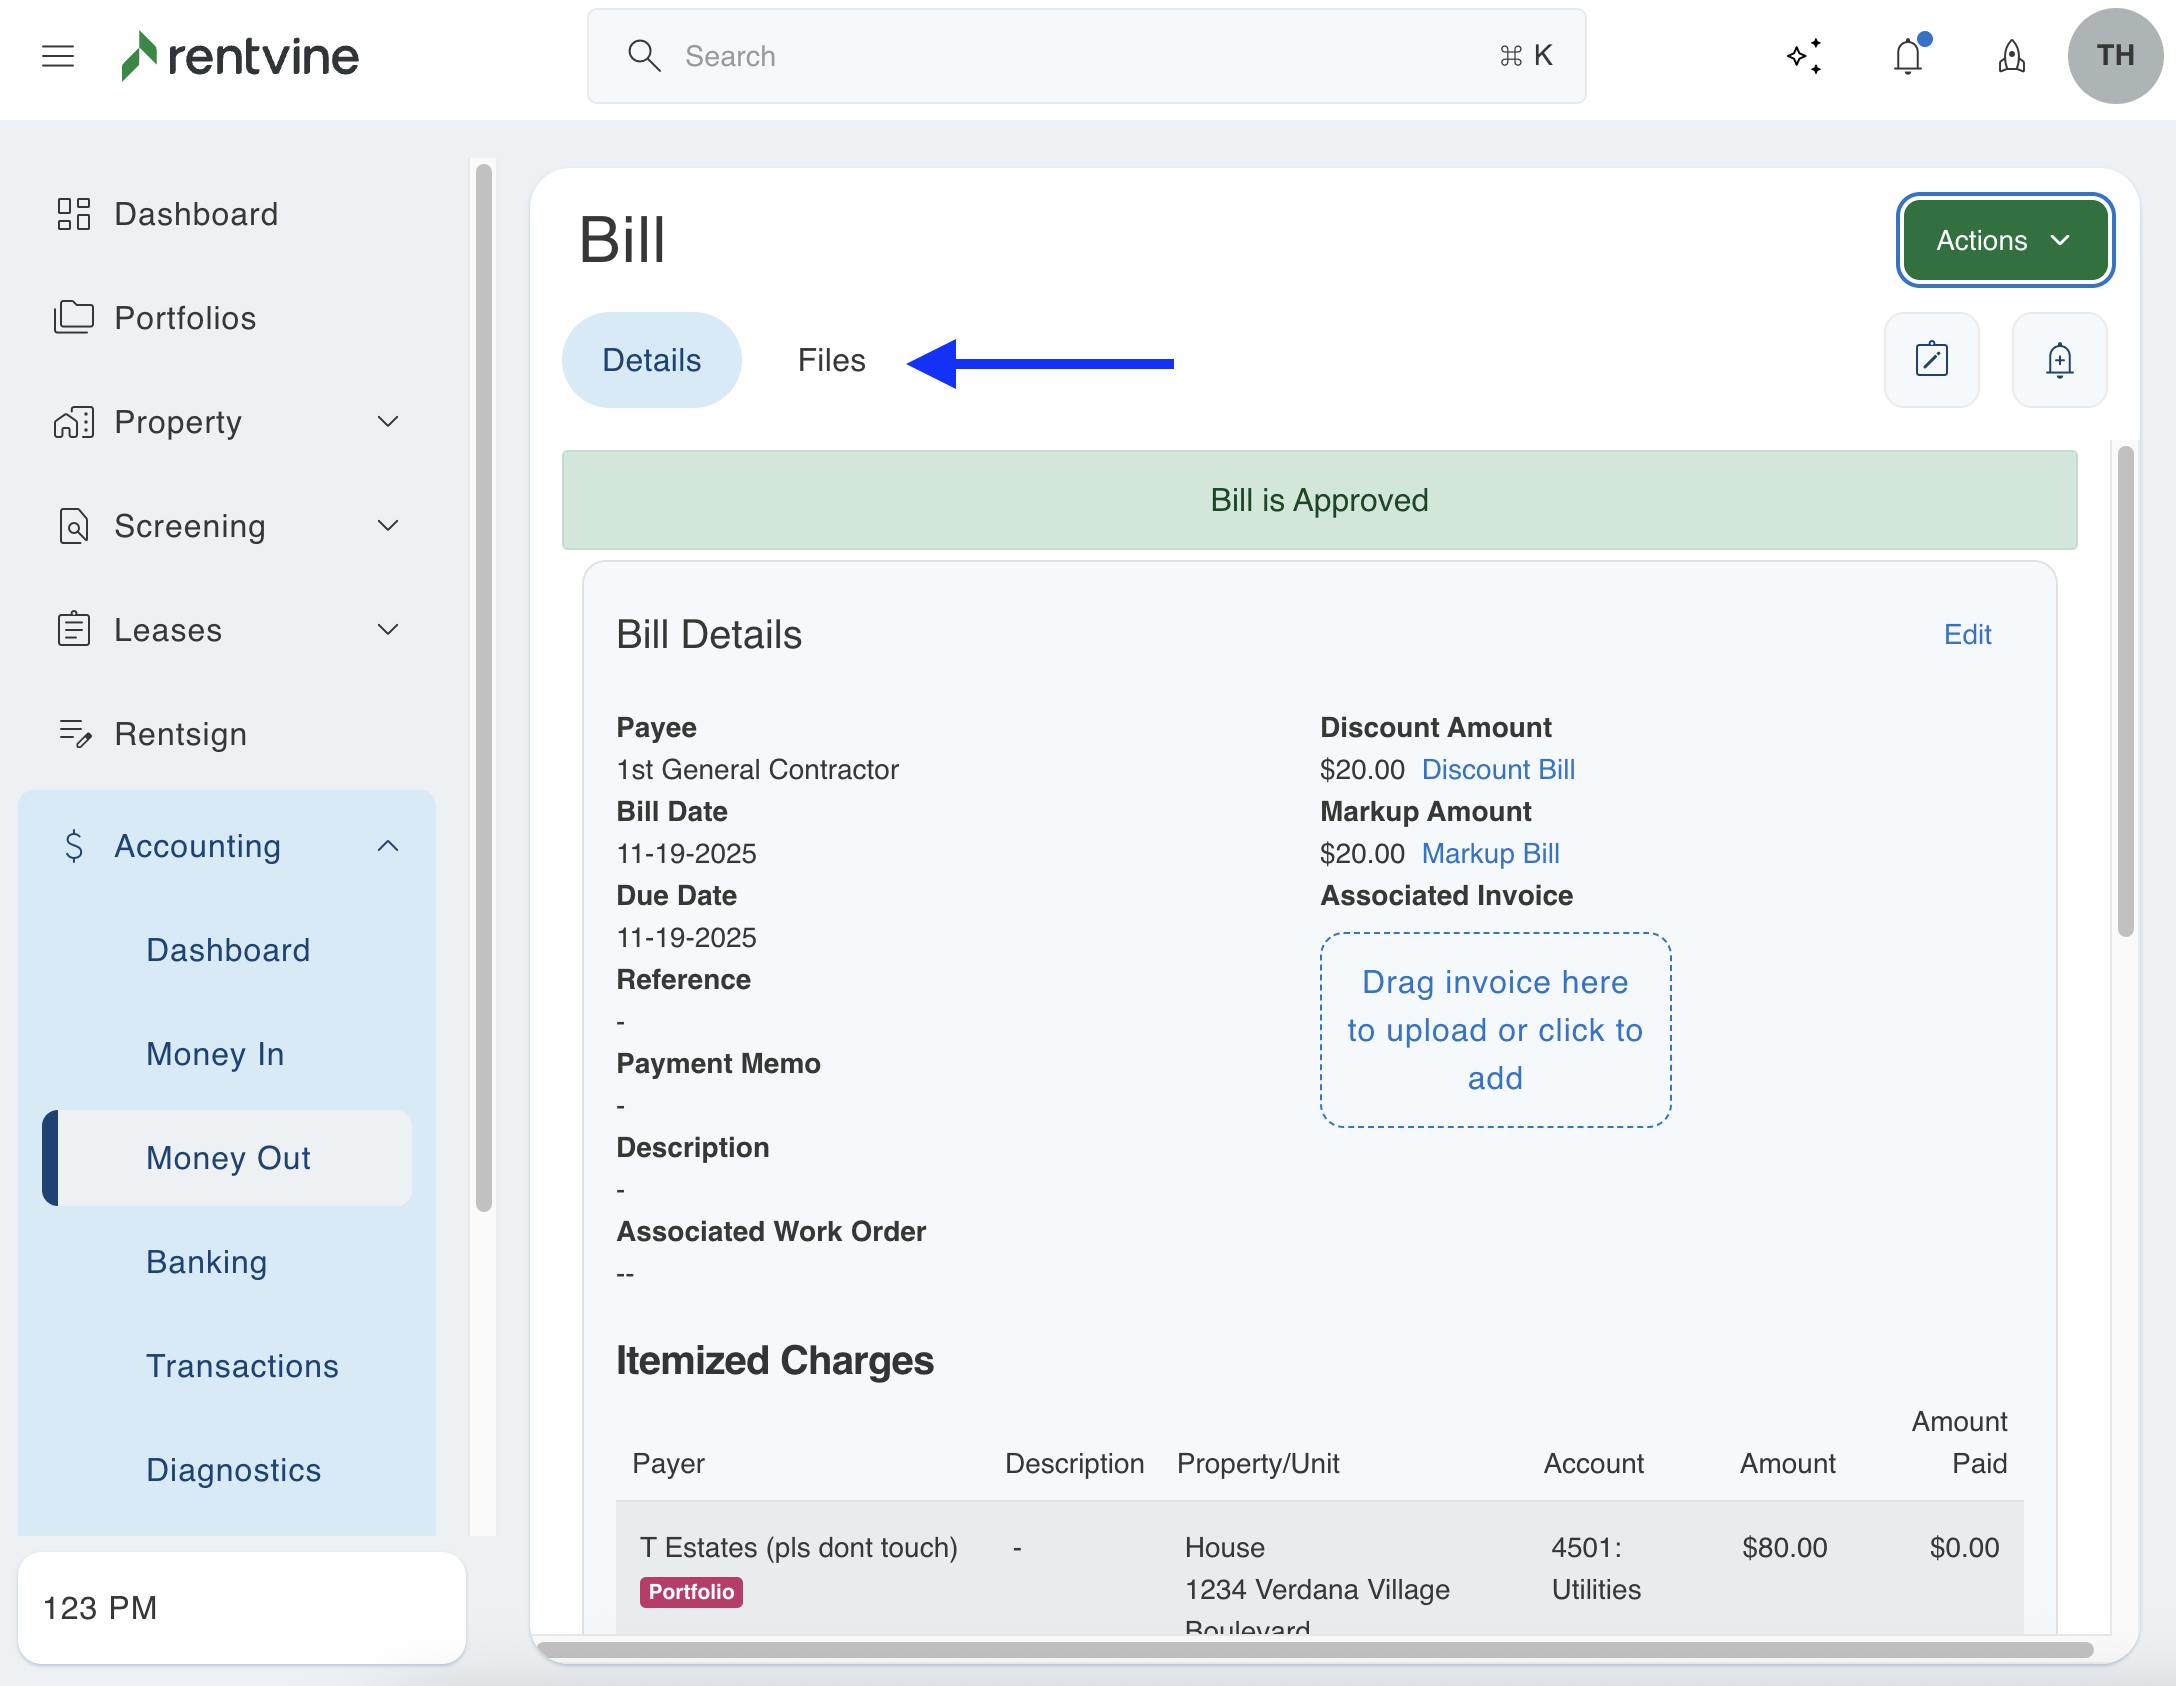
How to Upload Files to a Bill
- In the details section, click the Files menu found on top
- On the next screen, you can click on Click to Select so you can browse the file(s) that you want to upload, or just drag and drop the file into the box.
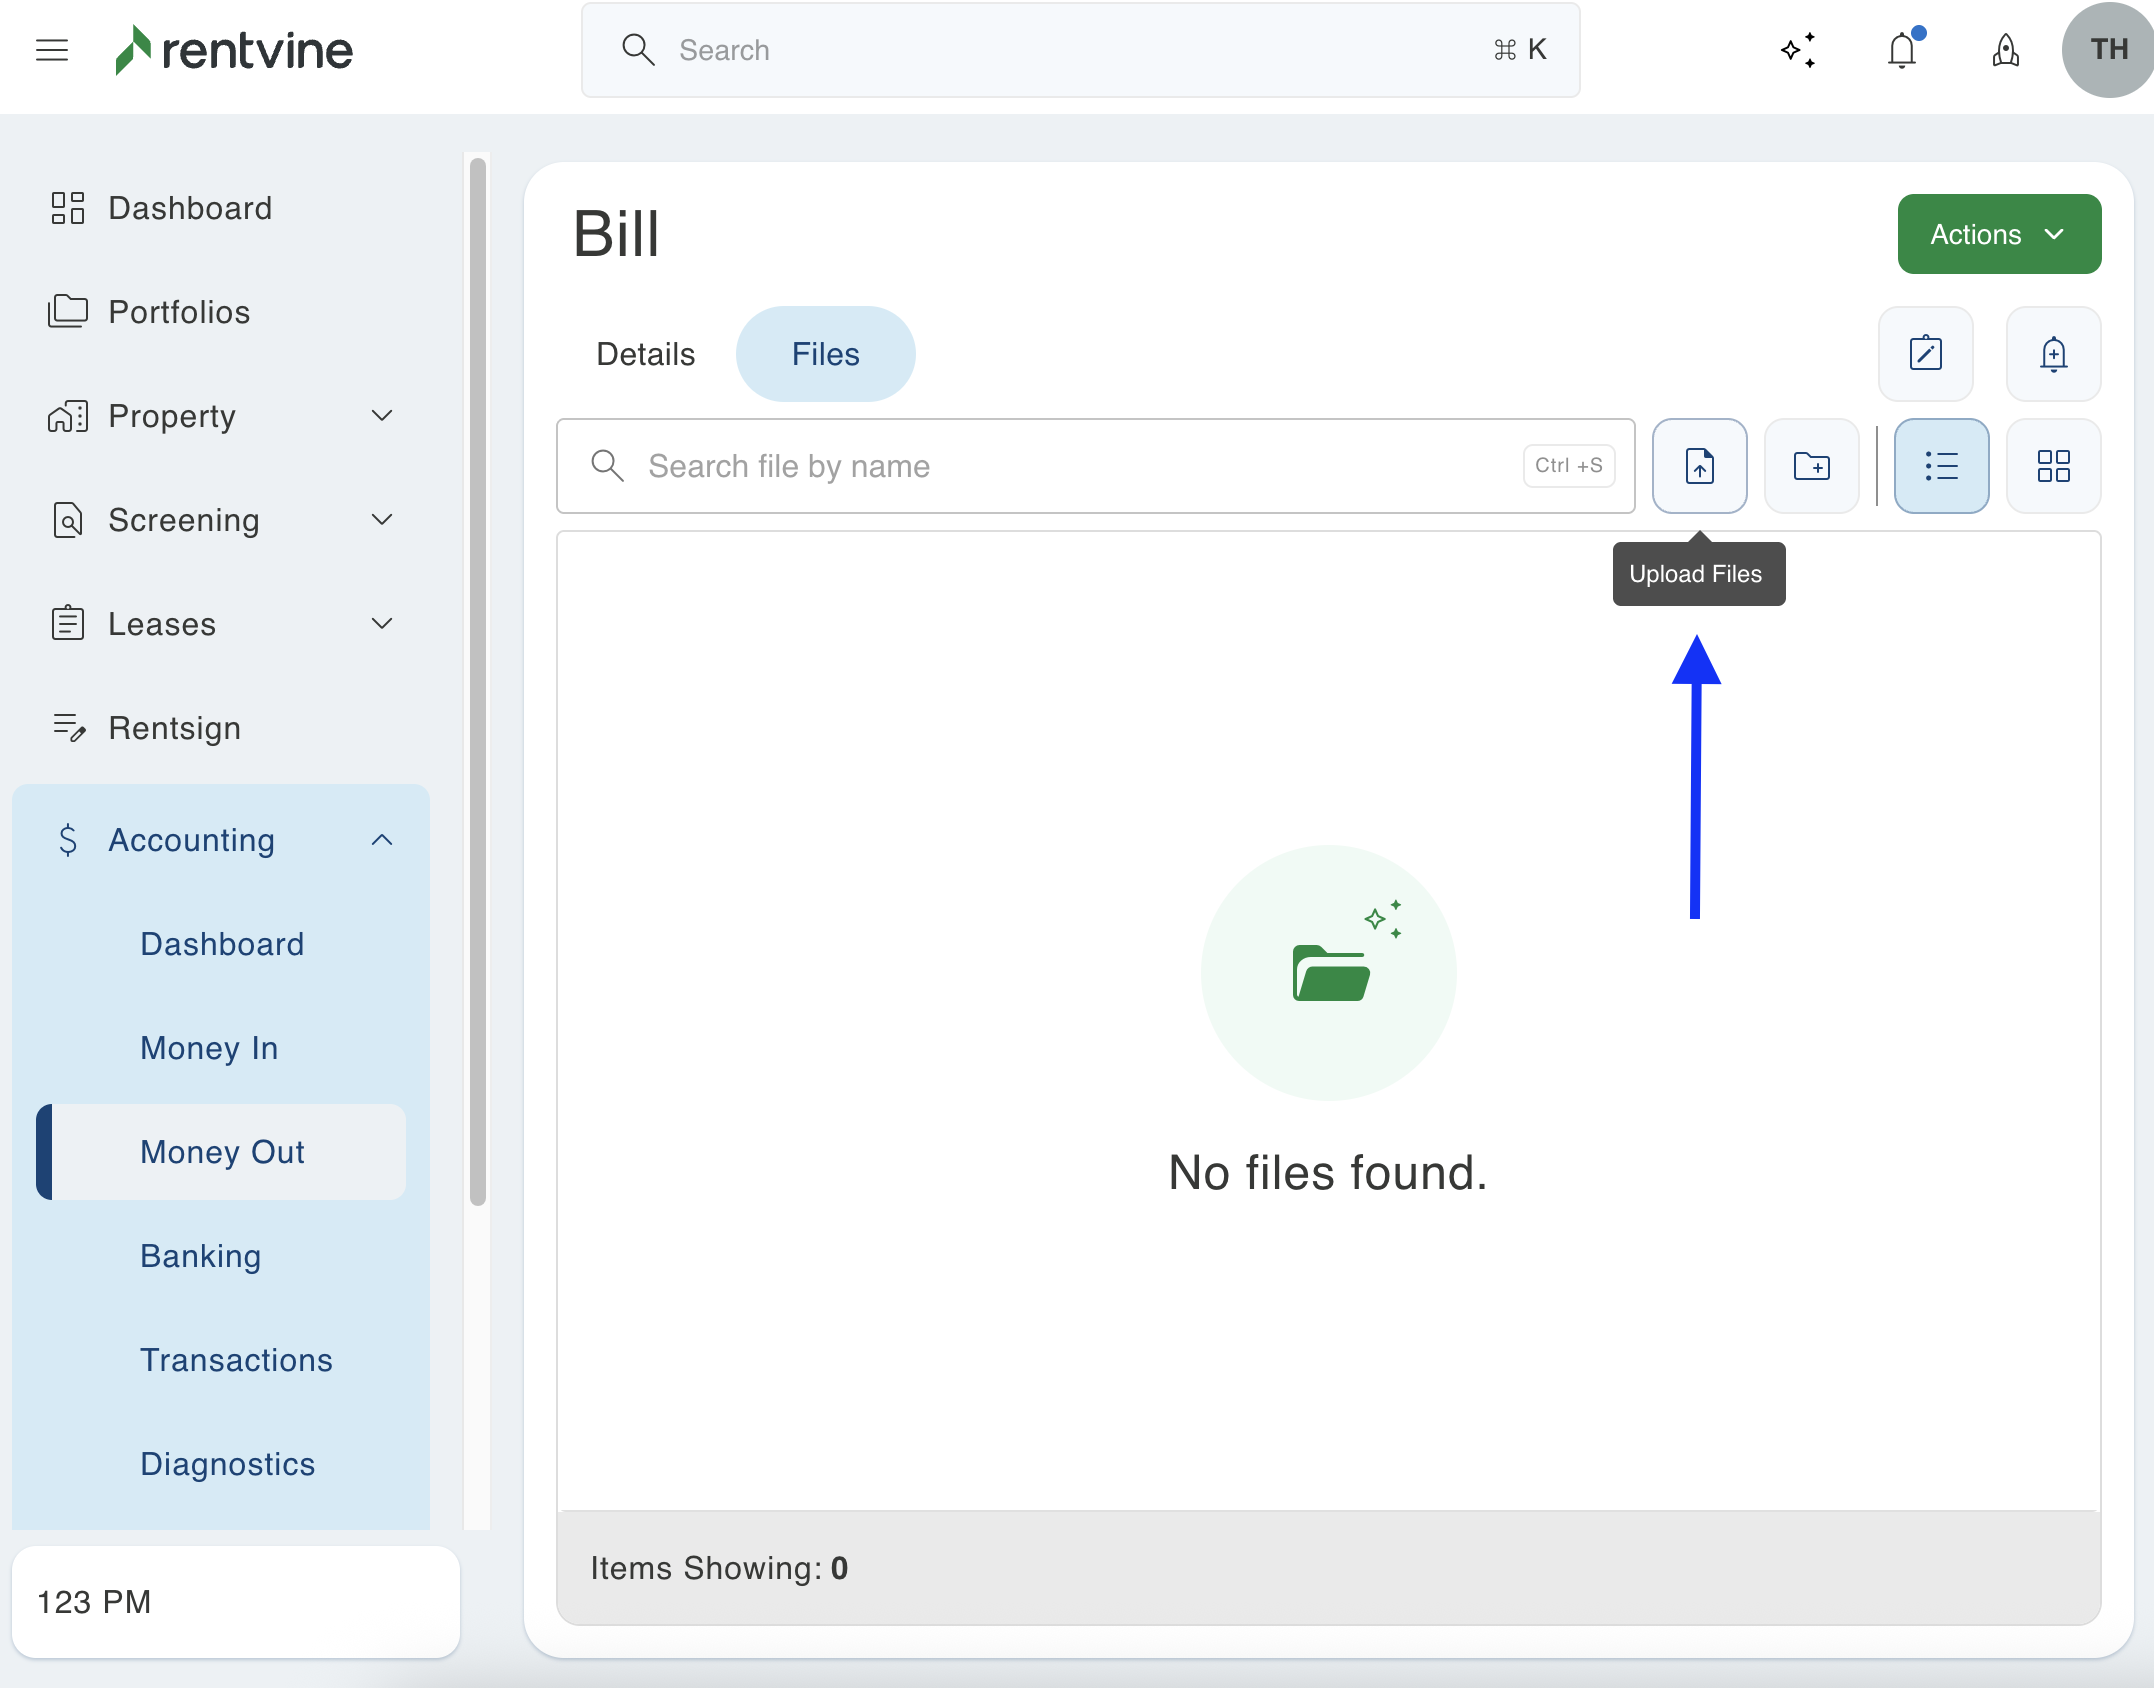
Files that are uploaded are automatically saved and will appear in real time.