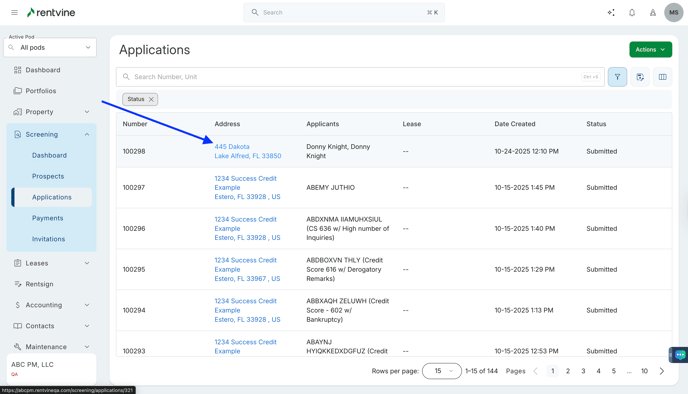
1- Navigate to the "Screening" tab on the left hand navigation bar and select "Applications"
2- Find the application you are wanting to create the lease for and click on the application
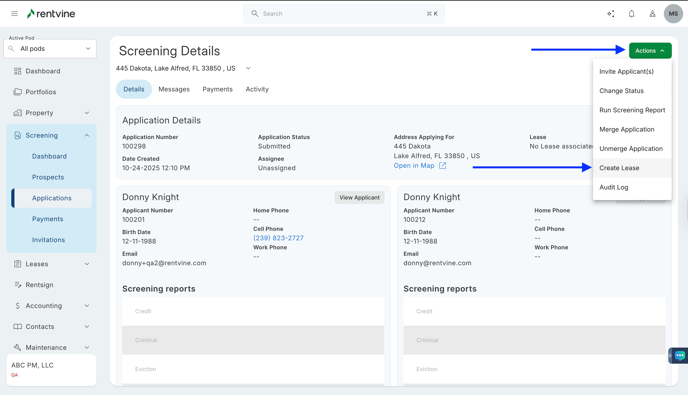
3- Using the green "Actions" button select "Create Lease". You will now be asked to enter the specifics of the lease through a lease generation flow
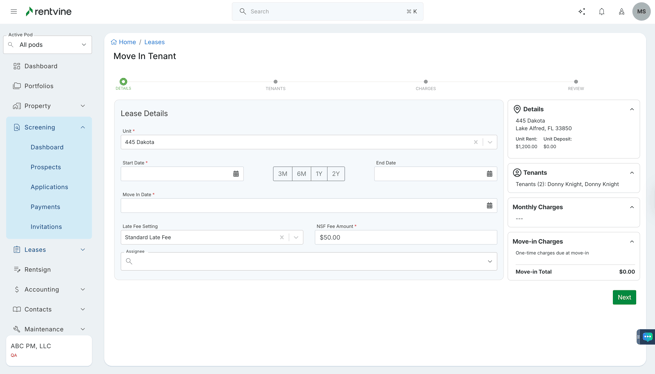
- Details - Here you will be selecting the start and end dates of the lease along with the move in dates. Also on this page you will select your late fee setting for this lease and the specific agreed upon rent amount. Select "Next" at the bottom to proceed to the next section
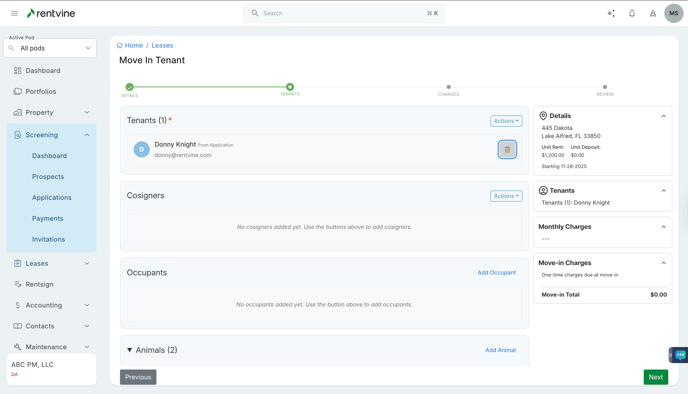
- Tenants - Rentvine will automatically enter the Tenant, Cosigners, Occupants, Pets, Vehicles, and Emergency Contacts information from the application that you selected to the lease. You can also enter any renters insurance information on this page as well and is optional. Once satisfied with your entries go ahead and select "Next" at the bottom to proceed to the next section
- On the Charges screen, you will first see the Monthly Charges. These will always be due on the first of the month, and you can now add Escalations to the Monthly Charges.
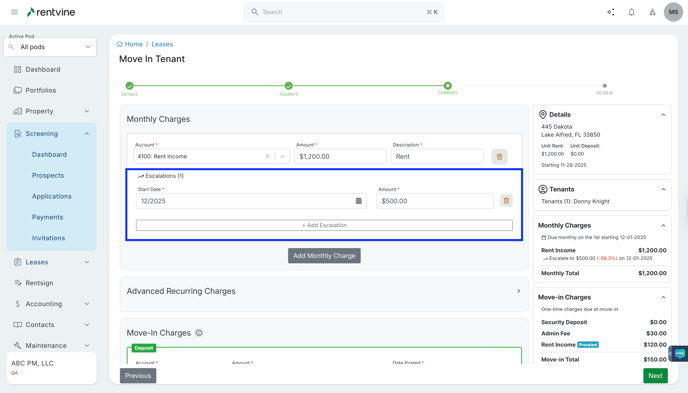
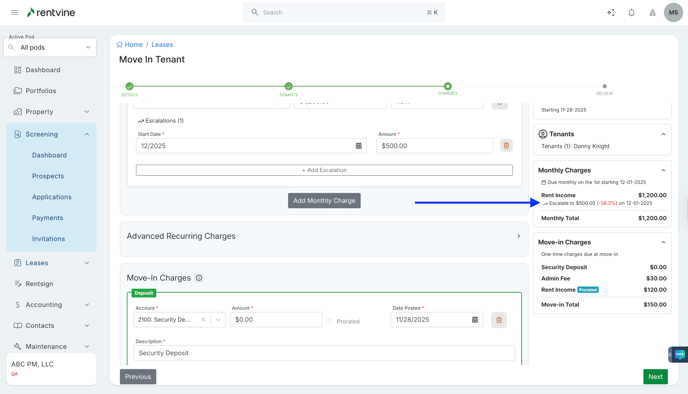
Escalations can be known as a predetermined date a Monthly Charge is to be increased. This saves your team time in having to do this manually on the lease and adjusting the amount. For example, if you have a predetermined date you would like to increase a Monthly Charge, such as the Rent Charge, you can do so here.
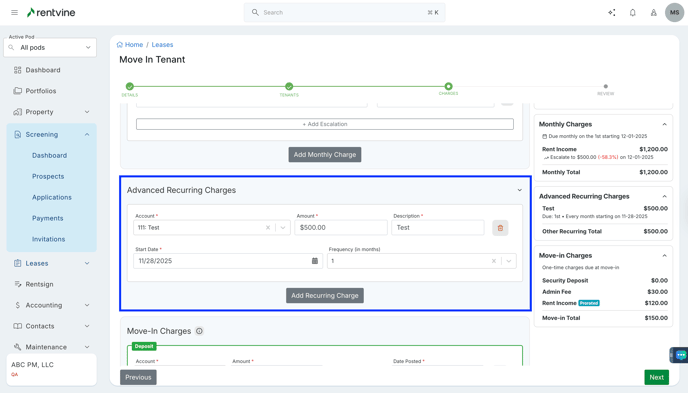
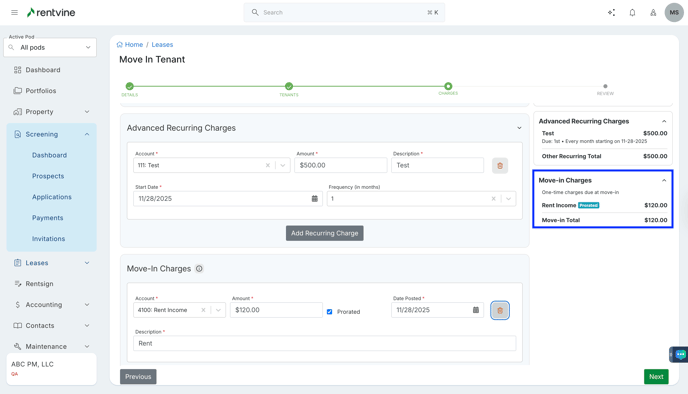
- On the same screen, you will also see, Advanced Recurring Charges, these can be something that is billed to the tenants that is not as frequent as a Monthly Charge. For example, if you were to bill your tenants an HOA Fee quarterly, you can add those charges here.

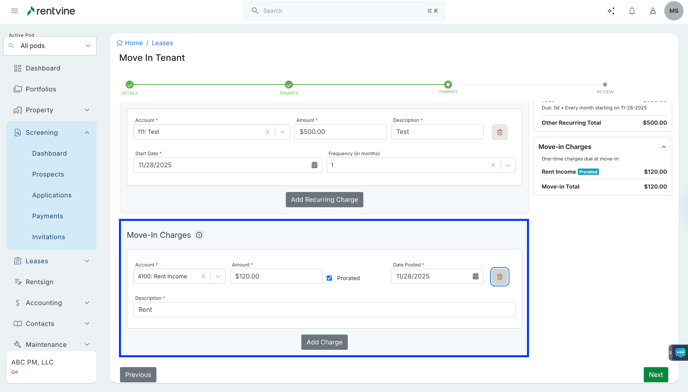
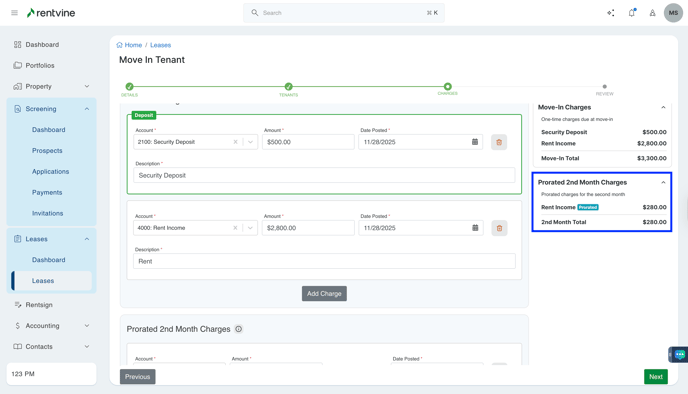
- You will see the Move In Charges next, which will pull the information of both the Default Monthly Charges and the Default Move In Charges.
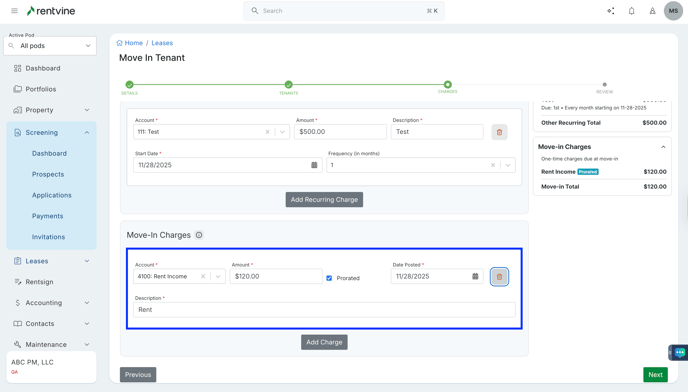
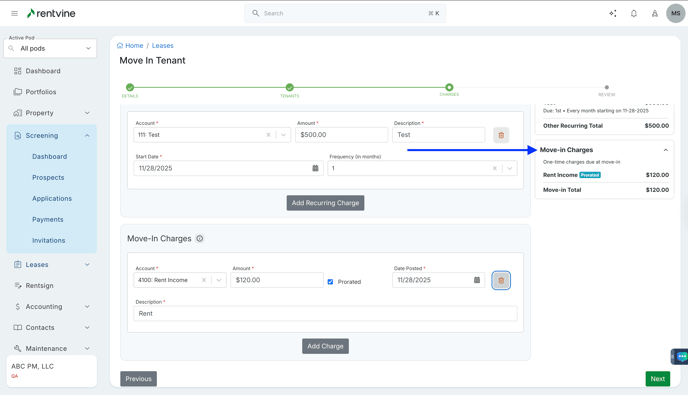
- You will also notice that the Defaulted Move In Charges are the only charges in this section that are fully priced. The rest of the Move In Charges will be those Monthly Charges, and will be automatically prorated
You'll also notice the Security Deposit cannot be prorated. You can also notice that Deposits will be highlighted Green for easier visibility of the charge.
- Depending on the settings you have for the Move In Proration, you can also see the last section labeled Prorated 2nd Month Charges.
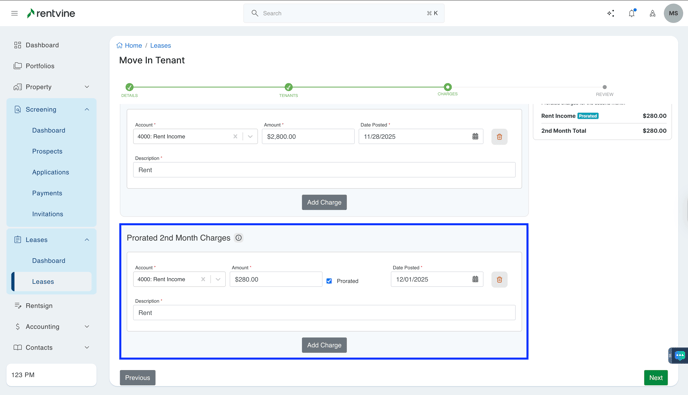
This section will be the Rent Charge, along with the Default Monthly Charges , and will prorate the charges for the second month of the lease 
This will all show on the summary section of the move in flow
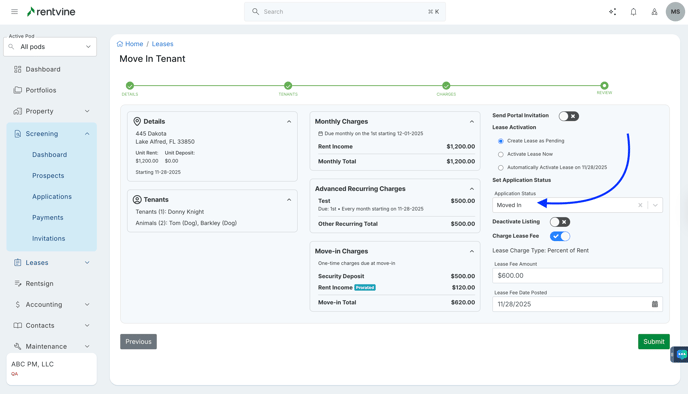
Review - This is a detailed breakdown of the lease you created and will review important information like the Rent Amount, Tenants Information, and the Move in / Recurring charges. If there are any corrections needed you can use the "Previous" buttons to change a section or you can simply use the "Edit" features in each category. Lastly you can instantly send "Portal Invitations" and "Activate" the lease from this final review page by simply using the toggle buttons. Your lease will be created one you choose the "Submit" button on the bottom of the screen. You can also adjust the application status here if needed.
*Note: If there is an active lease on the property you cannot use the "Activate lease" option, you will instead leave it toggled "Off" and the lease will be "Pending" until the current lease is closed.