Reporting Enhancements Video
- This article will show the newly created reports and ledgers and how to navigate them in the Rentvine Software.
- To get to the reports page, click Reports

- This will now show the new UI for the reports page. This page shows all reports the software previously had, but you can now collapse sections of reports you do not need to see

- You can search for the report you are looking for specifically using the Search Reports bar or by selecting the individual report under

You can also favorite reports from here and they will automatically be added in the Favorites Report

- Once the report is selected, you can add additional filters if needed

- This will present to you the report with the filters applied previously in a new tab

- You can view all filters selected in the top section of the report. You can also edit the existing filters and add more filters by selecting the green Edit Report button

- We have also changed the options on the report,

- Refresh - This will refresh the report for new data inputted
- Email - This will allow the user to email this report to another user's email

- Export - This allows the user to print the report out as either a JSON, PDF, CSV, or Excel form

- Save - This allows the user to save the report, including the Filters and column changes to the Current Report being used.
This reporting enhancement also changes the portfolio ledger and the tenant/lease ledger
Portfolio Ledger
Tenant Ledger
Copy and Paste Cells
- This new look resembles Excel, and you can now copy and paste these cells if needed.


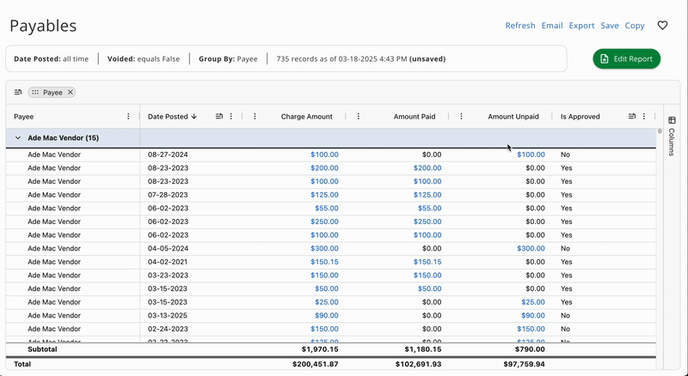
Adding Columns and Grouping to a report - If you would like to add Columns to the report, you can do this by clicking the Columns tab on the right side of the screen and toggling which column you would like to activate. This will automatically update the report results.

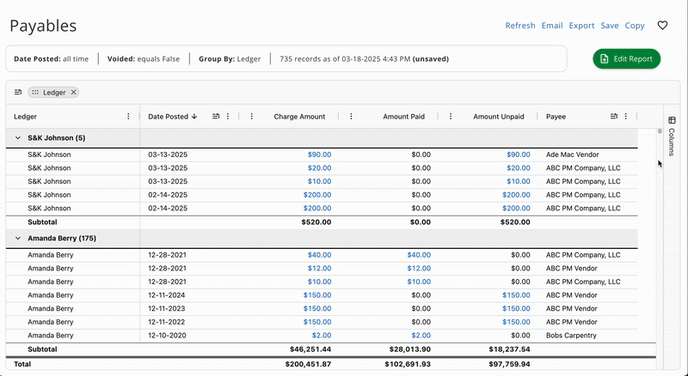
- For grouping (Row Groups), this can be found either in the Column tab or the report itself.
When you drag & drop the specific grouping you would like to use for the report under the Row Group, it will automatically apply to the report.

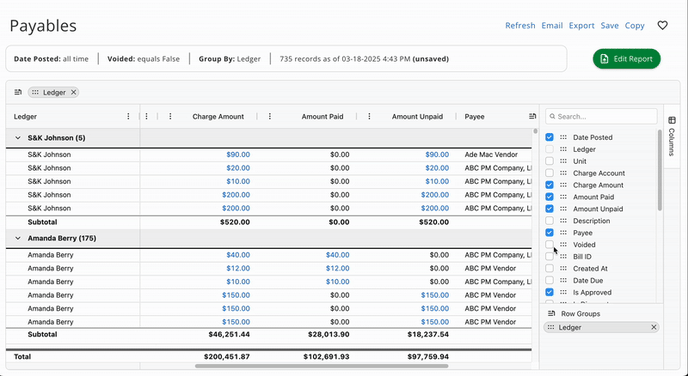
You can also do this directly on the columns displayed on the report by clicking the ellipses next to the name and selecting the 'Group By' option
Another option to use the Grouping feature is by dragging and dropping the Column to the grouping icon at the top left of the report
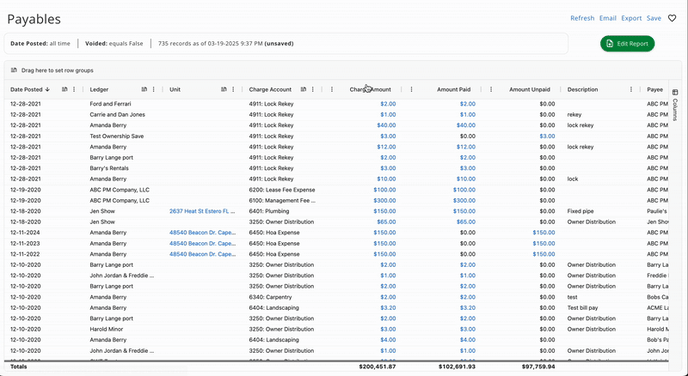
Only columns with this icon can be used to group the results in the report
Sticky Column Headers and Footers
- There are now sticky footers and headers on reports, which make it easier to view to balances for columns and which row they are attached to for now


The Sticky Header & Footers are designed so you no longer need to scroll towards the top to double-check which value falls under a specific column and no longer need to scroll down to find the total value for a specific grouping or total balance of a column.
Drag and Drop / Resizable Columns
- You can now customize the columns by dragging and dropping them exactly where you want them.


You can still order the columns in descending or ascending order by clicking the columns themselves


- You can also resize the columns to your liking now and autosize the column itself or all columns on the report.


- This feature also allows you to either Autosize This Column or Autosize All Columns.
Autosize All Columns will automatically size the columns so all columns display the data on the report, and nothing is cut off.
Autosize This Column will only do this for the specific column to ensure all data is shown and not cut off.
For Autosize This Column,

For Autosize All Columns,

Collapsible Row Groups
- This feature allows you to close out Row Groups, to clean up space on the report if you are looking for a specific report only, or do not want to see a specific row.


Notice that the amounts for the collapsed rows will still show the amounts associated with the row, to give you a total for that column it falls under
- You are also given the option to collapse all rows in the report and expand all rows


Column Pinning - This feature allows you to now pin specific columns in the report either to the left or right, or you can remove the pin entirely from the column

This will make the pinned columns stick to the area you set them at without interfering with the non-pinned columns to constantly show
You can have multiple columns pinned on either side