Has a tenant contact already been created in the system, but there is information that needs to be changed or added? Following this article will help you get that information changed or added.
- How To Edit the Tenant's Name
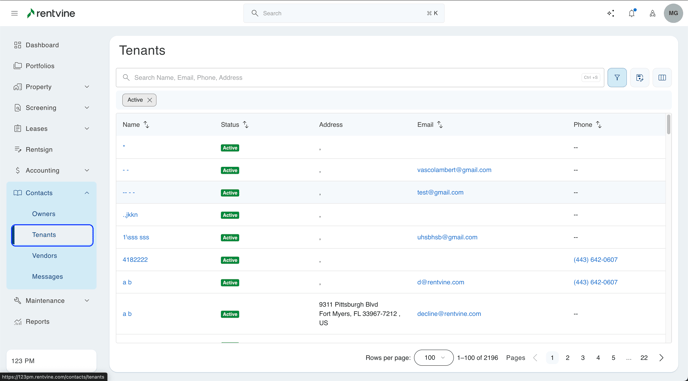
- From the dashboard view of Rentvine, click on Contacts on the left-hand side
- From the dropdown, click on Tenants
- On the next screen, enter the tenant in the search field
- From the results, click the tenant that you would like to change
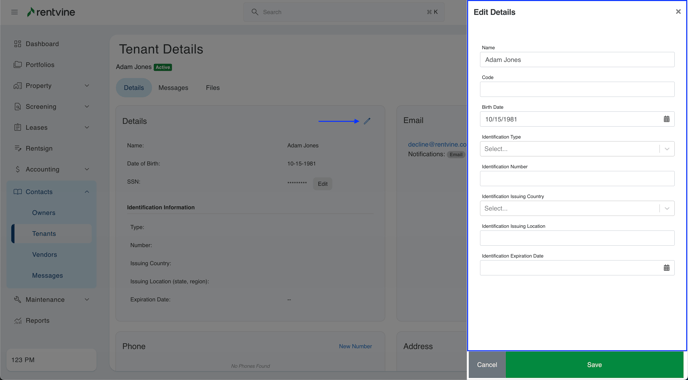
- In the Tenants section, click the Pencil Icon under DETAILS
- Enter the Name/ Date of Birth and click the Save Button

- How To Edit/Add a New Email
- From the dashboard view of Rentvine, click on Contacts on the left-hand side
- From the dropdown, click on Tenants
- On the next screen, enter the Tenant in the search field
- From the results, click the Tenant that you would like to change
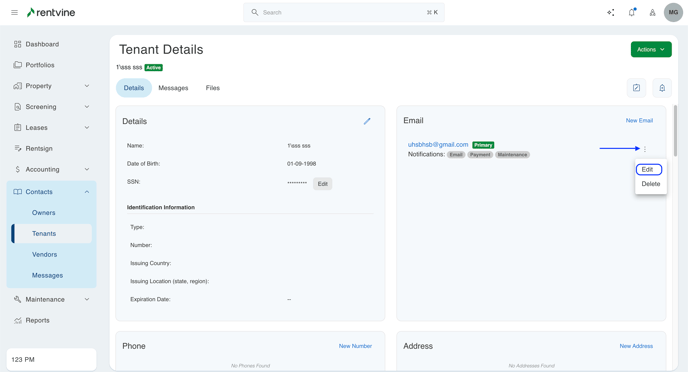
To Edit an Email:
-
- In the Email section, click the ellipsis button on the right and select Edit
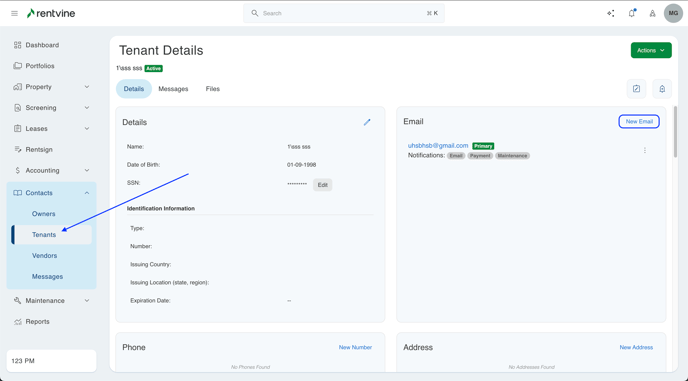
To Add An Email:
-
- In the Email section, click the New Email button
-
- Enter the new Email address
- Click toggle options if you would like to get notifications
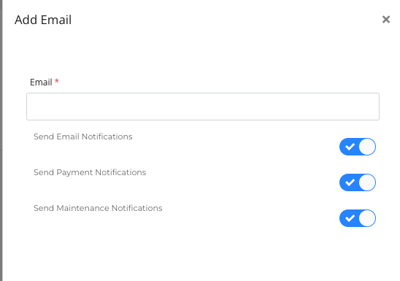
-
- Click the Save Button
- Click the Save Button
- How To Edit/Add a Phone Number
- From the dashboard view of Rentvine, click on Contacts on the left-hand side
- From the dropdown, click on Tenants
- On the next screen, enter the Tenant in the search field
- From the results, click the Tenant that you would like to change
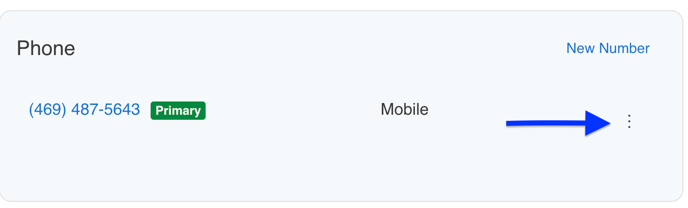
To Edit a Phone Number:
-
- In the Phone section, click the ellipsis button on the right and select Edit
-
- Enter the Phone Number
- Choose the Phone Type (Optional)
- Enter the Description (Optional)
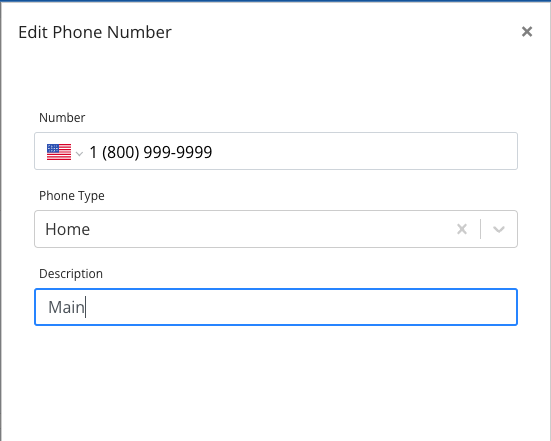
-
- Click the Save button
To Add a New Number:
-
- In the Phone section, click the New Number button
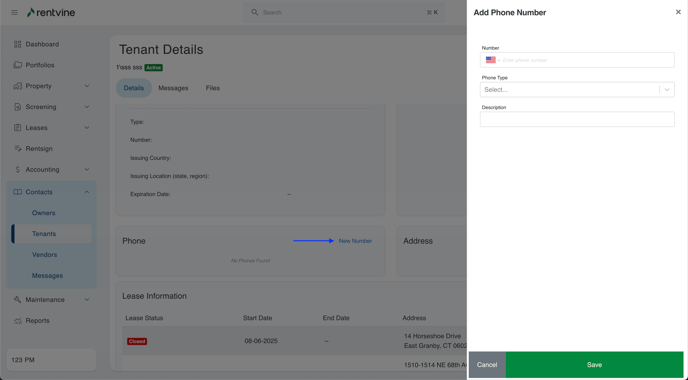
-
- Enter the Phone Number
- Choose the Phone Type (Optional)
- Enter the Description (Optional)
- Click the Save button
- How To Edit/Add an Address
- From the dashboard view of Rentvine, click on Contacts on the left-hand side
- From the dropdown, click on Tenants
- On the next screen, enter the Tenant in the search field
- From the results, click the Tenant that you would like to change
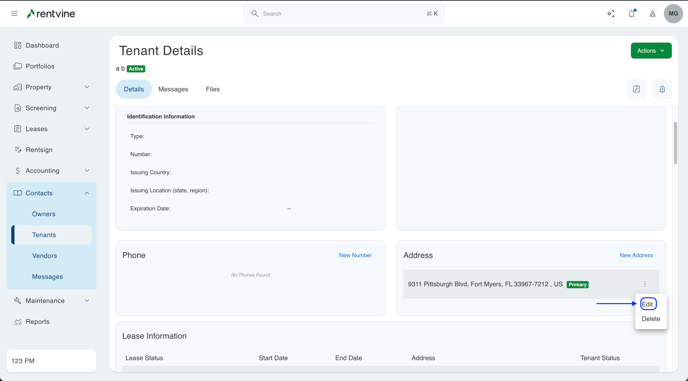
To Edit an Address:
-
- In the Address section, click the ellipsis button on the right and select Edit
-
- Enter the Address
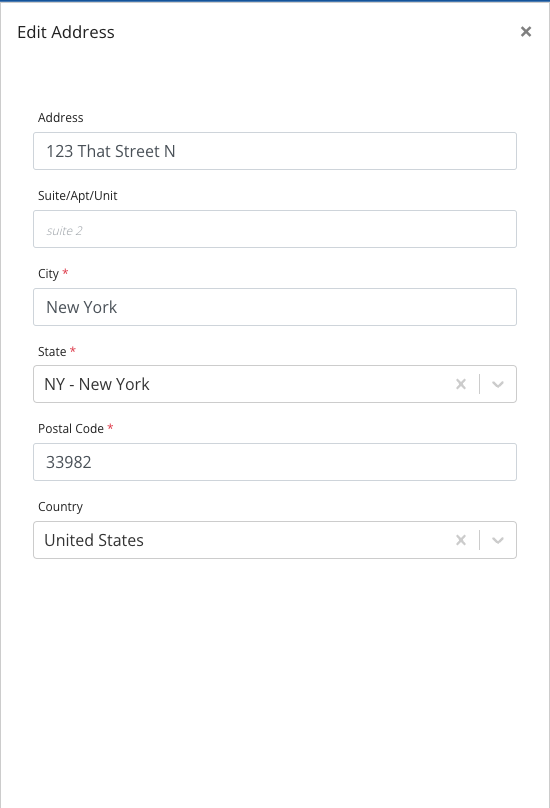
-
- Click the Save button
- Click the Save button
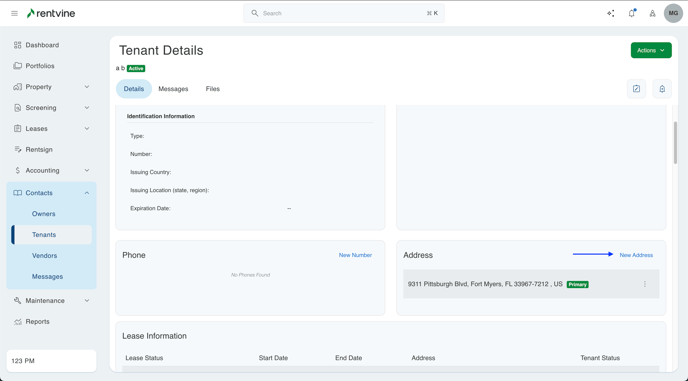
To Add a New Address:
-
- In the Address section, click the New Address button
-
- Enter the New Address
- Click the Save Button
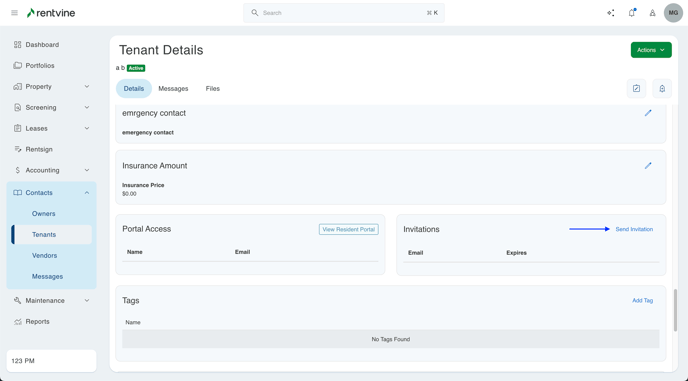
- How To View Portal Access to Impersonate a Tenant
- From the dashboard view of Rentvine, click on Contacts on the left-hand side
- From the dropdown, click on Tenants
- On the next screen, enter the Tenant in the search field
- From the results, click the Tenant that you would like to change
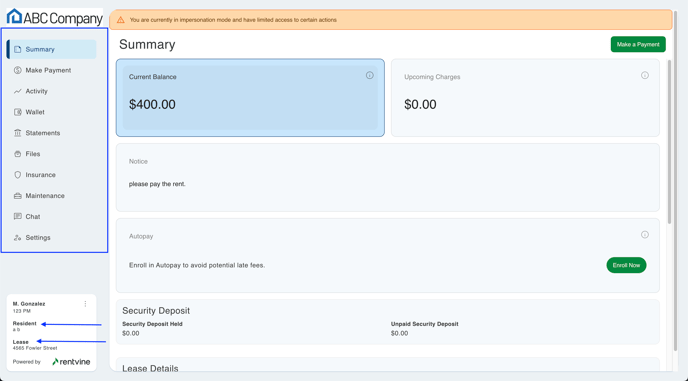
- In the Portal Access section, click the View Resident Portal button
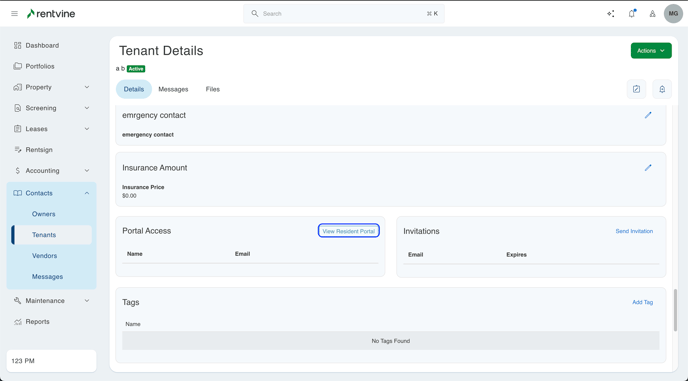
-
- On the next Screen, enter the username and password for verification if prompted
- After signing in, you will now be able to see the categories of the Tenant’s portal
- Invitations
-
- From the dashboard view of Rentvine, click on Contacts on the left-hand side
- From the dropdown, click on Tenants
- On the next screen, enter the Tenant in the search field
- From the results, click the Tenant that you would like to change
- In the Invitations section, click the Send Invitation button
- Enter the email address
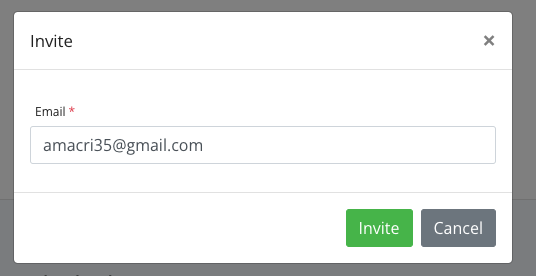
- Click the Invite button